The data lake is ready. You now create a developer endpoint which is used to write PySpark code to work with Redshift data in data lake. The code can then later be used to create Glue Job. Though we are not covering the job part today.
-
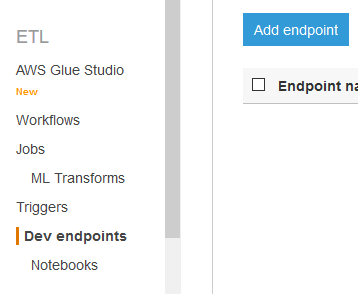
Goto the AWS Glue console, click on the Dev endpoints option in the left menu and then click on the Add endpoint button.
-
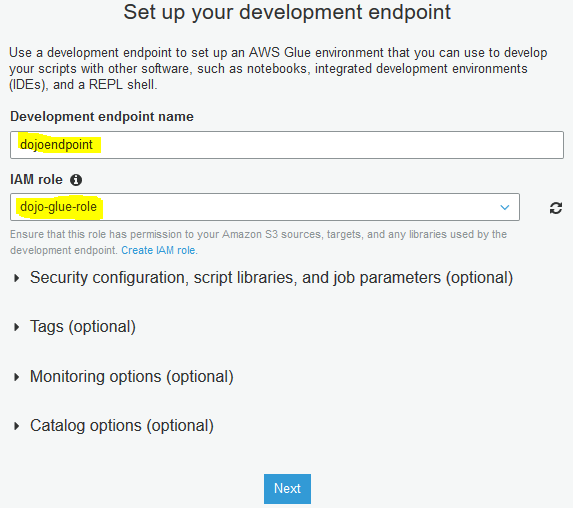
On the next screen, type in dojoendpoint as the name. Select dojo-glue-role as the IAM role. Then click on the Next button.
-
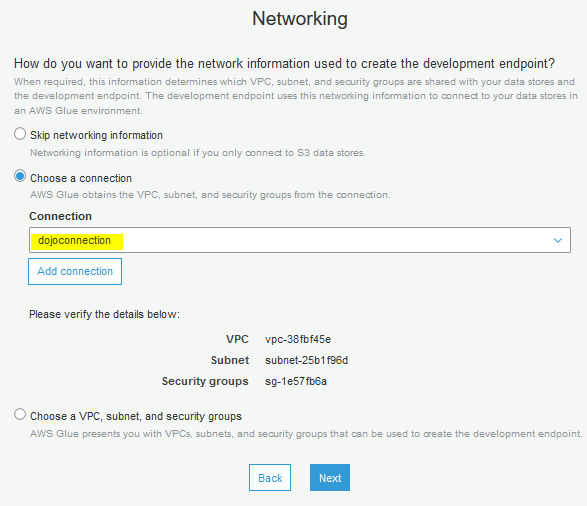
On the next screen, select Choose a connection as the option. Select dojoconnection as the connection. Click on the Next button.
-
On the next Add an SSH public key (Optional) screen, click on the Next button.
-
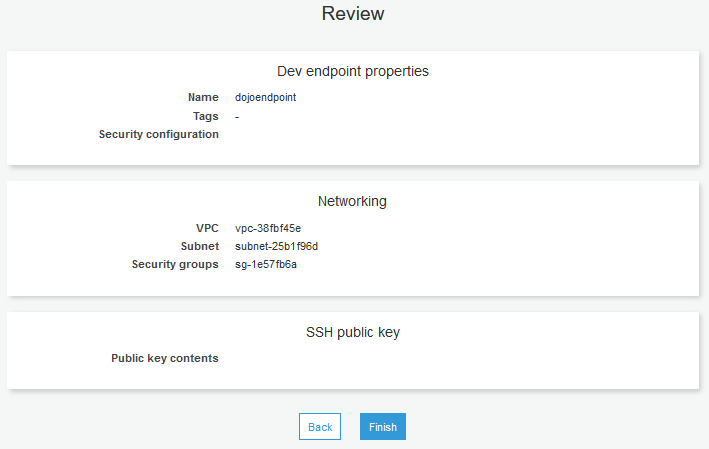
On the next Review screen, click on the Finish button. The endpoint creation will start.
-
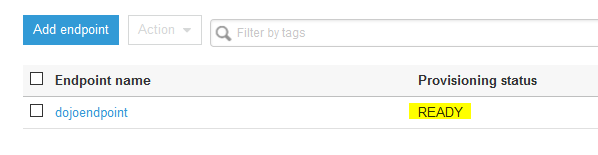
It will take some 8-10 mins for the developer endpoint to be ready. Wait till the status changes to READY.
-
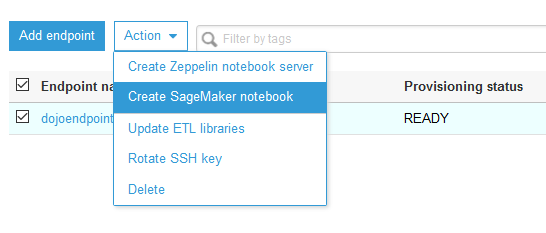
Once the developer endpoint is ready, select it and click on Create Sagemaker notebook under the Action dropdown menu.
-
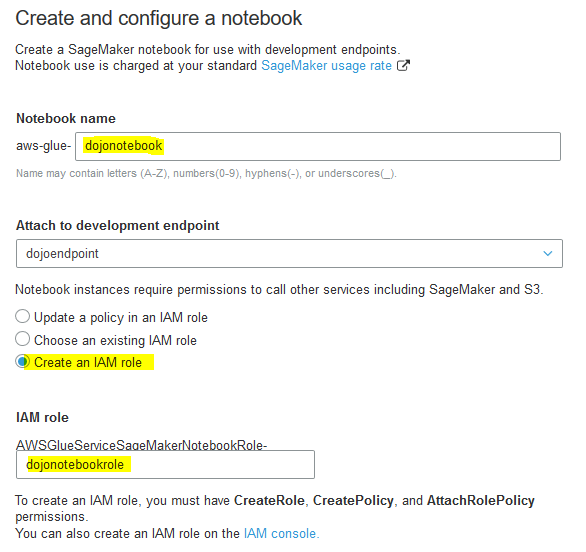
On the next screen, enter dojonotebook as notebook name, select Create an IAM role as the option, type in dojonotebookrole for the IAM Role. Keep rest of the configuration to the default and click on the Create notebook button.
-
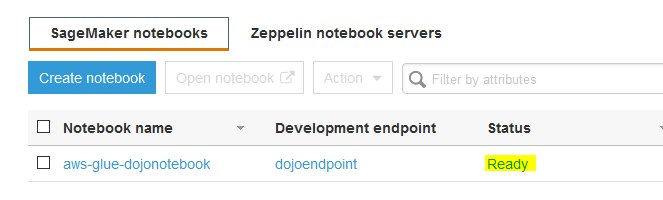
The notebook creation will start. Wait till the notebook status changes to Ready.
-
The development environment is ready. Let’s do PySpark programming in notebook to work with Redshift data using data lake.