The data lake is ready with the data catalog which gives access to the data stored in Amazon S3 bucket. It is time to configure access for the salesuser and customersuser users which you created in the earlier tasks. You will configure the permissions as following -
salesuser can query all the fields of the sales table only.
customersuser can query only CUSTOMERNAME, EMAIL fields of the customers table.
You do have opportunity to play more with the user permissions which is left to you.
-
On the AWS Lake Formation console, click on the Tables option on the left menu. Select the Sales table and click on the Grant menu option under the Action dropdown menu.
-
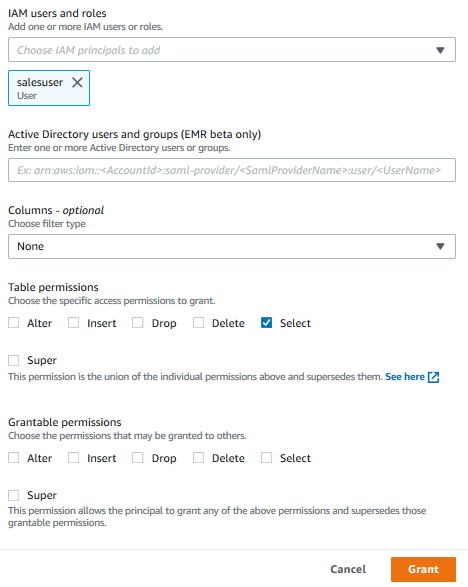
On Grant permissions screen, select salesuser for the IAM users and roles field. Choose only Select permissions from the Table permissions. Leave rest of the fields as default and then click on the Grant button. The permission for the salesuser is configured.
-
Next, select the customers table and click on the Grant menu option under the Action dropdown menu.
-
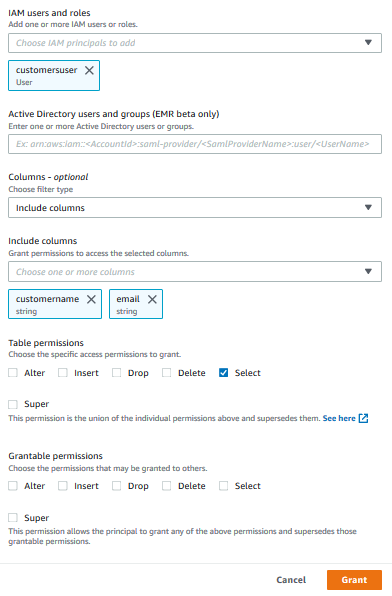
On Grant permissions screen, select customersuser for the IAM users and roles field. Choose Include columns for the Columns - optional field. In Include columns field, select customername and email fields. Choose only Select permissions from the Table permissions. Leave rest of the fields as default and then click on the Grant button. The permission for the customersuser is configured.
-
The user permissions are configured for both the users. You can now login as both users one by one and check their permission on the tables in the data lake.