The data is ready in Amazon S3 bucket. Let’s start configuration of the data lake. In data lake, you create a database and configure it with Amazon S3 bucket location. A database is used to organize data catalog tables in the data lake. You will later configure crawler to automatically create the data catalog tables in the data lake.
-
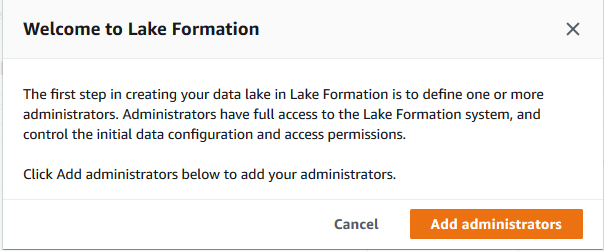
Open the AWS Lake Formation console. If you are using Lake Formation for the first time in the region, it will ask you to create a data lake administrator. A data lake administrator is an IAM user or IAM role that performs administrative tasks on the data lake. For the first time user, it will popup a message to add administrators. Click on the Add administrators button to create administrators for your Data Lake.
-
Select your AWS logged-in IAM user from the drop down list. For the rest of workshop, the user will be considered as a data lake administrator and will have full access to the data lake. Click on the Save button.
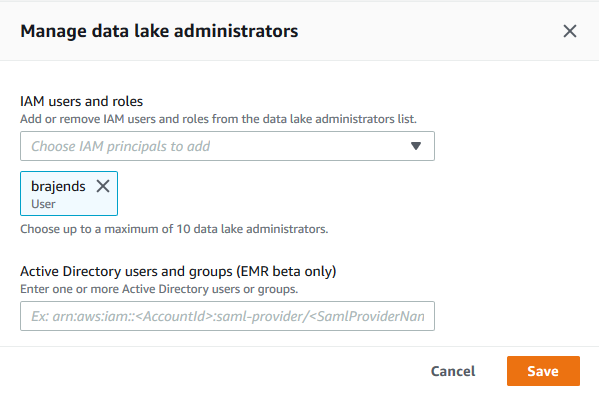
Note: if you did not get the popup then that means the data lake already has an administrator. You can check that by clicking on the “Admins and database creators” menu in the left. If you see that your logged-in IAM username is listed as the “Data lake Adminstrator” then you are ok to move to the next step. Otherwise, click on the “Grant” button to add “your AWS logged-in IAM user” as the administrator of the data lake.
-
After adding the administrator, you will create the database. On the AWS Lake Formation console, click on the Databases option on the left menu and then click on Create database button.

-
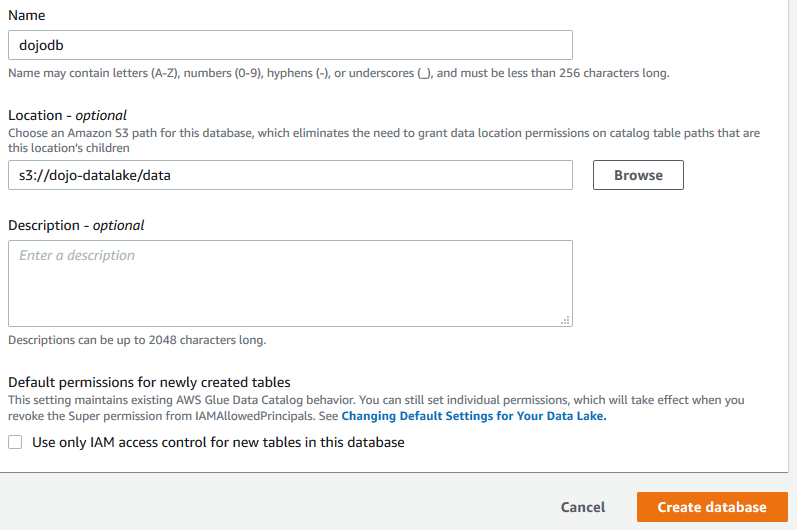
On the next screen, enter dojodb as the Name. On the Location box, select the S3 data lake path as s3://dojo-datalake/data. If you created the bucket with different name, then you replace dojo-datalake part with that name. Make sure you Uncheck the option - Use only IAM access control for new tables in this database. Leave rest of the options as default and click on Create database button.
-
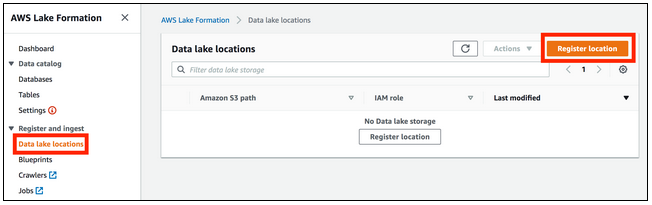
The database is added in no time. Now register the Amazon S3 bucket as your data lake storage. In the navigation pane, choose Data lake locations, and then choose Register location.
-
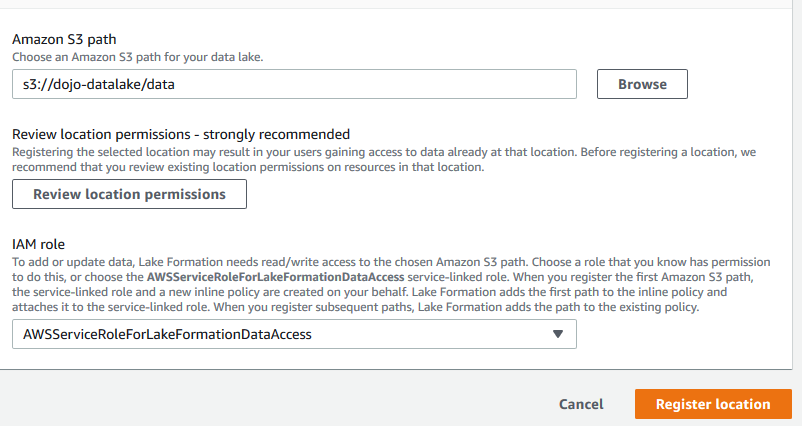
Enter a path to the existing S3 bucket s3://dojo-datalake/data. If you created the bucket with a different name, then you replace dojo-datalake part with that name. For the IAM role, select the AWSServiceRoleForLakeFormationDataAccess role. Click Register location to save it.
-
It is time to use crawler to catalog the data in the database.