Using Amazon EFS with AWS Lambda
Amazon Elastic File System (Amazon EFS) is a storage service which provides scalable and managed elastic NFS file system for use with AWS Cloud services and on-premises resources. On the other hand, AWS Lambda is a compute service which lets the users run code without provisioning or managing servers. In this exercise, you learn how to read-write data to Amazon EFS from AWS Lambda.
Step1: Pre-Requisite
You need to have an AWS account with administrative access to complete the exercise. If you don’t have an AWS account, kindly use the link to create free trial account for AWS.
Step2: Create IAM Role
You start with creation of the IAM role which AWS Lambda function uses for the authorization to call other AWS Services.
-
Login to the AWS Console. Select an AWS Region of your choice where Amazon EFS and AWS Lambda are available. You will see the exercise using the Paris region.
-
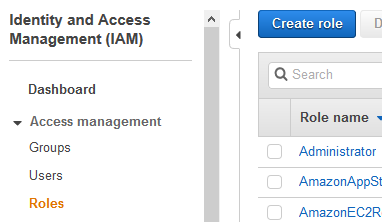
Goto the IAM Management console and click on the Roles menu in the left and then click on the Create role button.
-
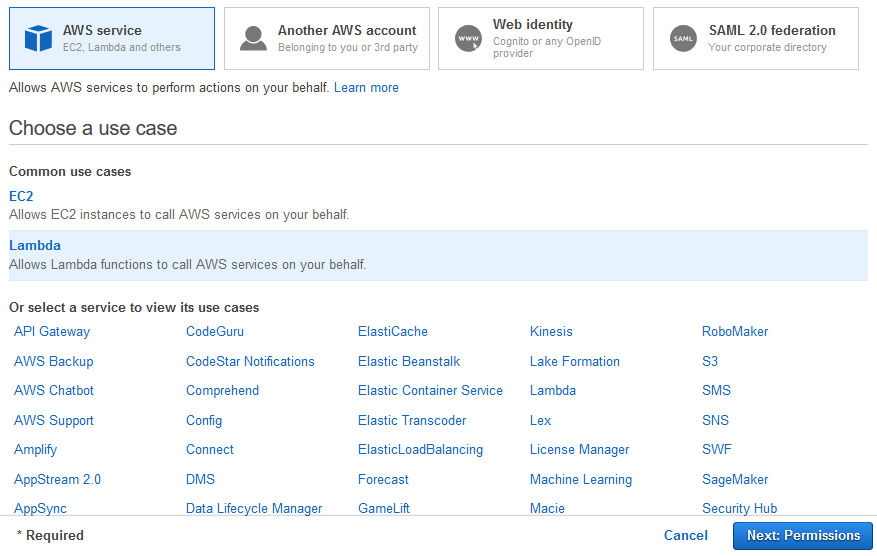
On the next screen, select Lambda as the service and click on the Next: Permissions button.
-
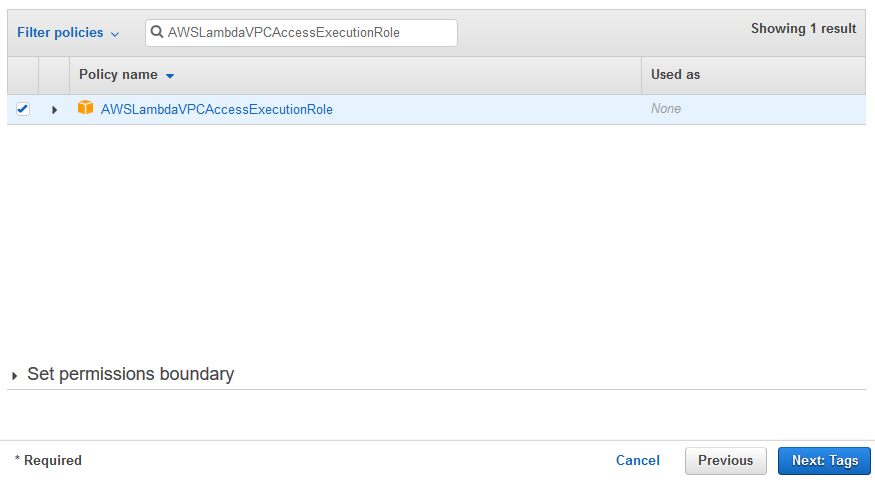
On the next screen, select AWSLambdaVPCAccessExecutionRole as the policy and click on the Next: Tags button. You are selecting this policy because the role is used by the Lambda function to work in the VPC to access the EFS file system. The policy will provide permissions to be able to create resources (like ENI) within the VPC.
-
On the next screen, click on the Next: Review button.
-
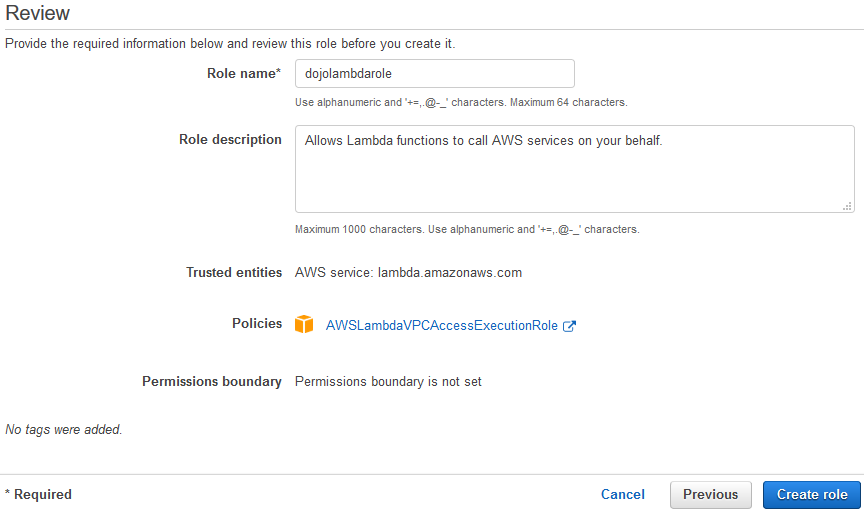
On the next screen, type in dojolambdarole for the Role name and click on the Create role button.
-
The role is created in no time. The next step is to create the Amazon EFS file system.
Step3: Create File System
You will create an Amazon EFS file system which AWS Lambda will use later to read-write data.
-
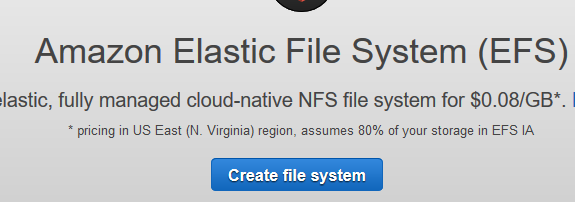
Goto EFS Management console and click on the Create file system.
-
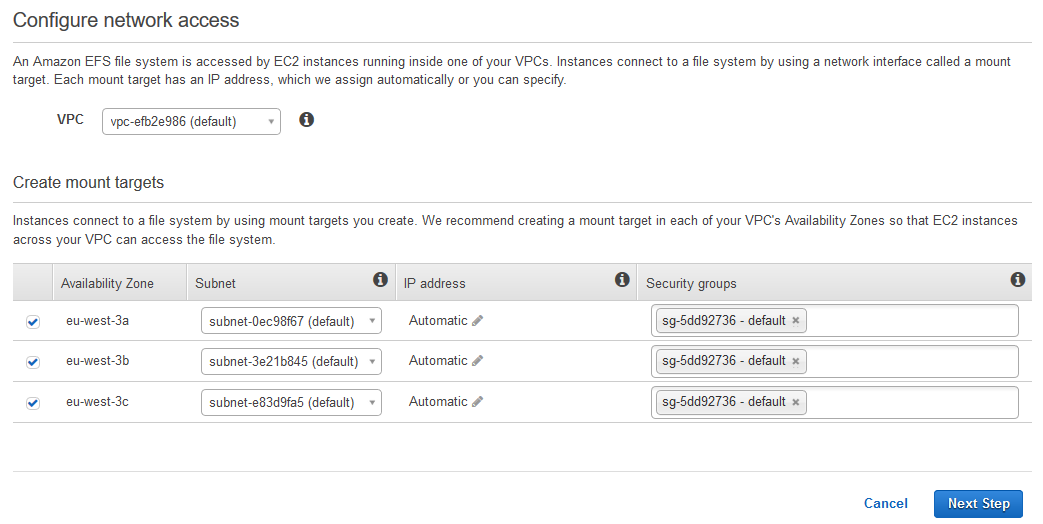
On the next screen, select the Default VPC, all all subnets for the mount target, keep the security group to the Default and then click on the Next Step button.
-
On the next screen Configure file system settings, click on the Next Step button.
-
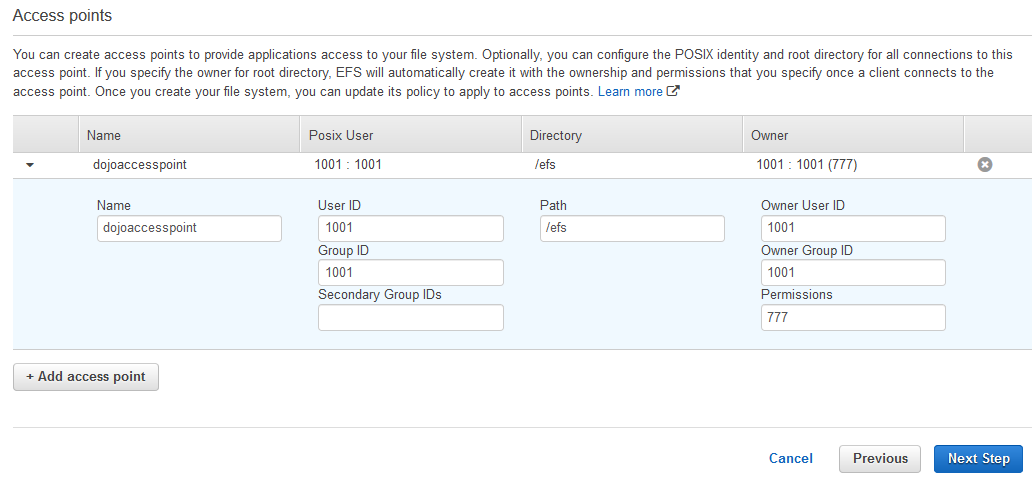
On the next screen Configure client access, click on the + Add access point button. The access point provides Lambda function access to the file system.

-
It opens access point screen. Type in dojoaccesspoint for the Name field. Type in /efs for the Path field. Type in 1001 for the User ID, Group ID, Owner User ID and Owner Group ID fields. Type in 777 for the Permissions field and then click on the Next Step. With the permissions, the owner can read and write data on the file system.
-
On the next screen Review and create, click on the Create File System button.
-
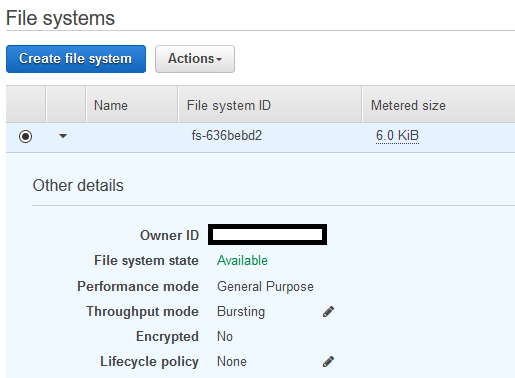
The file system is created in no time. Wait till the status of the file system changes to Available.
-
The next step is to create a Lambda function which uses this file system.
Step4: Create Lambda Function
You create a Lambda function which is configured to read-write data to the EFS file system created in the previous step.
-
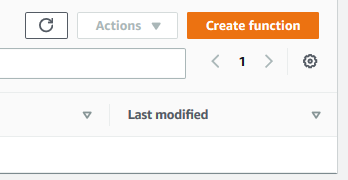
Goto Lambda Management console and click on the Create function button.
-
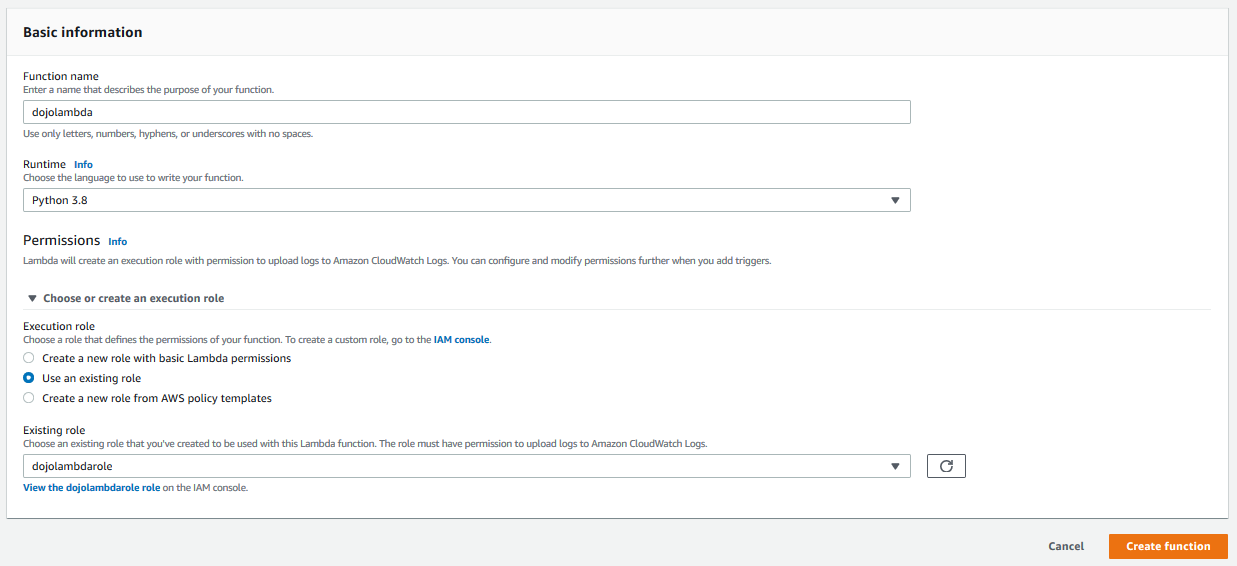
On the next screen, select Author from scratch as the option. Type in dojolambda as the Function name. Select Python 3.8 as the Runtime. Under Permissions, select Use an existing role as the option and then select dojolambdarole (you created in the earlier steps) as the role. Finally, click on the Create function button.
-
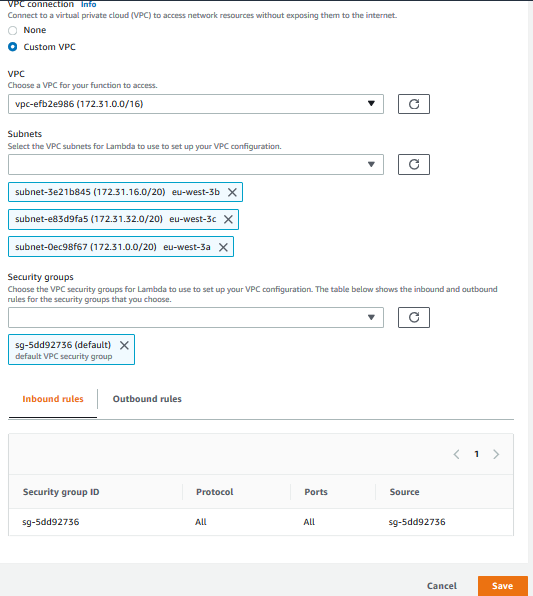
The function is created in no time. You now configure the Lambda function to use VPC resources like the EFS file system created in the previous step. You will also add access to the file system for the Lambda function. Goto the VPC settings for the Lambda function and click on the Edit button.

-
On the next screen, select Custom VPC as the option. Select the Default VPC for the VPC field. Select all three subnets and also select the default Security Group for the Security Groups field. Click on the Save button. The configuration will allow Lambda function to be able to use Default VPC resources - like in this case the EFS file system.
-
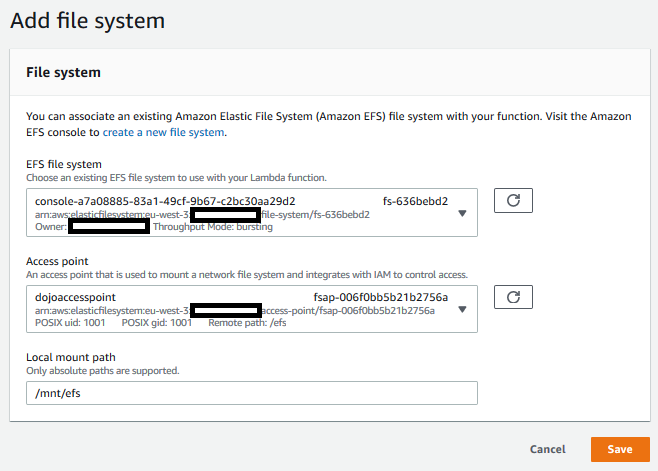
Once the VPC is configured, you add file system to the Lambda function. Goto the File System settings for the Lambda function and click on the Add file system button.

-
On the next screen, select the file system you created in the previous step. Select dojoaccesspoint as the Access point. Type in /mnt/efs as the Local mount path and click on the Save button.
-
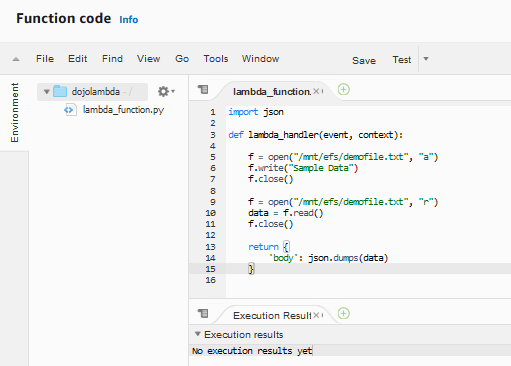
The Lambda function is now ready to use the file system for the read-write operation. You just need to update the function code for it. Goto the Function code setting for the lambda function and replace the code with the following code below.
import json

def lambda_handler(event, context):

    f = open("/mnt/efs/demofile.txt", "a")
    f.write("Sample Data")
    f.close()

    f = open("/mnt/efs/demofile.txt", "r")
    data = f.read()
    f.close()

    return {
        'body': json.dumps(data)
    }
-
In the code above, it first appends a sample text to a file demofile.txt in the file system and then it reads and returns the file content. Click on the Save button to upload the updated code. Note: please use the save button which saves the overall Lambda function.
-
The lambda function code and configuration is ready. You will run in the next step.
Step5: Run Lambda Function
Time to run the lambda function.
-
On Lambda Management console, for the function created in the previous step, click on the Test button.

-
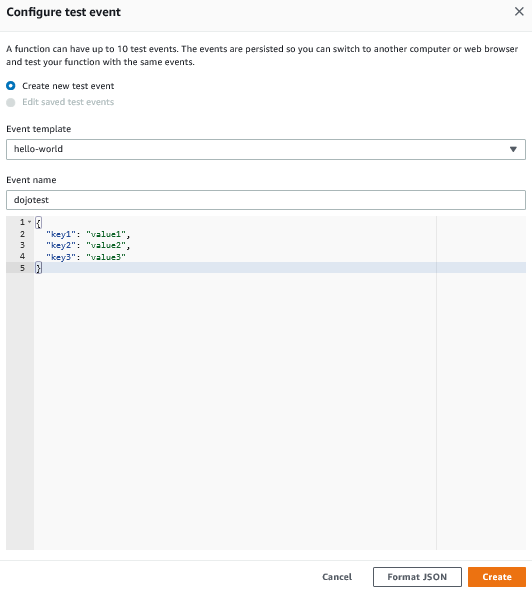
On the next screen, type in dojotest for the Event name and click on the Create button.
-
The test is created. Keeping dojotest selected, click on the Test button again.

-
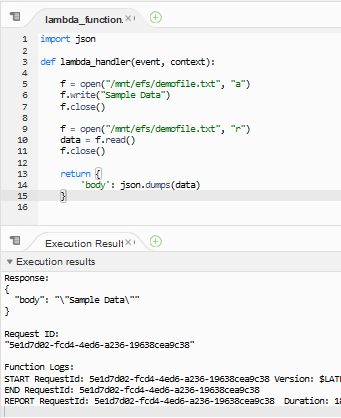
The function runs. It writes sample data to the file in the file system and then reads and returns it.
-
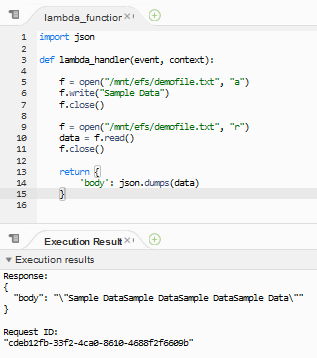
If you run couple of times more, you will see the data getting appended in the file and returned back as the output.
-
This concludes the exercise where you learn to configure a Lambda function to be able to read-write data from the Amazon EFS based file system. Please follow the next step to clean-up the resources so that you don’t incur any cost post the exercise.
Step6: Clean up
Delete dojolambda function in the AWS Lambda console.
Delete the Amazon EFS file system created in the EFS Console.
Finally delete dojolambdarole IAM role from the IAM Management console.
Thanks and hope you enjoyed the exercise.

