
AWS Glue Studio - Predict Missing Values in Data
AWS Glue Studio is GUI based service to create, run, and monitor extract, transform, and load (ETL) jobs in AWS Glue. It helps in visually composing data transformation workflows and run them on AWS Glue’s Apache Spark-based serverless ETL engine. AWS Glue Studio supports both tabular and semi-structured data. AWS Glue Studio also offers tools to monitor ETL workflows and validate that they are operating as intended.
In this exercise, you create Glue Job in Glue Studio to predict missing values in the data using machine learning.
Step1: Pre-Requisite
You need to have an AWS account with administrative access to complete the exercise. If you don’t have an AWS account, kindly use the link to create free trial account for AWS.
Step2: Create S3 Bucket
You create S3 bucket and folders which are used as the source and destination data locations when you process data using Glue Job.
-
Login to AWS Management Console and change the region to Ireland.
-
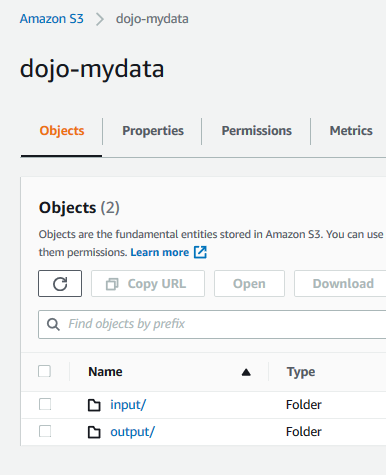
Goto S3 Management Console. Create a bucket with the name dojo-mydata. If the bucket name is not available, create bucket with a name which is available. In this bucket, create two folders - input and output.
-
The input folder is used as the input location for the data to be processed by the Glue Job. The output folder is the destination location where Glue Job will write the processed data output.
-
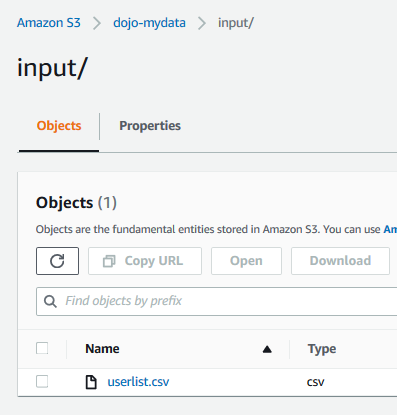
Download userlist.csv file from the link. Upload the file to the input folder.
-
It is a sample file downloaded from the website kaggle.com which we will use for the exercise. The S3 configuration is ready. In the next step, you configure IAM Role for the Glue Job.
Step3: Create IAM Role for Glue
You create an IAM Role which is used by AWS Glue Job to process the data.
-
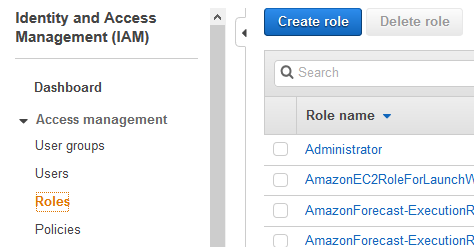
Go to IAM Management Console. Click on the Roles menu in the left side and then click on the Create role button.
-
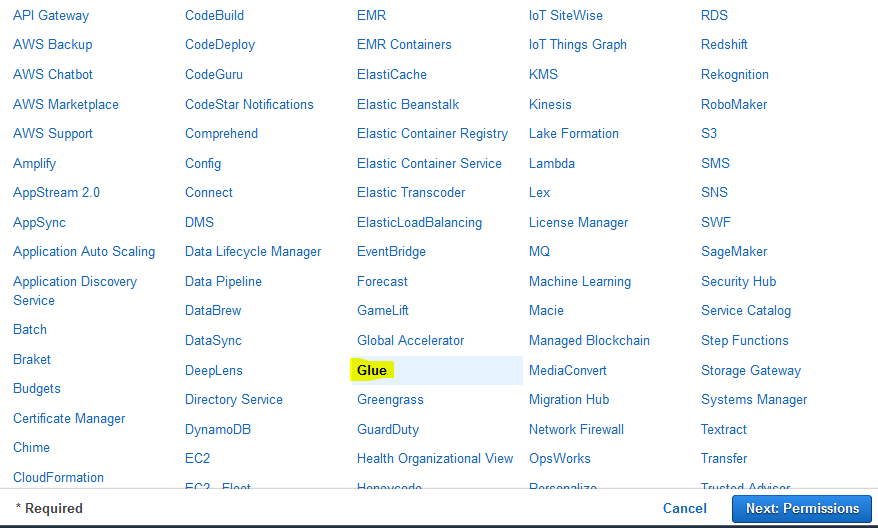
On the next screen, select Glue as the AWS Service. Click on the Next: Permission button.
-
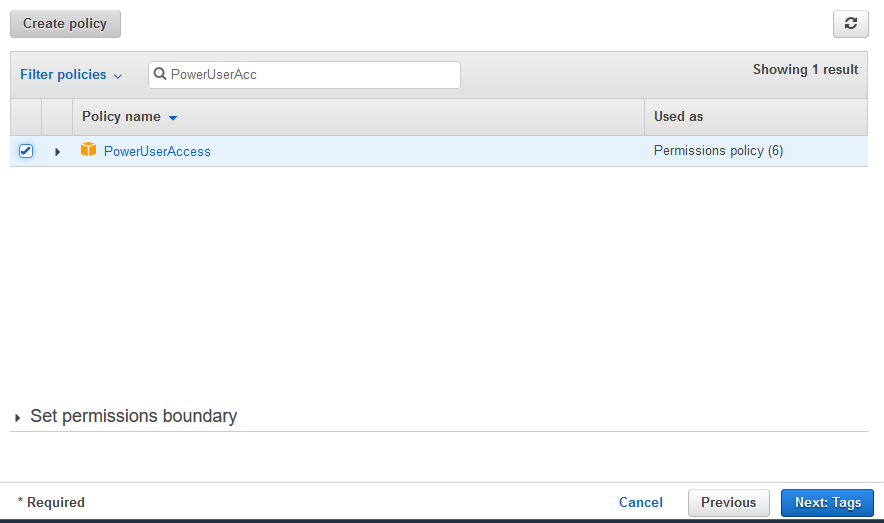
On the next screen, select PowerUserAccess as the policy. Click on the Next: Tags button.
-
Click on the Next: Review button on the next screen.
-
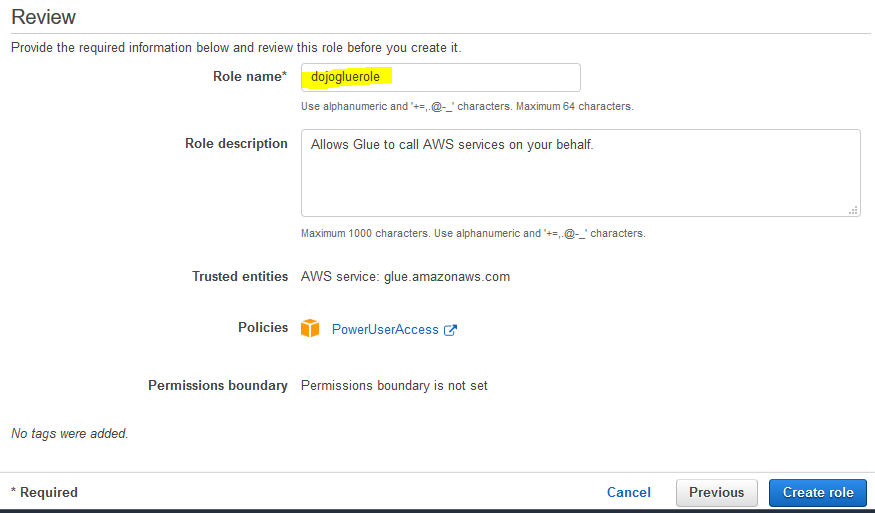
On the next screen, enter the Role name as dojogluerole and click on the Create role button.
-
The role is created in no time. The next step is to configure Glue Job in Glue Studio.
Step4: Configure and Run Glue Job
You configure Glue Job using AWS Glue Studio. The job will process userlist.csv file data. The data has gender field and around 28% of the rows are missing value for this field. The Glue job would predict value for the missing value rows and populate in another field gender_filled.
-
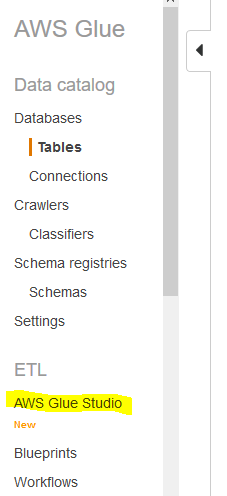
Go to Glue Service console and click on the AWS Glue Studio menu in the left.
-
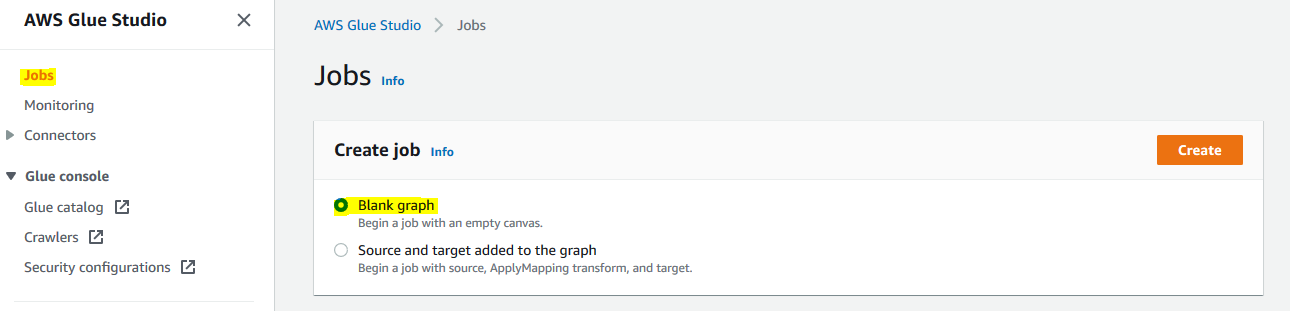
On the next screen, click on the Jobs menu in the left. Select Blank graph option and click on the Create button.
-
It opens the Glue Studio Graph Editor. Click on the Job Details tab. Type in dojojob for the name and select dojogluerole for the IAM Role. Keep rest of the fields as the default and click on the Save button.

-
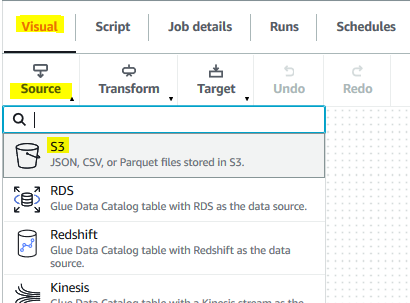
The job name and role configuration are saved. Go back to the Visual tab and click on the S3 option under the Source menu.
-
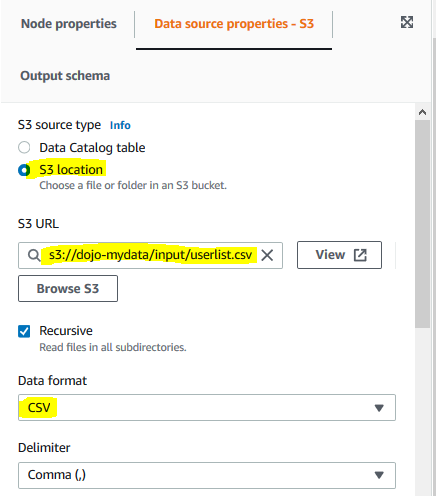
It creates a new source node in the editor. For the node, in the Data source properties - S3 tab, select S3 location option for S3 source type. Select s3://dojo-mydata/input/userlist.csv for the S3 URL. If you created bucket with a different name, use that one. Make sure the data format is CSV.
-
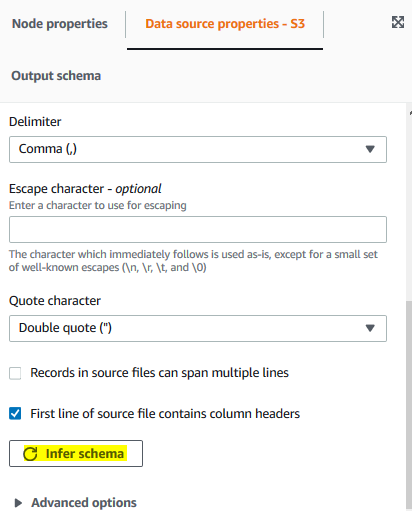
On the same tab, click on the Infer schema button to generate schema for the S3 data.
-
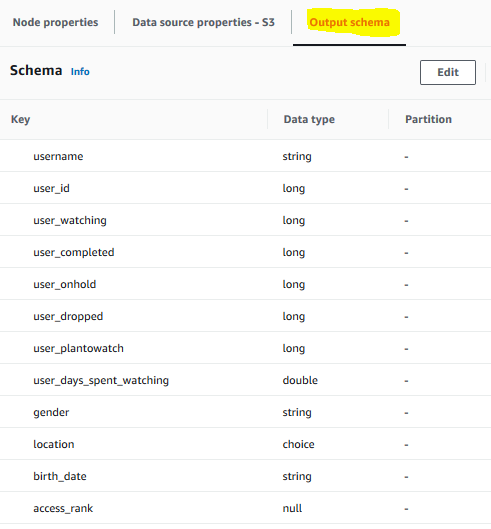
It will generate schema for the source data. Click on the Output schema tab to see the schema. You can see gender as a field there which we are interested in.
-
The source node is ready. Next, click on the FillMissingValues option under the Transform menu.
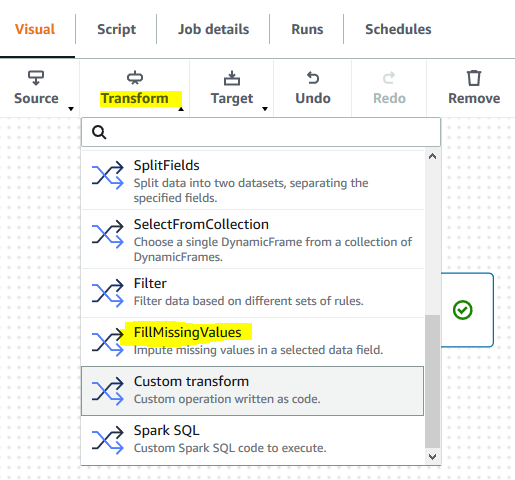
-
The transform node is added. Click on the Transform tab for the node and select gender option for Data field with missing values field.

-
The transform node is ready. Next, click on the S3 option under the Target menu.
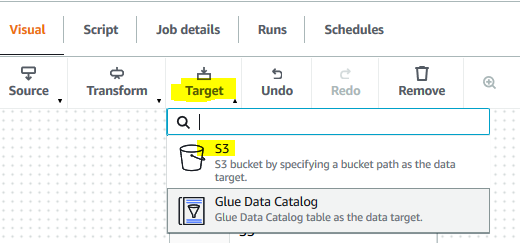
-
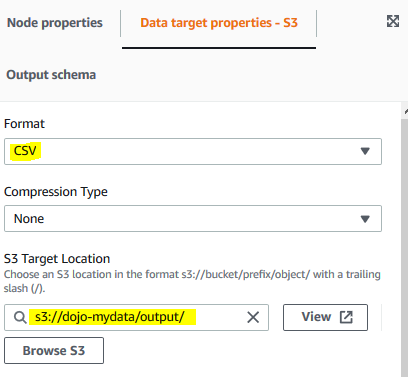
The target node is added. For the target node, select Data target properties - S3 tab. On the tab, select CSV for the format and select s3://dojo-mydata/output/ for the S3 target location. If you created bucket with a different name, then use that one.
-
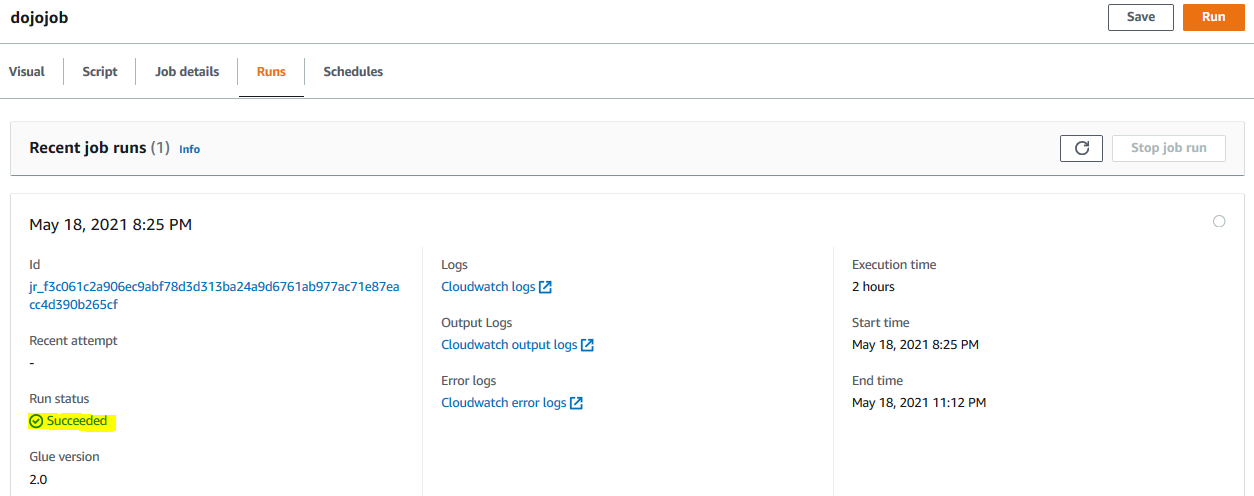
The target node configuration is complete. Save and run the job.

-
It will start the job execution. Go to the Runs tab to see the job running. Wait till the job run status turns to Succeeded. It might take up to 2 hours to finish the job execution as it is using machine learning for fill missing values.
-
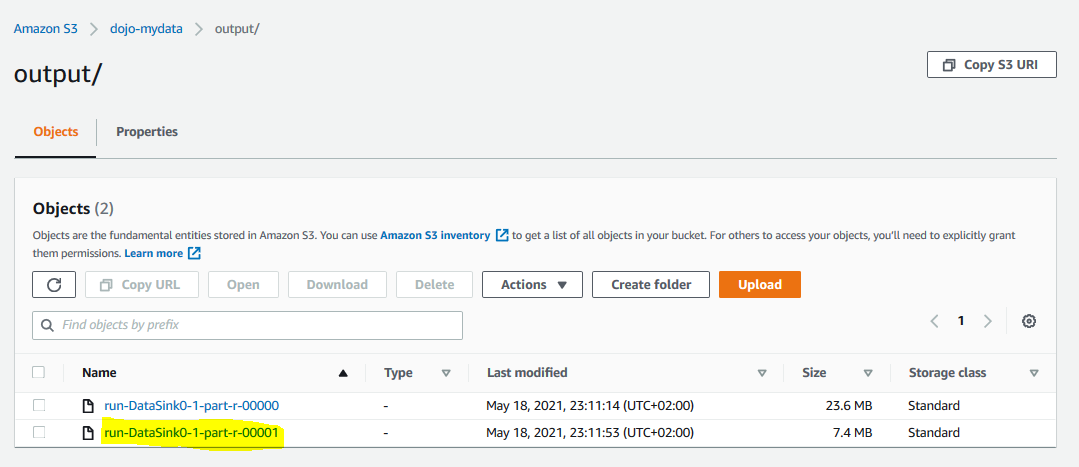
The job execution has completed. You can go to the output folder of the S3 bucket to see the result. The run-DataSink0-1-part-r-00001 file holds the records where the gender field values were missing and now Glue job has added predicted value in the gender_filled field. You can download the file and verify it.
-
This finishes the exercise. Follow the next step to clean up the resources so that you don’t incur any cost post the exercise.
Step5: Clean up
Clean up the following resources.
Delete dojojob Glue Job.
Delete dojogluerole IAM Role.
Delete dojo-mydata S3 Bucket.
Thanks for using the exercise.