
Amazon AppFlow to transfer data from S3 to S3
Amazon AppFlow is a fully managed integration service that enables secure transfer of data between Software-as-a-Service (SaaS) applications like Salesforce, Marketo, Slack, and ServiceNow, and AWS services like Amazon S3 and Amazon Redshift. It can also be used to perform such transfer between AWS Services like S3 and Redshift. AppFlow facilitates to run data flows at nearly any scale at the frequency of choice - Schedule, Event or On-demand. In this exercise, you learn to configure Amazon AppFlow to transfer data from S3 bucket to S3 bucket.
Step1: Pre-Requisite
You need to have an AWS account with administrative access to complete the exercise. If you don’t have an AWS account, kindly use the link to create free trial account for AWS.
Step2: Create S3 Buckets
Login to the AWS Console. Select an AWS Region of your choice where Amazon AppFlow is available. You will see the exercise using the Paris region.
Let’s start with creating two Amazon S3 buckets - aws-dojo-src and aws-dojo-dest. aws-dojo-src is used as the source bucket and aws-dojo-dest is used for the destination of the data transfer. If the bucket names are not available then use name of your choice which is available. Please make sure the buckets are created in the same region where you plan to run the exercise.
Once the buckets are created, upload customers.csv file in the aws-dojo-src bucket. You are using customers.csv as the source data.
Click on the customers.csv link to download the customers.csv file.
Step3: Configure Flow in Amazon AppFlow
You now create a flow for the data transfer.
-
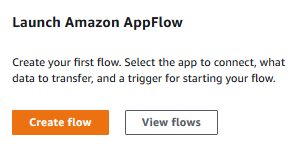
Goto the Amazon AppFlow console and click on the Create flow button.
-
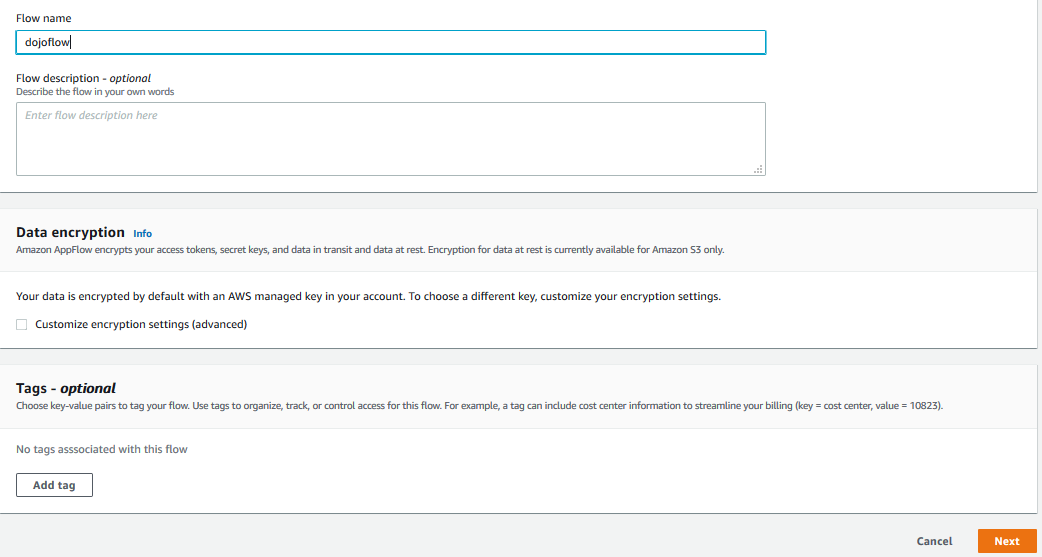
On the next screen, enter dojoflow as the flow name and click on the Next button.
-
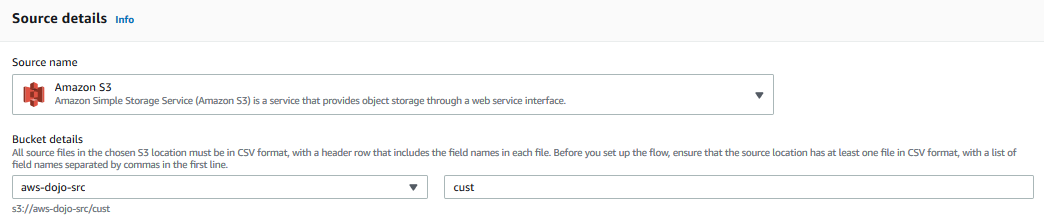
On the next screen, for the source configuration, select source name as Amazon S3, also select aws-dojo-src as the bucket name and type in cust as the prefix. If you used a different bucket name for the source, then select that one.
-
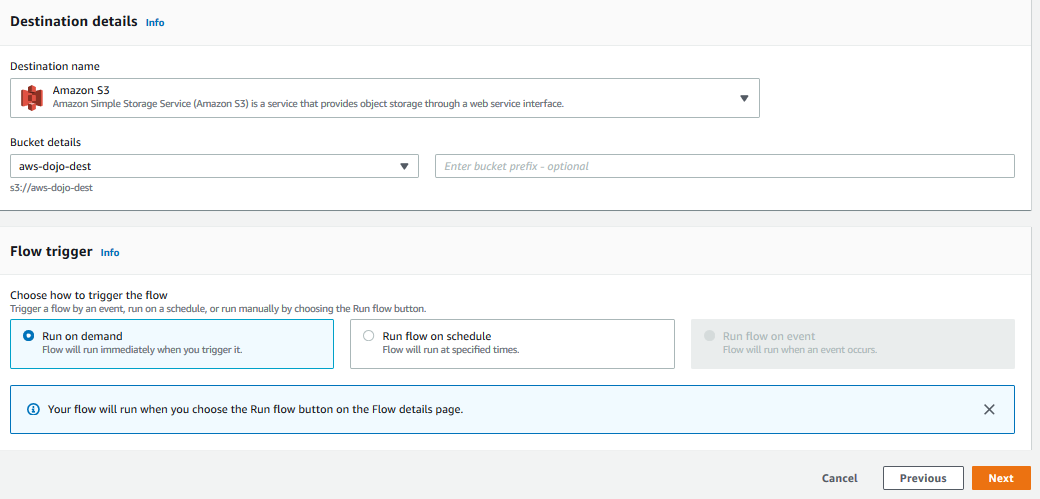
On the same screen, for the destination configuration, select destination name as Amazon S3, select aws-dojo-dest as the bucket name. If you used a different bucket name for the destination, then select that one. For Flow trigger, select Run on demand option and click on the Next button.
-
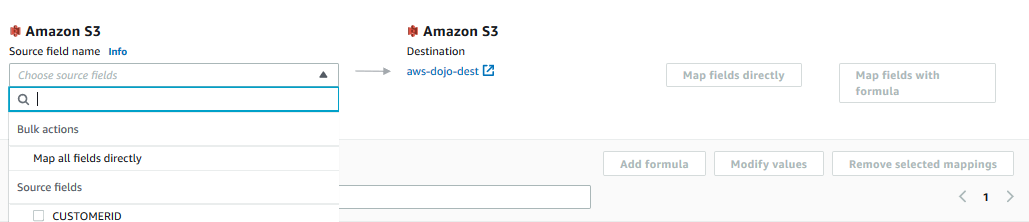
On the next screen, keep the Mapping method to Manually map fields. In the Amazon S3 source field name, select the option Map all fields directly.
-
All fields are mapped one to one by default from the source to destination. You will now configure some transformations. Select EMAIL field and click on the Modify values button.

-
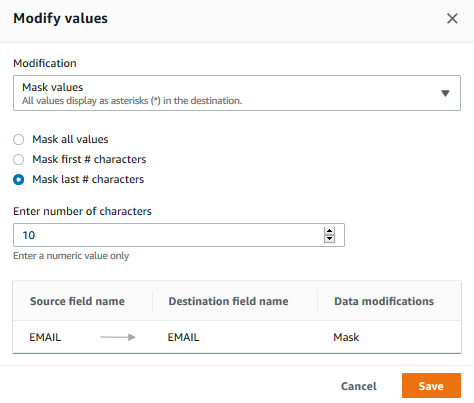
On the popup screen, select Mask values as the modification option, select Mask last # characters option, enter number of characters equal to 10 and the click on the Save button.
-
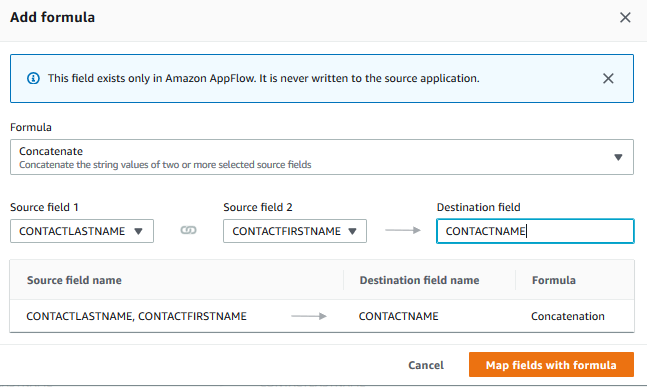
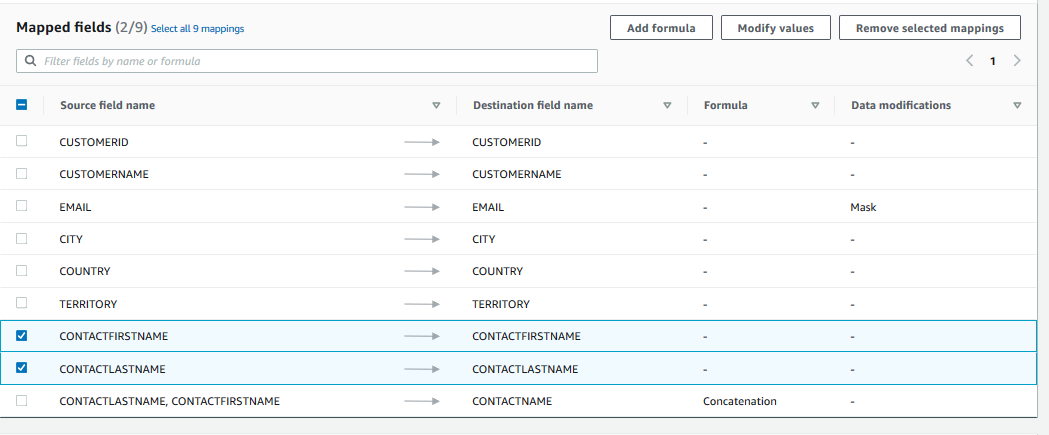
The email field has been configured for the partial masking. Next, select CONTACTFIRSTNAME and CONTACTLASTNAME field and then click on the Add formula button.
-
On the popup screen,select Concatenate as the formula, type in destination field name as CONTACTNAME and then click on the Map fields with formula button.
-
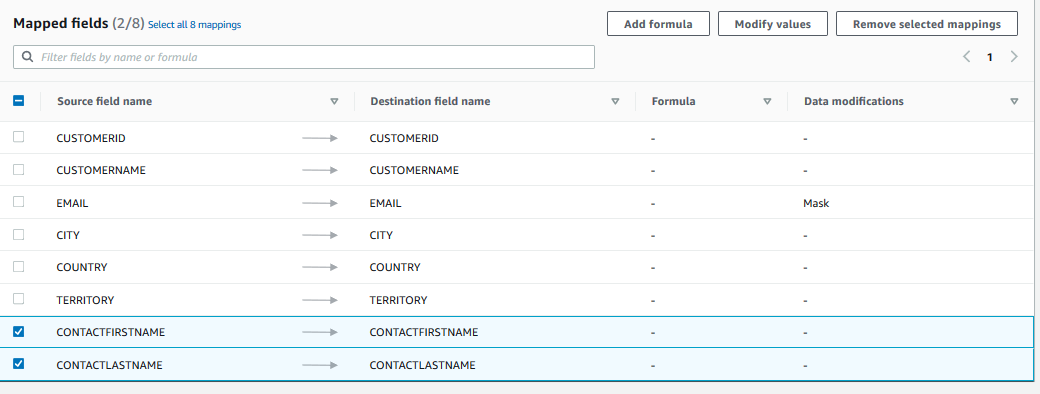
The concatenate formula for the name fields is also configured. Now that you have the CONTACTNAME, you don’t need CONTACTFIRSTNAME and CONTACTLASTNAME fields. Select these two fields and then click on the Remove selected mappings button.
-
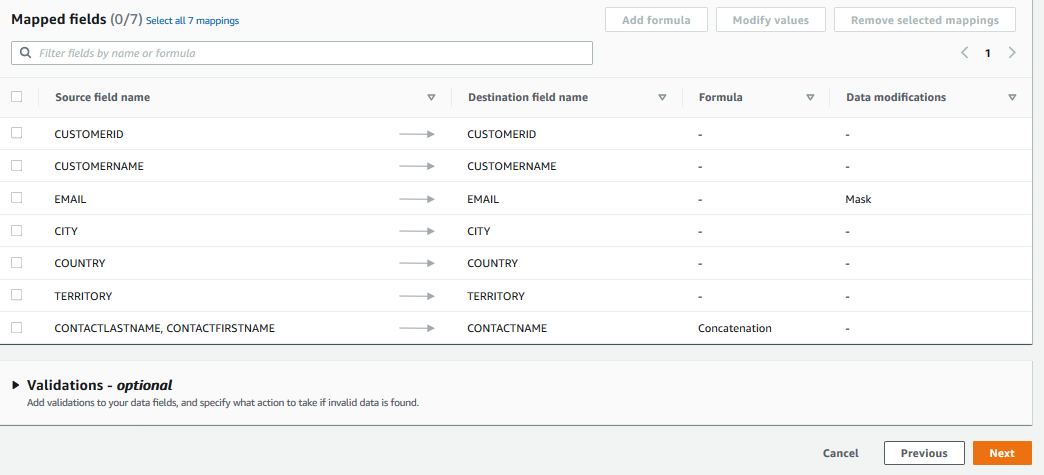
The source to destination mapping is complete. You can also perform Validations configuration which is used to validate source fields. Based on the validation on the source fields, you can choose to ignore the record or terminate the flow. The exercise is not using the Validations configuration. Click on the Next button.
-
On the next screen, click on the Next button.
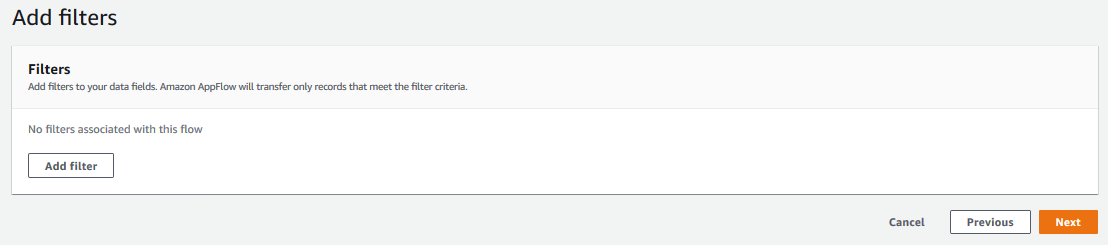
Note: It seems filter configuration which is used to filter the source records, is not available when selecting Amazon S3 as the source. AWS Dojo is looking for authentic documentation to confirm it.
-
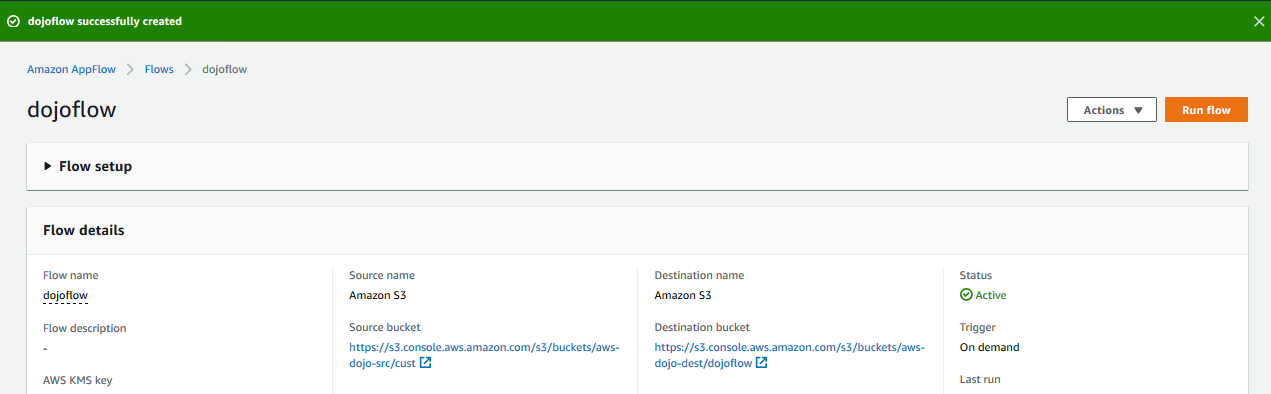
On the next screen, you can review the configuration and click on the Create flow button to create the flow.
-
The flow is created in no time. Click on the Run flow button to run the flow.
-
It will take couple of minutes to finish the execution. Please wait for the run to complete successfully.

-
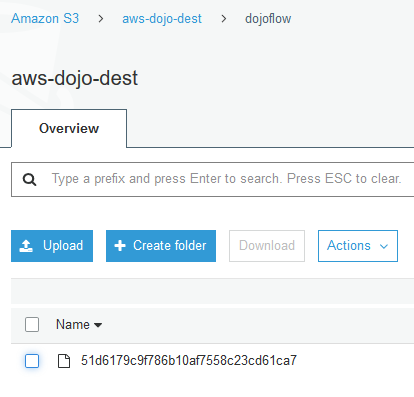
Once the flow run has completed, you can see the data transferred in the destination bucket.
-
Congratulations, you finished the exercise. Kindly follow the next step to clean the AWS account to avoid any further cost.
Step4: Clean up
Goto the Amazon S3 Console and delete aws-dojo-src and aws-dojo-dest buckets. If you used different bucket names, then delete those buckets.
Goto the Amazon AppFlow console and delete the dojoflow flow.
Thanks and hope you enjoyed the exercise.