
AWS Data Wrangler Series - Part4- Working with Amazon DynamoDB
Amazon DynamoDB is a key-value and document database that delivers high performance at scale. AWS Data Wrangler is an open source initiative from AWS Professional Services. It extends the power of Pandas by allowing to work AWS data related services using Panda DataFrames. Once can use Python Panda and AWS Data Wrangler to build ETL with major services - Athena, Glue, Redshift, Timestream, QuickSight, CloudWatchLogs, DynamoDB, EMR, PostgreSQL, MySQL, SQLServer and S3 (Parquet, CSV, JSON and EXCEL).
In this exercise, you learn to use AWS Data Wrangler with DynamoDB table.
Step1: Pre-Requisite
You need to have an AWS account with administrative access to complete the exercise. If you don’t have an AWS account, kindly use the link to create free trial account for AWS.
Step2: Create DynamoDB Table
You create a DynamoDB table dojotable which is used to upload data from three sources S3, local json file and local csv file.
-
Login to AWS Management Console and select Ireland as the region.
-
The exercise is using the new UI console for DynamoDB. Goto DynamoDB console. Select Tables menu in the left and then click on the Create table button.

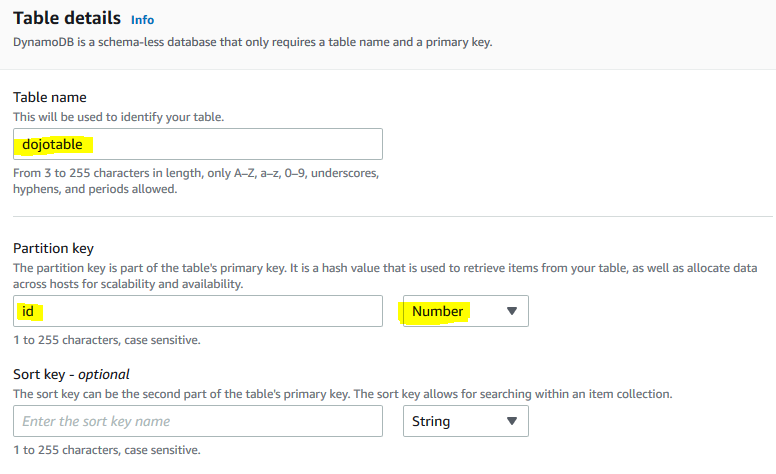
-
On the next screen, type in dojotable as the table name. Type in id as the partition key with data type selected as Number. Keep rest of the configuration to the default and click on the Create table button.
-
The table is created in no time. Next, you create an IAM Role for the SageMaker.
Step3: Create SageMaker Role
You create an IAM Role which used by the SageMaker Jupyter Notebook for authorization to call other AWS Services.
-
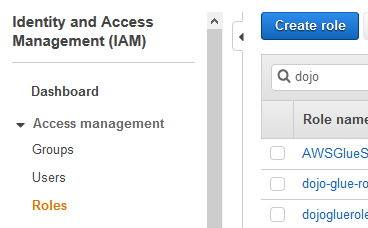
Goto the IAM Management console, click on the Roles menu in the left and then click on the Create role button.
-
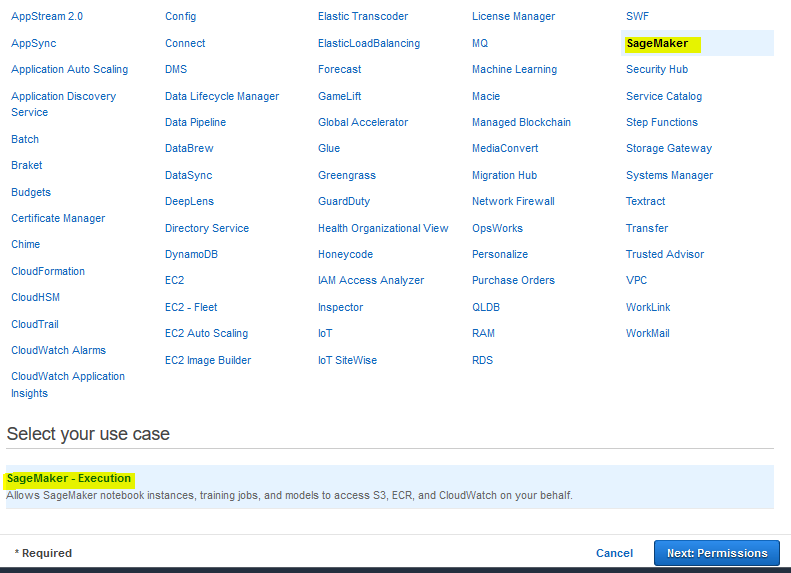
On the next screen, select SageMaker as the service and click on the Next: Permissions button.
-
On the next screen, click on the Next: Tags button.
-
On the next screen, click on the Next: Review button.
-
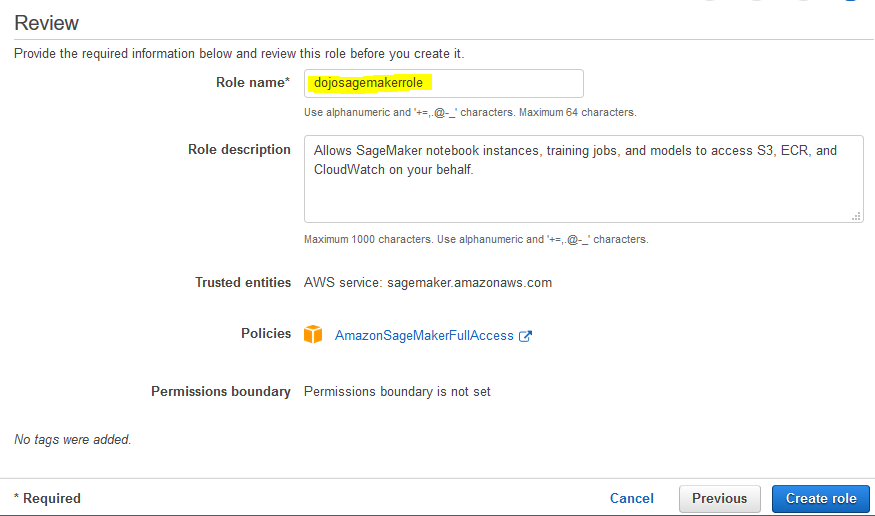
On the next screen, type in dojosagemakerrole as the role name and click on the Create role button.
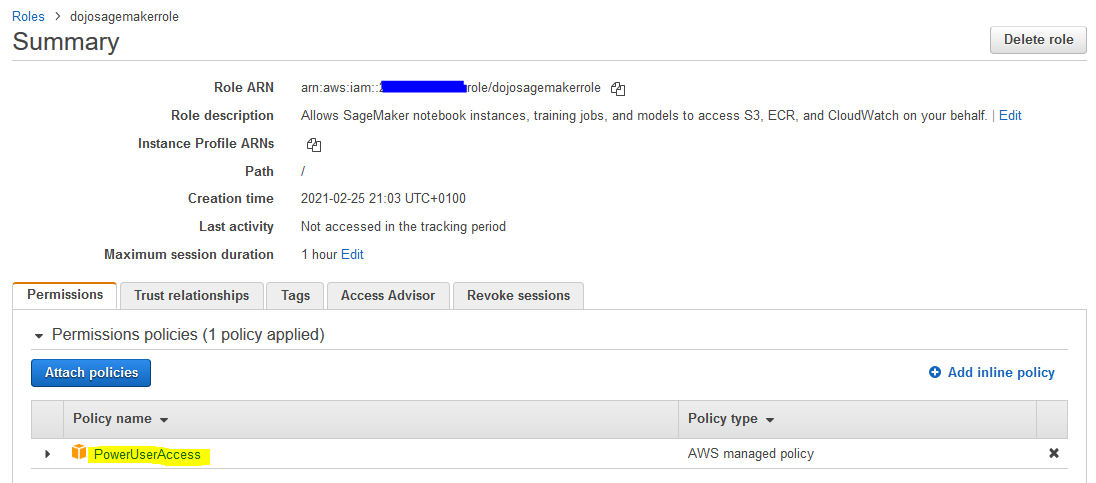
-
The role is created in no time. Open the dojosagemakerrole role details, remove AmazonSageMakerFullAccess policy and attach PowerUserAccess policy to the role.
-
The role is ready. You now create S3 bucket and upload a sample data file.
Step4: Create SageMaker Notebook Instance
You create S3 bucket and upload a sample data file which is ingested into the DynamoDB table.
-
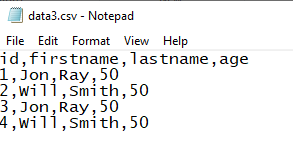
Download data3.csv from the link. The file looks like the following.
-
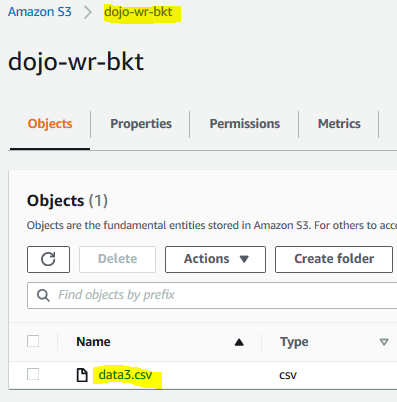
Goto S3 Management console and create a bucket with name dojo-wr-bkt. If this bucket name already exists, create bucket with a name which is available. Upload data3.csv file to the bucket.
-
The S3 bucket and data are ready. Let’s launch the Notebook Instance next.
Step5: Create SageMaker Notebook Instance
You launch SageMaker Notebook instance which is used for AWS Data Wrangler coding.
-
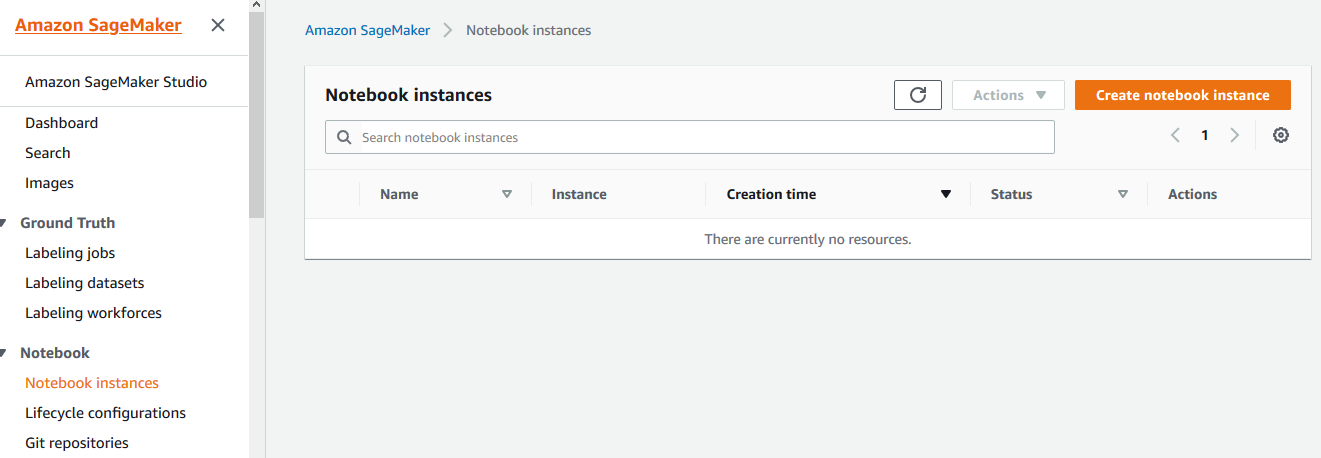
Goto Amazon SageMaker console. Select Notebook instances in the left and then click on the Create notebook instance button.
-
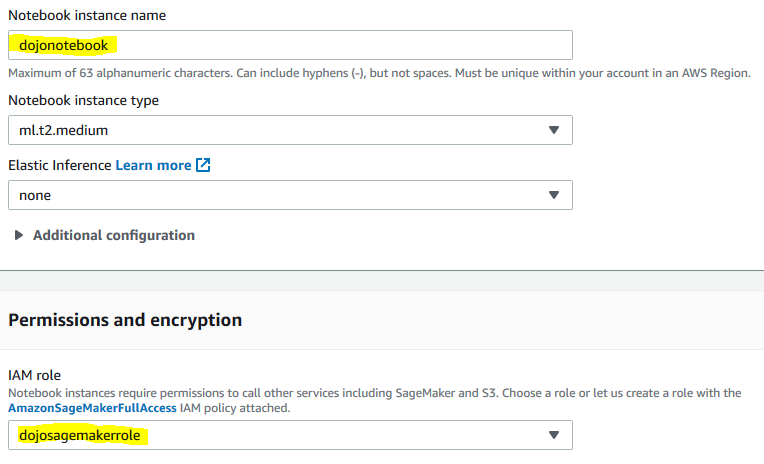
On the next screen, type in dojonotebook as the notebook instance name, select dojosagemakerrole as the IAM role. Leave rest of the configuration as the default and click on the Create notebook instance button.
-
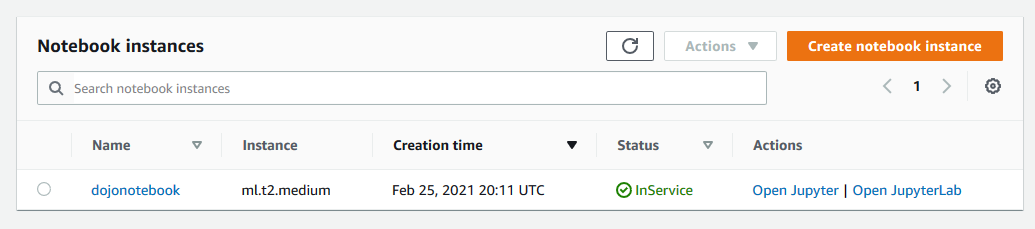
The notebook instance launch starts. Wait till the status changes to InService.
-
The notebook is ready, let’s write code to upload data to DynamoDB.
Step6: Writing Code
With notebook instance ready, you start working on code using AWS Data Wrangler to upload data to the DynamoDB table.
-
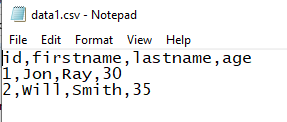
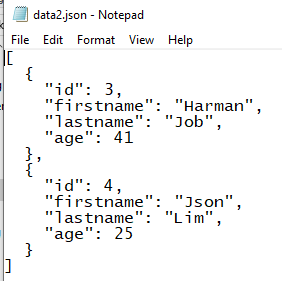
Download data1.csv from the link and download data2.json from the link. Data of these files will be uploaded to DynamoDB table using Data Wrangler. These files look like the following.
-
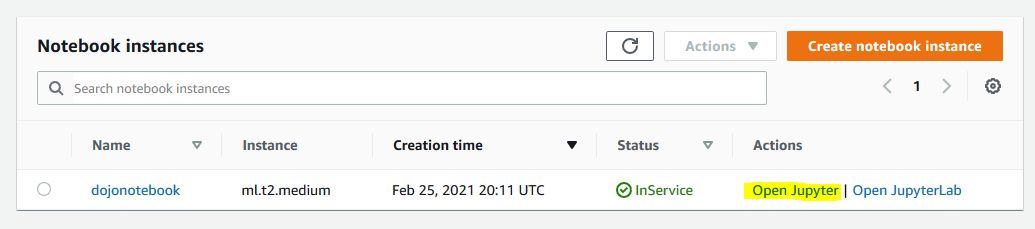
In the Amazon SageMaker console, select dojonotebook instance and click on the Open Jupyter option under the Actions menu.
-
It will open Jupyter in a new browser tab or window. Use Upload button to upload data1.csv and data2.json to the notebook environment.

-
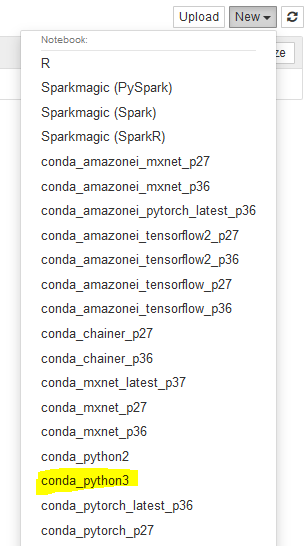
Next, select conda_python3 option under the New menu. Basically, you are starting a notebook with Python3.
-
It will open a notebook in a new browser tab or window.

-
Copy-paste and run the following command to install AWS Data Wrangler in the notebook instance.

!pip install awswrangler`
-
Copy-paste and run the following script to import AWS Data Wrangler and Pandas modules.

import awswrangler as wr
import pandas as pd
from pathlib import Path
`
-
Copy-paste and run the following script to import data from data1.csv to the DynamoDB table dojotable.

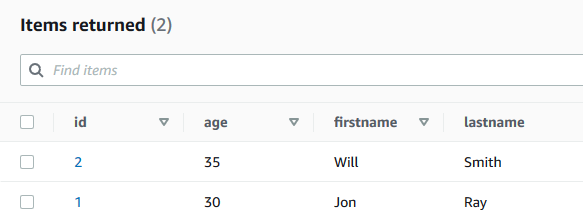
wr.dynamodb.put_csv(path="data1.csv", table_name="dojotable") -
You can verify the data inserted into the DynamoDB table dojotable.
-
Copy-paste and run the following script to import data from data2.json to the DynamoDB table dojotable.

wr.dynamodb.put_json(path="data2.json", table_name="dojotable") -
You can verify the data inserted into the DynamoDB table dojotable.
-
Copy-paste and run the following script to import data from data3.csv file in the S3 bucket to a Pandas dataframe. If you created bucket with a different name, then use that bucket name in the script. You will see that it is repeating the partition key of the earlier inserted items but the age value is different. Inserting this dataframe into DynamoDB table will perform update operation because the partition keys already exist in the table.
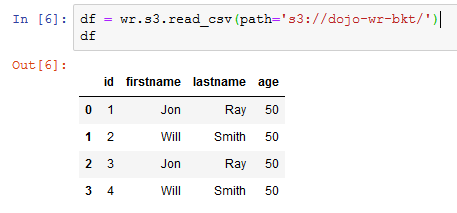
df = wr.s3.read_csv(path='s3://dojo-wr-bkt/') df -
Copy-paste and run the following script to update data in df dataframe to the DynamoDB table dojotable.

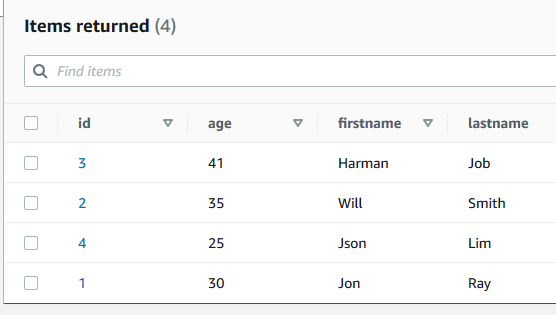
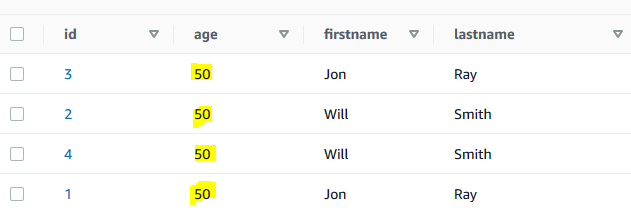
wr.dynamodb.put_df(df=df, table_name="dojotable") -
You will find that the age field has been updated for all the items in the DynamoDB table dojotable.
-
This finishes the exercise. Follow the next step to clean up the resources so that you don’t incur any cost post the exercise.
Step7: Clean up
Delete dojonotebook SageMaker Notebook Instance.
Delete dojo-wr-bkt S3 Bucket. If you created bucket with a different name, then delete that one.
Delete dojotable DynamoDB Table.
Delete dojosagemakerrole IAM Role.
Thanks and hope you enjoyed the exercise.