
Configure AWS Cloud9 for Docker
AWS Cloud9 is a cloud-based integrated development environment (IDE) from Amazon Web Services. The Cloud9 IDE provides the software and tooling needed for dynamic programming with 40 languages including JavaScript, Python, PHP, Ruby, Go, and C++. You learn about configuring the IDE to be able to create a Docker image and publish the Docker image to the AWS Elastic Container Registry (ECR).
Step1: Pre-Requisite
You need to have an AWS account with administrative access to complete the exercise. If you don’t have an AWS account, kindly use the link to create free trial account for AWS.
Step2: Create ECR Repository
Let’s start with creating a repository for the Docker images in AWS ECR. Later when you create a Docker image in Cloud9 IDE, you can push the image to this repository for the deployment.
-
Login to the AWS Console. Select an AWS Region of your choice where AWS Cloud9 and AWS ECR services are available. You will see the exercise using the Paris region.
-
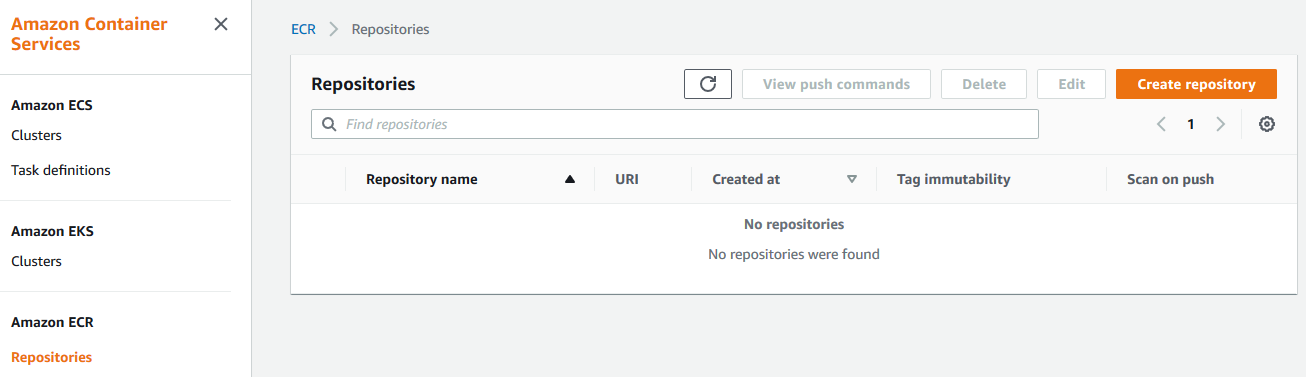
Goto the AWS Elastic Container Services (ECS) console and click on the Repositories menu in the left and then click on the Create repository button.
-
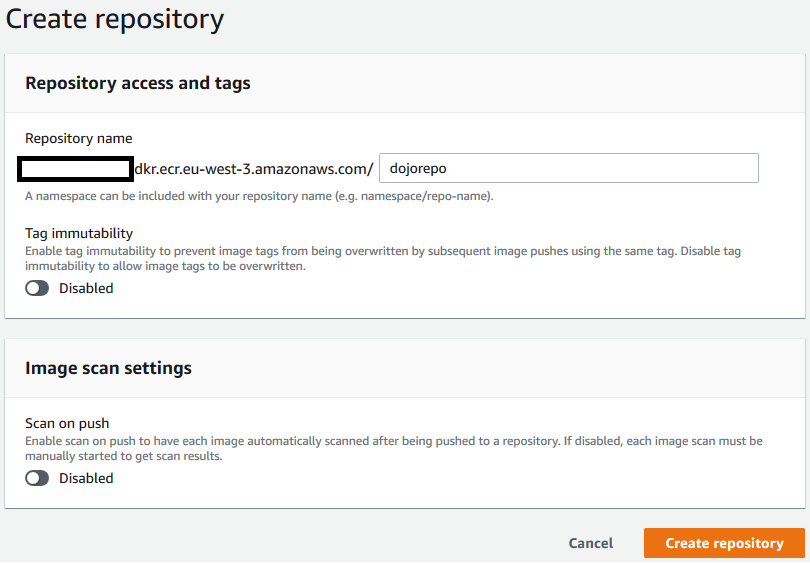
On the next screen, enter dojorepo as the repository name and click on the Create repository button.
-
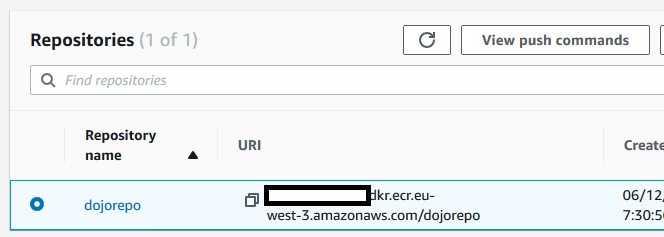
The repository is created in no time. Select the repository created and click on the View push commands button.
-
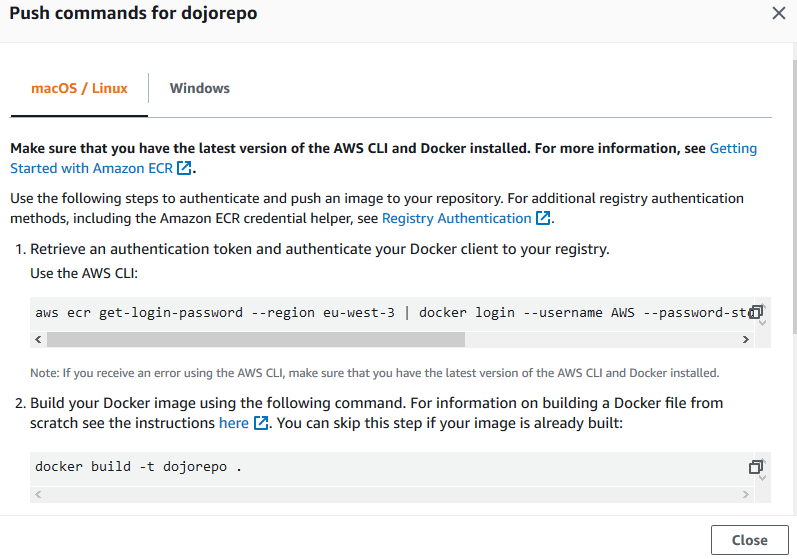
In popup window, you can the commands which are used to push the Docker image to the repository from the development environment. You will use these commands later in the Cloud9 IDE environment.
-
The repository is ready. You now create and configure Cloud9 environment for Docker.
Step3: Launch Cloud9 Environment
You will launch AWS Cloud9 environment. When you launch an environment, it starts an Amazon EC2 instance in the background and uses it with AWS Cloud9 IDE as the development machine.
-
Goto the AWS Cloud9 console and click on the Create environment button.
-
On the next screen, enter dojoenvironment as the name and click on the Next step button.

-
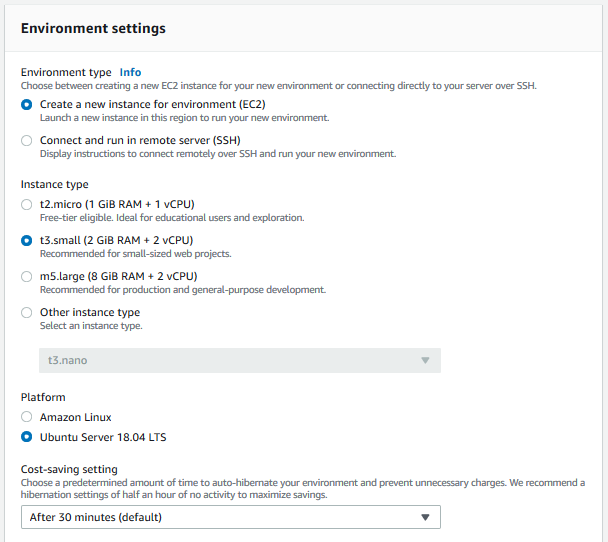
On the next screen, select Environment type as Create a new instance for environment (EC2). Select Instance type as t3.small (2 GiB RAM + 2 vCPU). Select Ubuntu Server 18.04 LTS for the Platform. The development environment will have Ubuntu as the operating system. Keep rest of the fields with the default values and click on the Next step button.
-
On the next screen, click on the Create environment button.
-
It will take couple of minutes to create the environment. Wait for the environment to be ready. Once it is ready, you can see console window in the bottom part of the screen. It provides console base access to the development machine.
-
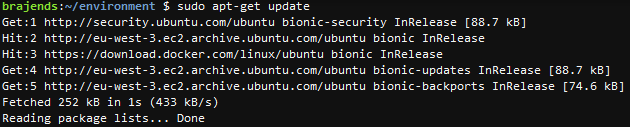
You will now configure the environment for the Docker. Run the following command in the console to update the environment.
sudo apt-get update`
-
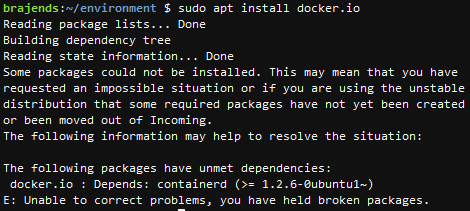
Next run the following command in the console to install the Docker package.
sudo apt install docker.io`
-
Next run the following commands one by one to automate Docker start.
 sudo systemctl start docker
 sudo systemctl enable docker
`

-
The Docker is installed and configured. Run the following command to check the version of the Docker installed.
docker --version`

-
With environment ready, it is time to create the Docker package.
Step4: Create Docker Package
You first create a Docker image and then upload to the AWS ECR repository. You will create Docker image with a sample python file test.py which simply creates an Amazon S3 bucket.
-
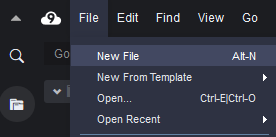
In AWS Cloud9 IDE, Click on the New File option under the File menu to create a new file.
-
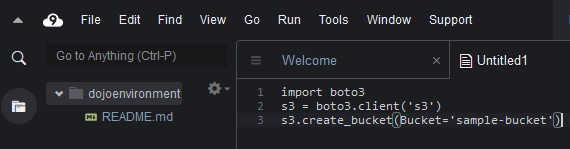
It creates a new Untitled1 file. Copy-paste the following code in the file.
 import boto3
 s3 = boto3.client('s3')
 s3.create_bucket(Bucket='sample-bucket')
`
-
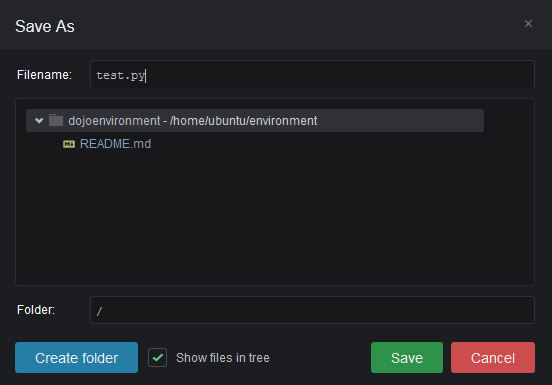
In AWS Cloud9 IDE, Click on the Save option under the File menu to save the file. In the popup, enter the file name as test.py and click the Save button.
-
In AWS Cloud9 IDE, Click on the New File option under the File menu to create another new file. Copy-paste the following code in the file and save the file as Dockerfile. It is the script to create the Docker image.
 FROM python:3
 ADD test.py /
 RUN pip3 install boto3
 CMD [ "python", "./test.py" ]
`
-
The files are ready. You will use the push commands from the AWS ECR repository to create and upload the Docker image. Run the following command in the console to authenticate to the ECR registry. Replace with the code of the region you are using for the workshop. Replace with the account number of the AWS account you are using.
aws ecr get-login-password --region <Region-Code> | docker login --username AWS --password-stdin <Account-Number>.dkr.ecr.<Region-Code>.amazonaws.com`

-
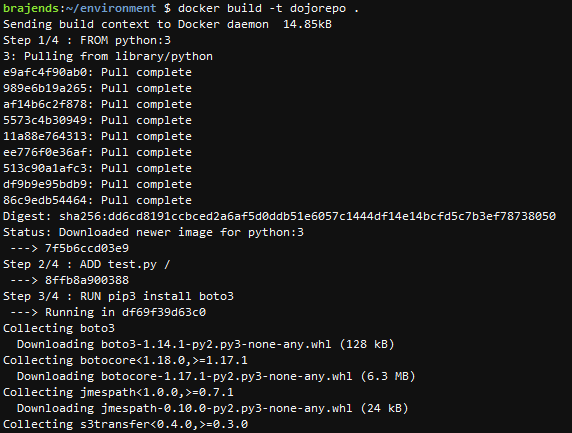
Next you run the following command in the console to create the Docker image. There is a dot in the end of the command, copy the complete command.
docker build -t dojorepo .`
-
Next you run the following command to tag the image so you can push the image to the repository. Replace with the code of the region you are using for the workshop. Replace with the account number of the AWS account you are using.
docker tag dojorepo:latest <Account-Number>.dkr.ecr.<Region-Code>.amazonaws.com/dojorepo:latest`
-
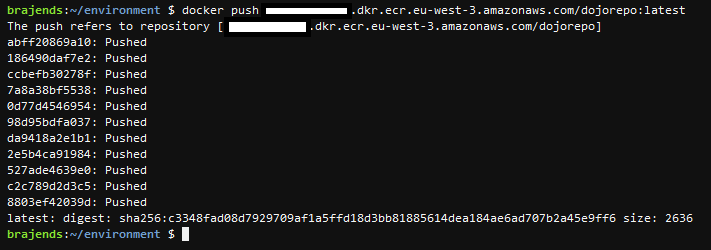
Finally, run the following command to push the image to the AWS ECR repository. Replace with the code of the region you are using for the workshop. Replace with the account number of the AWS account you are using.
docker push <Account-Number>.dkr.ecr.<Region-Code>.amazonaws.com/dojorepo:latest`
-
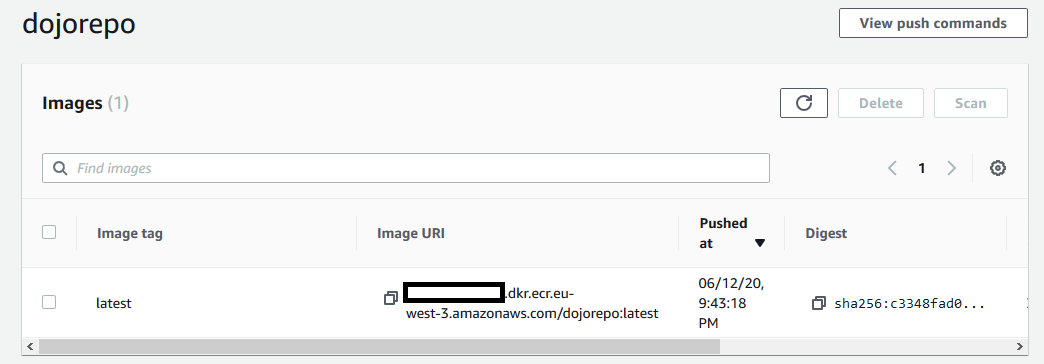
The Docker image has been pushed to the AWS ECR repository. You can verify it by opening the dojorepo repository in the AWS ECS console.
-
Congratulations, it finishes the exercise. You learnt how to use AWS Cloud9 IDE to create the Docker image and then store in the AWS ECR repository. Please follow the next steps to clean the AWS account so that you don’t incur any further cost.
Step5: Clean up
Goto the AWS Cloud9 console and delete dojoenvironment environment.
Goto the AWS ECS console and delete the dojorepo repository.
Thanks and hope you enjoyed the exercise.