
Using Custom AWS Glue Classifiers
AWS Glue uses classifiers to catalog the data. There are out of box classifiers available for XML, JSON, CSV, ORC, Parquet and Avro formats. But sometimes, the classifier is not able to catalog the data due to complex structure or hierarchy. In such cases, the custom classifiers are configured and used with the crawler.
In this exercise, you configure a custom XML classifier to catalog XML data.
Step1: Pre-Requisite
You need to have an AWS account with administrative access to complete the exercise. If you don’t have an AWS account, kindly use the link to create free trial account for AWS.
Step2: Create IAM Role for Glue
You start with creation of the IAM role which AWS Glue uses for the authorization to call other AWS Services.
-
Login to the AWS Console and select Paris as the region.
-
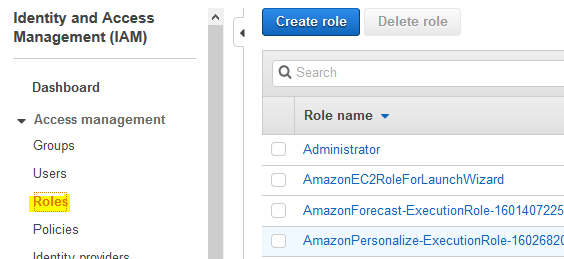
Goto the IAM Management console and click on the Roles menu in the left and then click on the Create role button.
-
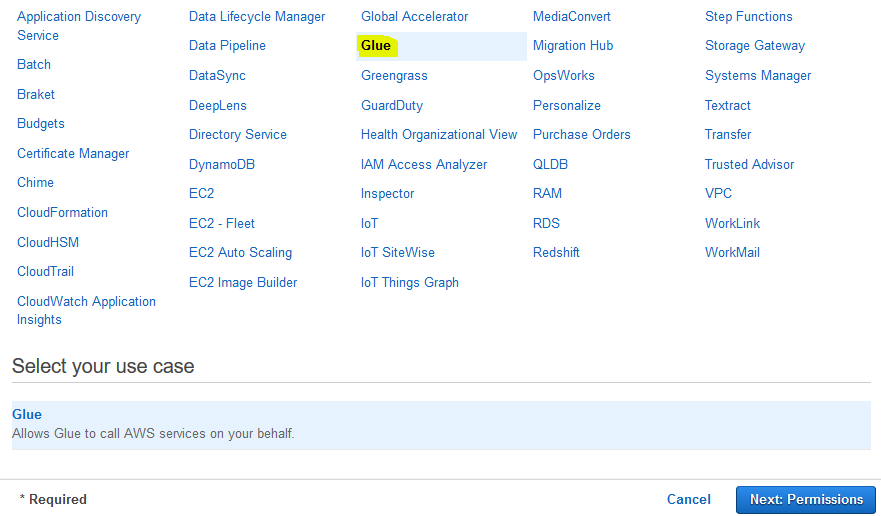
On the next screen, select Glue as the service and click on the Next: Permissions button.
-
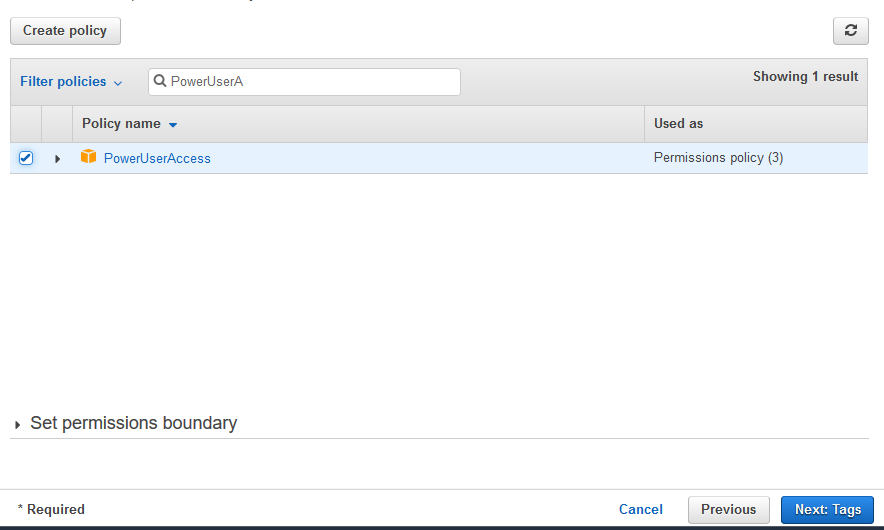
On the next screen, select PowerUserAccess as the policy and click on the Next: Tags button. The exercise is using power user permission but in actual production use it is recommended to use minimum required permission only.
-
On the next screen, click on the Next: Review button.
-
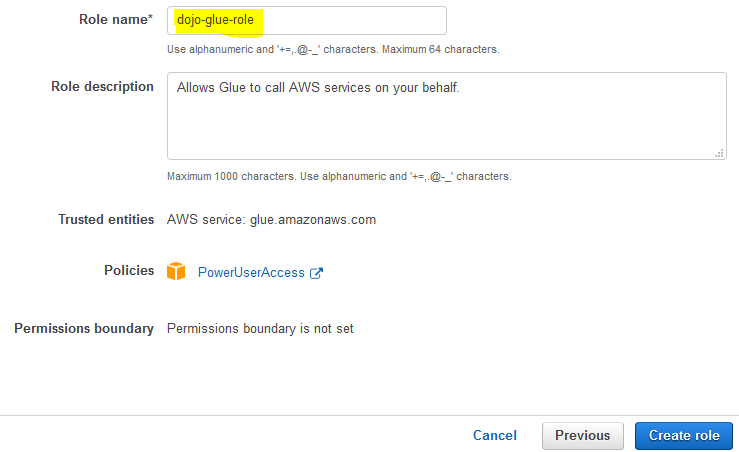
On the next screen, type in dojo-glue-role for the Role name and click on the Create role button.
-
The role is created in no time. The next step is to create S3 bucket and upload data.
Step3: Create S3 Bucket
A sample XML file (sample.xml) has been provided for the exercise. Download it from the link.
-
Goto S3 Management studio. Create an S3 bucket with name dojo-xml-data and create a folder with the name planes under it. If the bucket name is not available, create bucket with a name which is available. Finally upload sample.xml file in the planes folder.
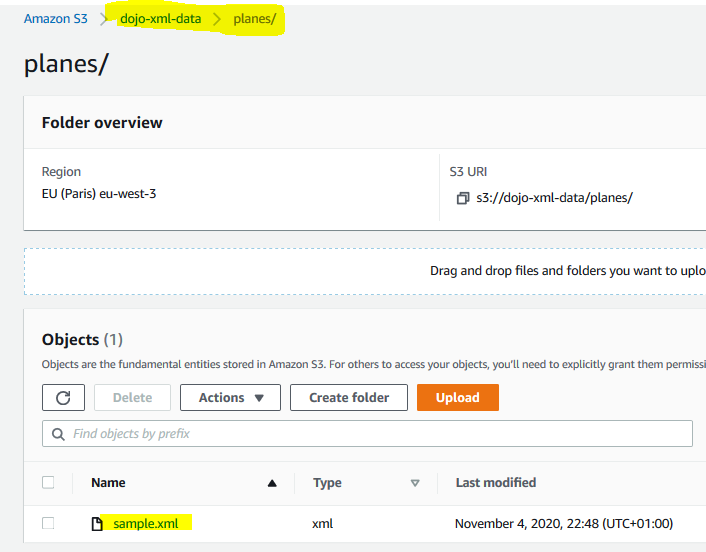
-
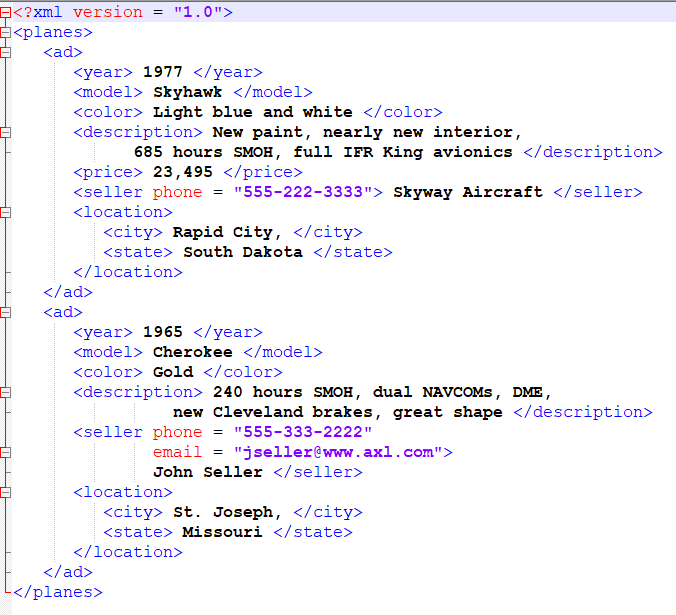
The sample.xml file looks like below. It has sales data for the planes.
-
The data is ready. The next step is to create Glue database where the data can be cataloged.
Step4: Create Glue Database
In this step, you create AWS Glue database where the XML data can be cataloged.
-
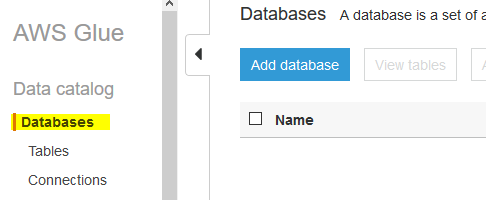
Goto Glue Management console. Click on the Databases menu in the left and then click on the Add database button.
-
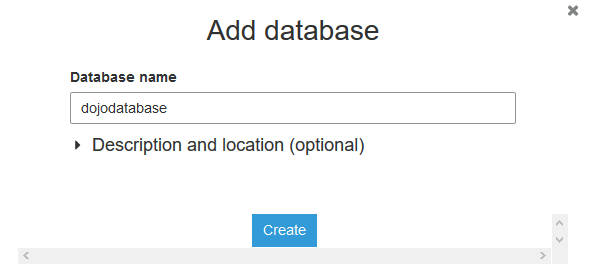
On the next popup screen, type in dojodatabase as the database name and click on the Create button.
-
The database is created in no time. The next step is to configure the crawler to catalog the data stored in the S3 bucket.
Step5: Create and Run Crawler
In this step, you configure AWS Glue Crawler to catalog the XML data stored in S3.
-
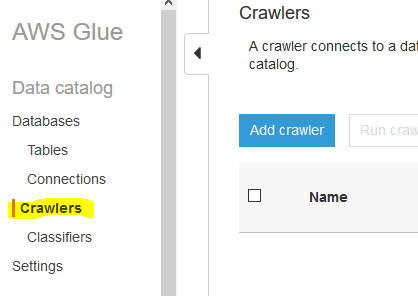
Goto Glue Management console. Click on the Crawlers menu in the left and then click on the Add crawler button.
-
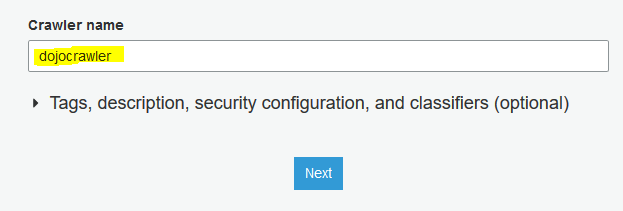
On the next screen, type in dojocrawler as the crawler name and click on the Next button.
-
On the next screen, select Data stores for the Crawler source type and select Crawl all folders for the Repeat crawls of S3 data stores fields. Click on the Next button.
-
On the next screen, select S3 as the data store. Select Specified path in my account option for the Crawl data in field. Select s3://dojo-xml-data/planes for the include path. If you created bucket with a different name; then use that bucket name. Click on the Next button.

-
On the next screen, select No for Add another data store and click on the Next button.
-
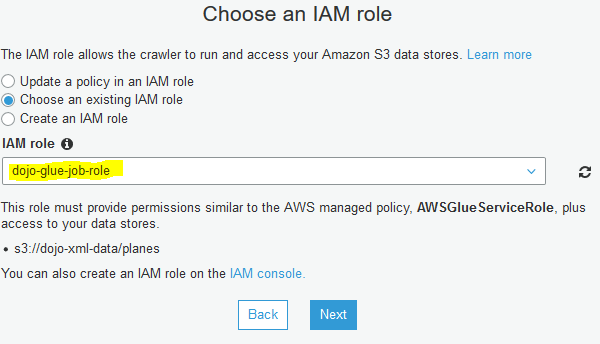
On the next screen, select Choose an existing IAM role option. Select dojo-glue-role as the IAM role and click on the Next button.
-
On the next screen, for the crawler run frequency, select Run on demand and click on the Next button.
-
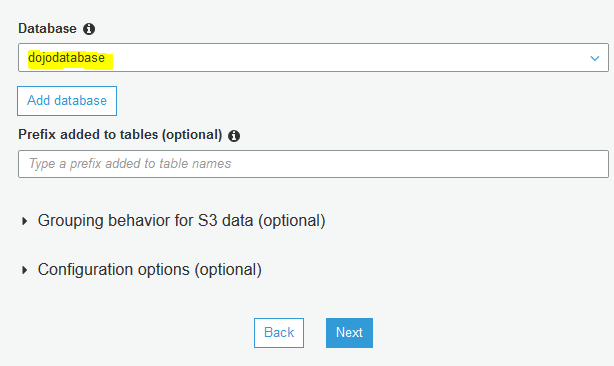
On the next screen, select dojodatabase as the database and click on the Next button.
-
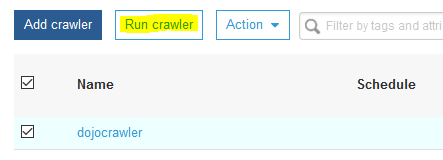
On the next screen, click on the Finish button. The crawler is created in no time. Select the crawler and click on the Run crawler button.
-
The crawler will run and will take some time to catalog the data. After sometime, the crawler will stop and you can see one table added.

-
On the Glue Console, click on the Tables menu in the left and you can see planes table created by the crawler.

-
Click on the planes table to check the schema. You can see the out of box classifier could not determine the schema. The schema is blank.
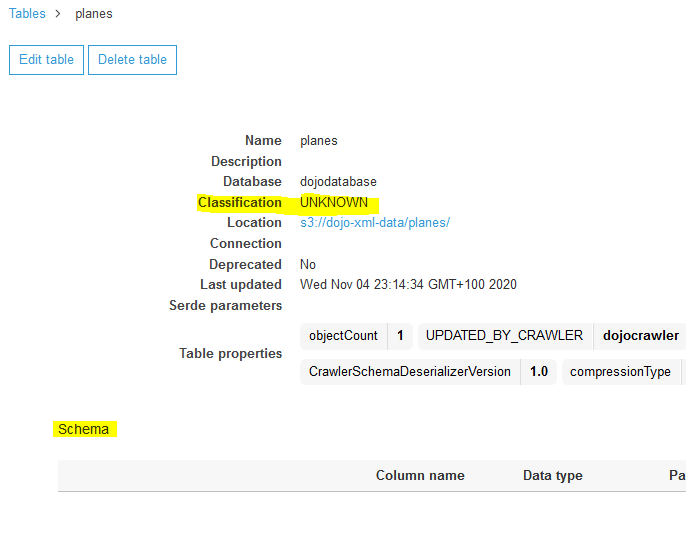
-
The out of box classifier is not able to catalog the data. You will now use a custom classifier to catalog the data.
Step6: Create Custom Classifier
In this step, you configure a custom classifier to catalog the data.
-
Before you catalog the data. Have a look at the data again. In custom classifier, you want to record data within ad tag as the record. All the tags and attributes under ad tag should be cataloged as fields.
-
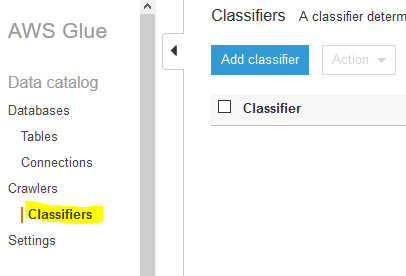
Goto Glue Management console. Click on the Classifiers menu in the left and then click on the Add classifier button.
-
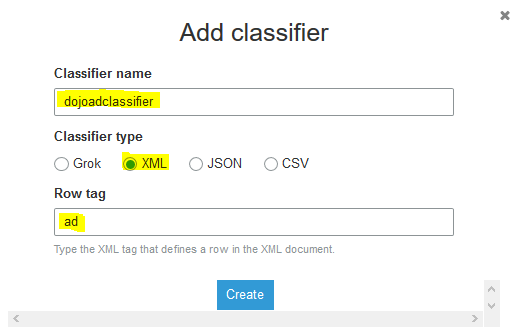
On the next popup screen, type in dojoadclassifier as the name. Select XML as the classifier type. Type in ad as the row tag. Finally click on the Create button.
-
The classifier is created in no time. In the next step, you catalog the data again using the custom classifier.
Step7: Create and Run Crawler with Custom Classifier
In this step, you catalog the data again using new custom classifier.
-
First delete planes table and dojocrawler Glue crawler in the AWS Glue Management console.
-
In Glue Management console. Click on the Crawlers menu in the left and then click on the Add crawler button.
-
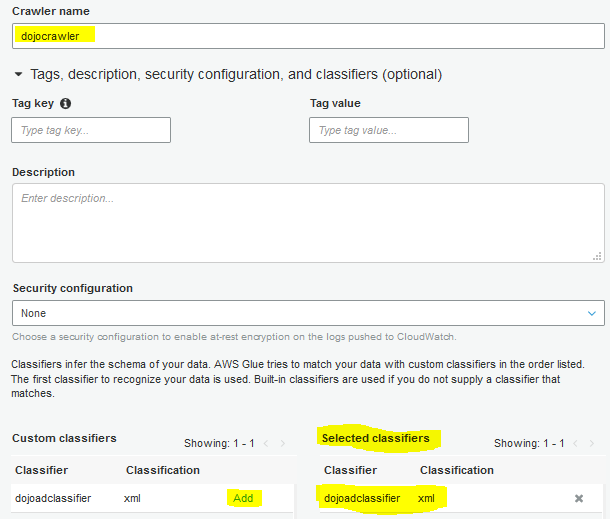
On the next screen, type in dojocrawler as the crawler name. Expand Tags, description, security configuration, and classifiers (optional) section. Click on Add link to select dojoadclassifier. Finally click on the Next button.
-
On the next screen, select Data stores for the Crawler source type and select Crawl all folders for the Repeat crawls of S3 data stores field. Click on the Next button.
-
On the next screen, select S3 as the data store. Select Specified path in my account option for the Crawl data in field. Select s3://dojo-xml-data/planes for the include path. If you created bucket with a different name; then use that bucket name.
-
On the next screen, select No for Add another data store and click on the Next button.
-
On the next screen, select Choose an existing IAM role option. Select dojo-glue-role as the IAM role and click on the Next button.
-
On the next screen, for the crawler run frequency, select Run on demand and click on the Next button.
-
On the next screen, select dojodatabase as the database and click on the Next button.
-
On the next screen, click on the Finish button. The crawler is created in no time. Select the crawler and click on the Run crawler button.
-
The crawler will run and will take some time to catalog the data. After sometime, the crawler will stop and you can see one table added.
-
On the Glue Console, click on the Tables menu in the left and you can see planes table created.
-
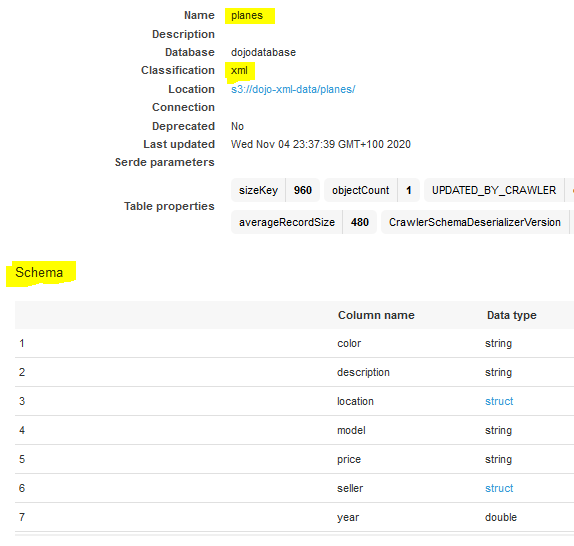
Click on the planes table to check the schema. You can see that the custom classifier was able to catalog data. It has cataloged the tags and attributes under ad tag as a record.
-
The custom classifier worked. Let’s create another classifier which creates record in the catalog using a different XML tag.
Step8: Create another Custom Classifier
In this step, you configure another custom classifier which uses a different XML tag for the records in the catalog.
-
Have a look at the data again. In new custom classifier, you want to record data within location tag as the record.
-
Goto Glue Management console. Click on the Classifiers menu in the left and then click on the Add classifier button.
-
On the next popup screen, type in dojolocationclassifier as the name. Select XML as the classifier type. Type in location as the row tag. Finally click on the Create button.

-
The classifier is created in no time. In the next step, you catalog the table again using the new custom classifier.
Step9: Create and Run Crawler with Custom Classifier Again
In this step, you catalog the data again using new custom classifier.
-
First delete planes table and dojocrawler Glue crawler in the AWS Glue Management console.
-
In Glue Management console. Click on the Crawlers menu in the left and then click on the Add crawler button.
-
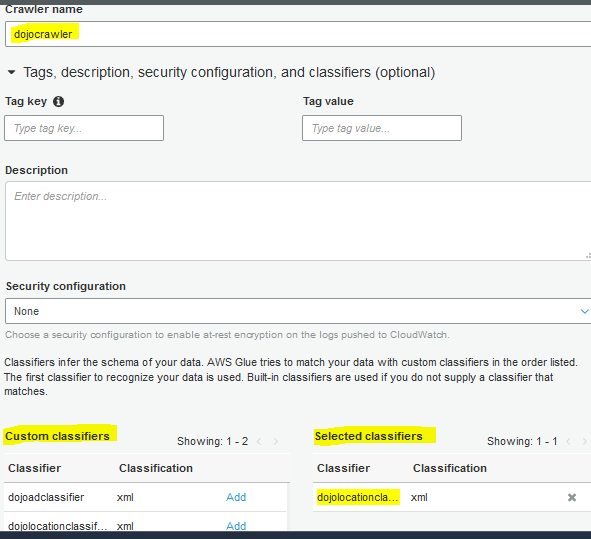
On the next screen, type in dojocrawler as the crawler name. Expand Tags, description, security configuration, and classifiers (optional) section. Click on Add link to select dojolocationclassifier. Finally click on the Next button.
-
On the next screen, select Data stores for the Crawler source type and select Crawl all folders for the Repeat crawls of S3 data stores field. Click on the Next button.
-
On the next screen, select S3 as the data store. Select Specified path in my account option for the Crawl data in field. Select s3://dojo-xml-data/planes for the include path. If you created bucket with a different name; then use that bucket name.
-
On the next screen, select No for Add another data store and click on the Next button.
-
On the next screen, select Choose an existing IAM role option. Select dojo-glue-role as the IAM role and click on the Next button.
-
On the next screen, for the crawler run frequency, select Run on demand and click on the Next button.
-
On the next screen, select dojodatabase as the database and click on the Next button.
-
On the next screen, click on the Finish button. The crawler is created in no time. Select the crawler and click on the Run crawler button.
-
The crawler will run and will take some time to catalog the data. After sometime, the crawler will stop and you can see one table added.
-
On the Glue Console, click on the Tables menu in the left and you can see planes table created.
-
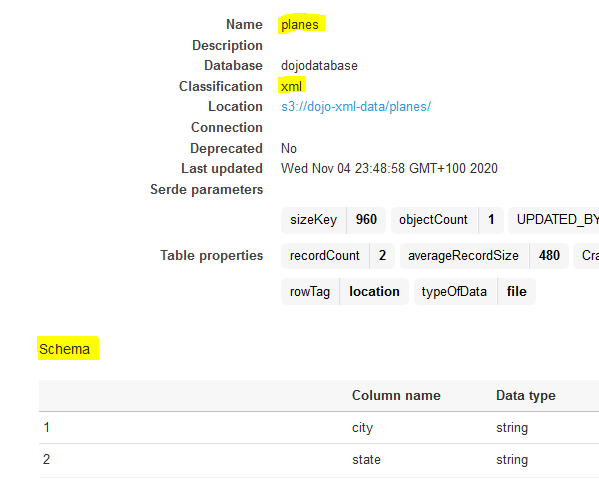
Click on the planes table to check the schema. You can see that the custom classifier was able to catalog data. It has cataloged the tags and attributes under location tag as a record because we configured the custom classifier to use location tag as the record.
-
You learnt using custom classifiers with two examples. The exercise is complete now. Follow the next step to clean-up the resources so that you don’t incur any cost post the exercise.
Step10: Clean up
Delete dojoadclassifier and dojolocationclassifier custom classifiers.
Delete dojocrawler Glue Crawler.
Delete dojodatabase Glue Database.
Delete dojo-glue-job-role IAM Role.
Delete dojo-xml-data S3 bucket. If you created bucket with a different name then delete that one.
Thanks and hope you enjoyed the exercise.