
Integrating SageMaker Notebook with AWS CodeCommit
Amazon SageMaker notebook instance is a machine learning (ML) compute instance running the Jupyter Notebook App. Jupyter notebooks are used to prepare and process data, write code to train models, deploy models to SageMaker hosting, and test or validate the models.
AWS CodeCommit is a fully-managed source control service that hosts secure Git-based repositories. It makes it easy for teams to collaborate on code in a secure and highly scalable ecosystem.
In this exercise, you learn to integrate Amazon SageMaker notebook instance with AWS CodeCommit.
The AWS Resource consumption for the exercise falls under AWS Free Tier.
Step1: Pre-Requisite
You need to have an AWS account with administrative access to complete the exercise. If you don’t have an AWS account, kindly use the link to create free trial account for AWS.
Step2: Create IAM Role
Let’s start with creating an IAM role which is used by the SageMaker Notebook Instance.
-
Login to the AWS Console and choose Ireland as the region.
-
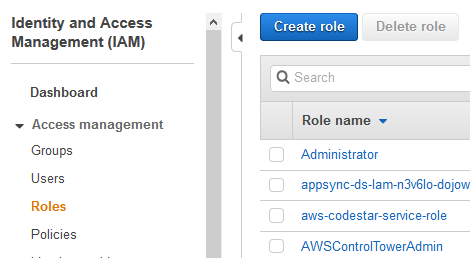
Goto IAM Management Console. Click on the Roles menu in the left and then click on the Create role button.
-
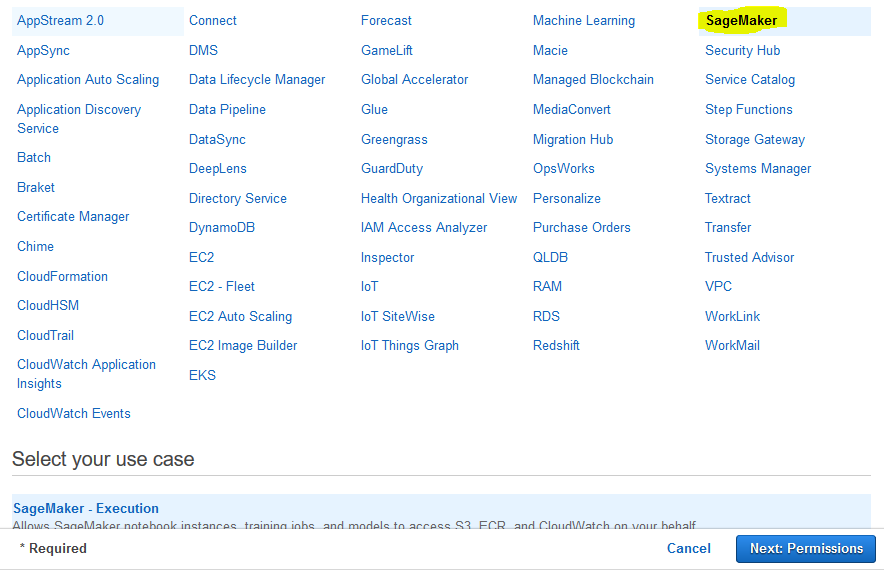
On the next screen, select SageMaker as the service and click on the Next: Permissions button.
-
On the next screen, click on the Next: Tags button.
-
On the next screen, click on the Next: Review button.
-
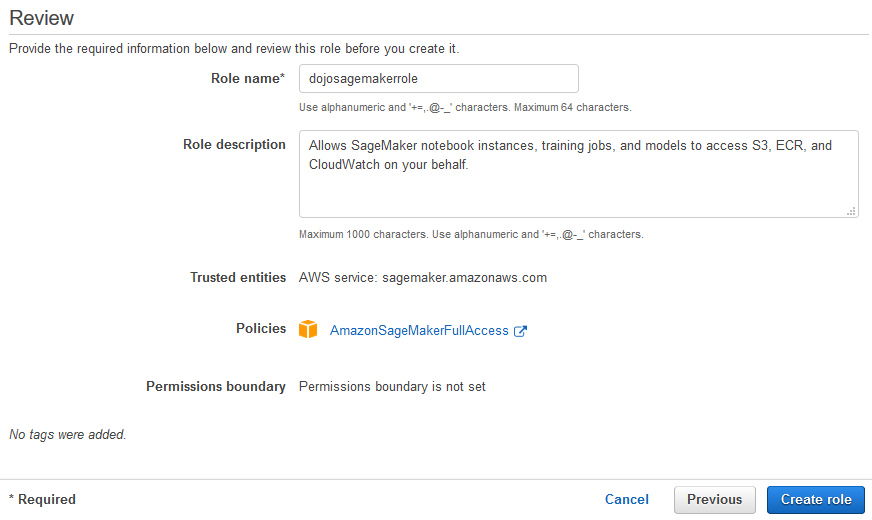
On the next screen, type in dojosagemakerrole as the role name and click on the Create role button.
-
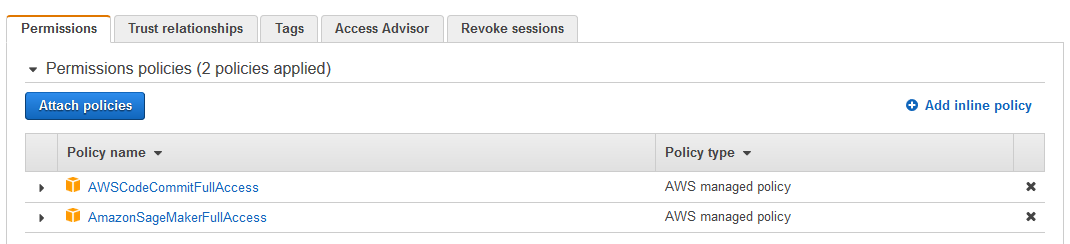
The role is created in no time. Open the role details and attached additional policy AWSCodeCommitFullAccess to the role.
-
The role is ready. Let’s create CodeCommit repository in the next step.
Step3: Create CodeCommit Repository
Setup CodeCommit repository which you integrate later with the SageMaker Notebook Instance.
-
Goto CodeCommit Console and click on the Create repository button.

-
On the next screen, type in dojorepo as the repository name and click on the Create button.

-
The repository is ready. Let’s configure the repository in the Amazon SageMaker.
Step4: Configure Repository in SageMaker
Time to configure CodeCommit repository in Amazon SageMaker.
-
Goto Amazon SageMaker Console. Click on the Git repositories menu in the left and then click on the Add repository button.

-
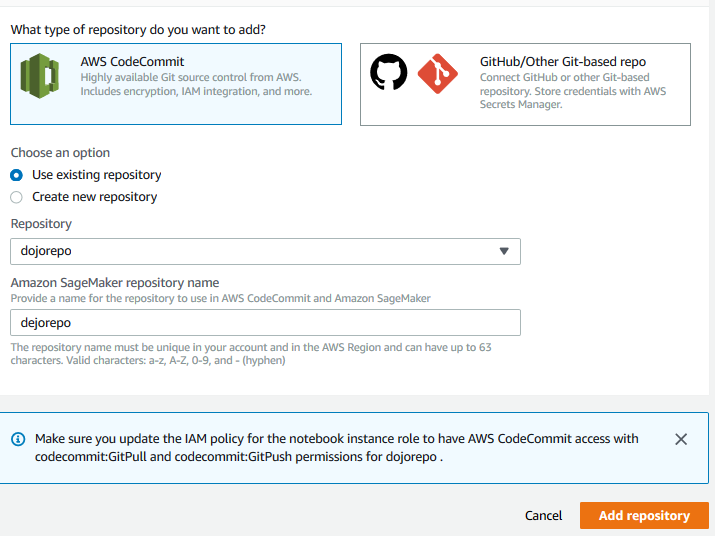
On the next screen, select AWS CodeCommit option. Choose for Use existing repository. Select dojorepo for the repository. For the Amazon SageMaker repository name field, type in dojorepo. Click on the Add repository button.
-
The repository is now configured with Amazon SageMaker and can be used with any notebook you want.
Step5: Launch SageMaker Notebook Instance
In this step, you launch SageMaker Notebook Instance and make it work with the CodeCommit repository.
-
Goto Amazon SageMaker Console. Click on the Notebook instances menu in the left and then click on the Create notebook instance button.

-
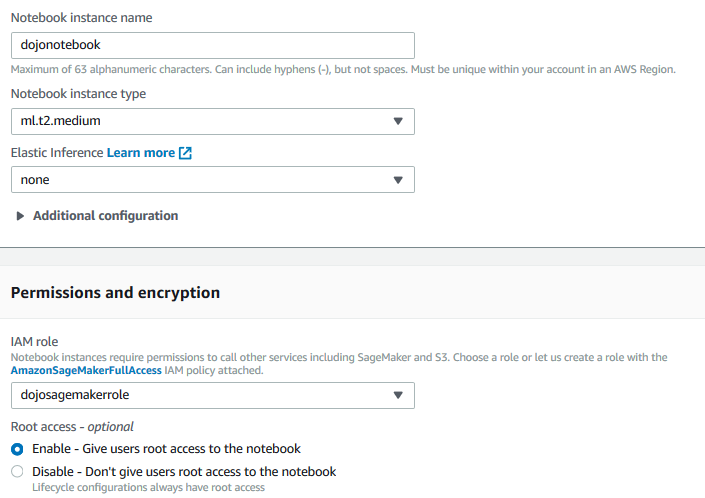
On the next screen, type in dojonotebook as the instance name. Select dojosagemakerrole as the IAM Role. Keep rest of the configuration as the default.
-
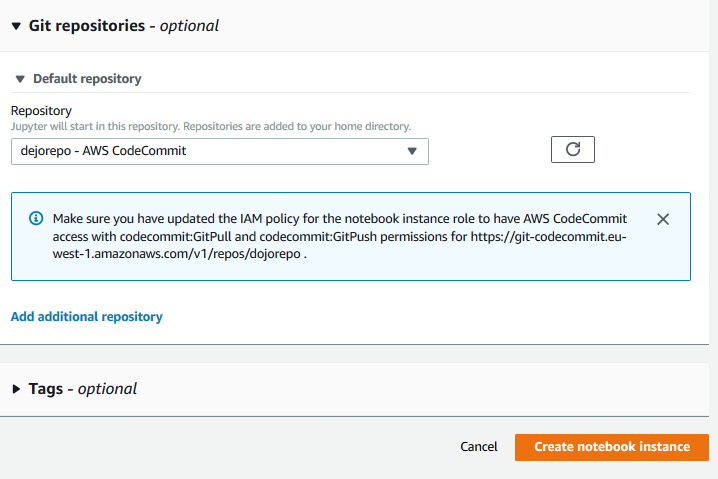
On the same screen, expand Git repositories - optional section. Select dojorepo - AWS CodeCommit for the repository. Click on the Create notebook instance button.
-
The notebook instance creation will start. Wait till the status of the notebook changes to InService. For the notebook, click on the Open JupyterLab link.

-
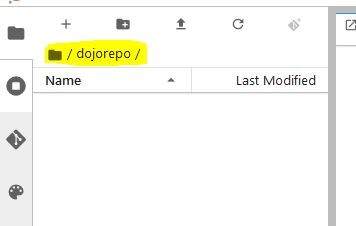
It will open JupyterLab in a new browser window or browser tab. You can see that the repository dojorepo is already configured in the notebook.
-
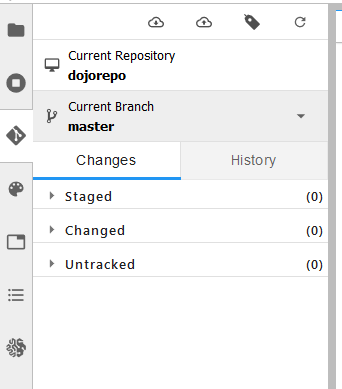
Click on the Git menu in the left to open the repository details. You can see the repository branches. You also have GUI options to perform operations like create branch, pull, push, track change and commit.
-
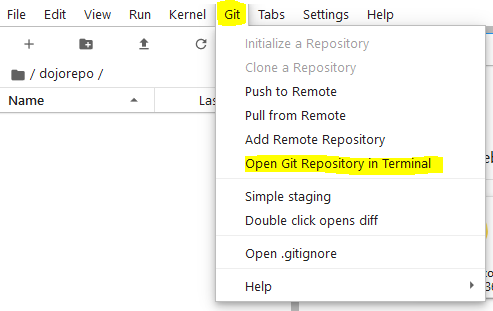
If you like to use Git commands in place of GUI, click on the Open Git Repository in Terminal option in the Git menu.
-
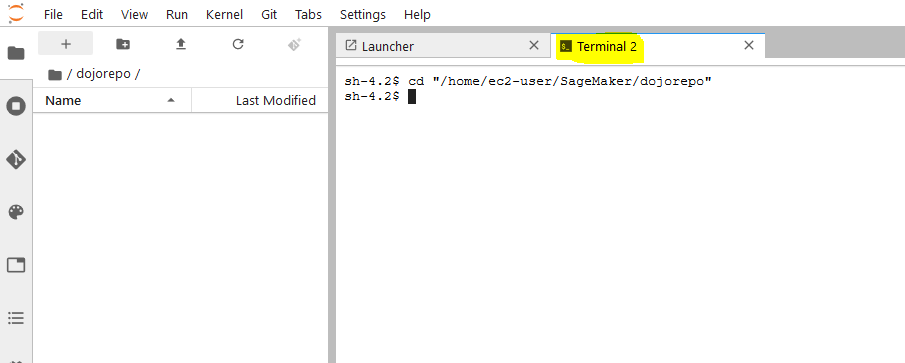
It will open a terminal window which can be used to work with Git commands in place of GUI.
-
You have choice to use the GUI or command line both. This finishes the exercise. Goto the next step to clean-up the resources so that you don’t incur any cost post the exercise.
Step6: Clean up
Delete dojosagemakerrole IAM Role.
Delete dojorepo CodeCommit Repository.
Delete dojonotebook SageMaker Notebook Instance.
Thanks and hope you enjoyed the exercise.