
Python Programming with Amazon EventBridge
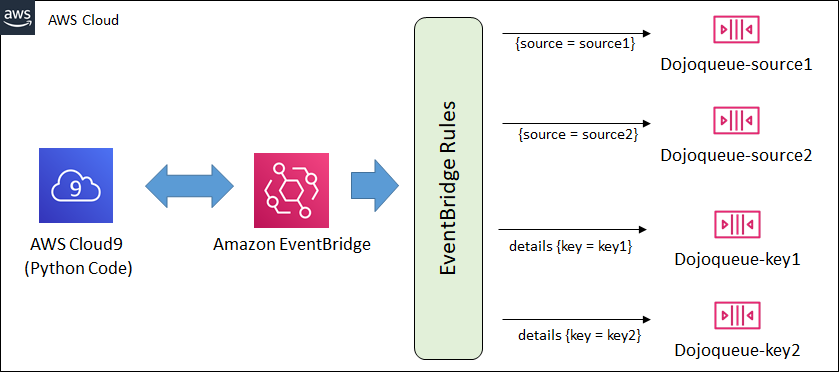
Amazon EventBridge is a serverless event bus to enable event publishing and rules based routing to the different destinations. Amazon EventBridge provides integration with custom applications, Software-as-a-Service (SaaS) applications, and AWS services. The routing rules can be based on facts like event source, AWS Service and also based on the content of the message.
In this exercise, you create a custom event bus where you publish events using Python code. The events published are then routed based on source and content to the different AWS SQS Queues.
The AWS Resource consumption for the exercise does not fall under AWS Free Tier.
Step1: Pre-Requisite
You need to have an AWS account with administrative access to complete the exercise. If you don’t have an AWS account, kindly use the link to create free trial account for AWS.
Step2: Create SQS Queues as Routing Destinations
The EventBridge bus routes the event messages to Amazon SQS queues based on the source of the message and also based on the content of the message. In this step, you create the queues.
-
Login to the AWS Console. Select an AWS Region of your choice where Amazon EventBridge and Amazon Cloud9 are available. You will see the exercise using the Ireland region.
-
Goto SQS Management Console and click on the Create queue button.

-
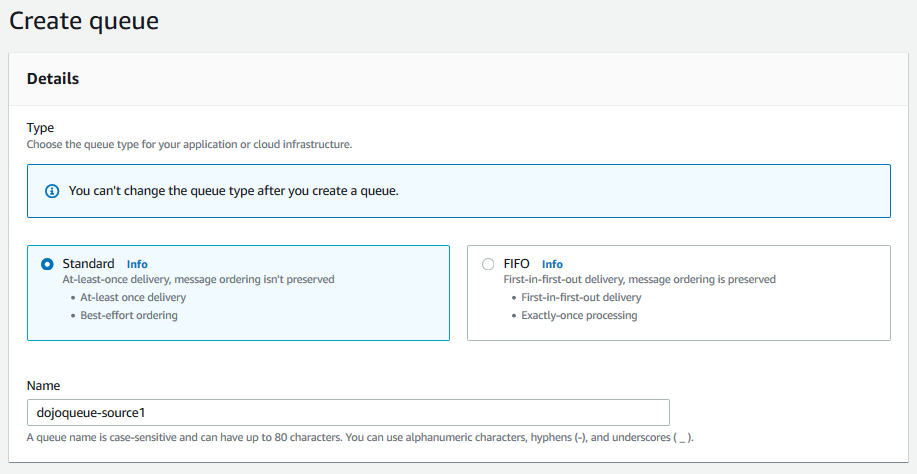
On the next screen, select Standard as type. Type in dojoqueue-source1 as the queue name and keep the rest of the configuration to the default. Click on the Create queue button in the bottom side of the page.
-
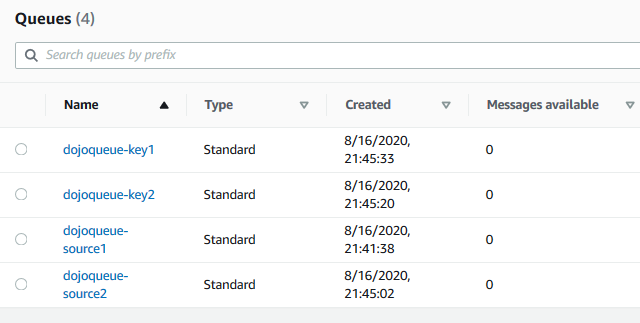
The queue is created in no time. Repeat steps 1 to 3 to create three more queues with names - dojoqueue-source2, dojoqueue-key1 and dojoqueue-key2.
-
The destination queues are created. Let’s create the event bus where the event messages are published.
Step3: Create Event Bus
The next step is to create event bus in EventBridge where the messages can be published.
-
Goto the EventBridge Console and click on the Event buses menu in the left. Then click on the Create event bus button.

-
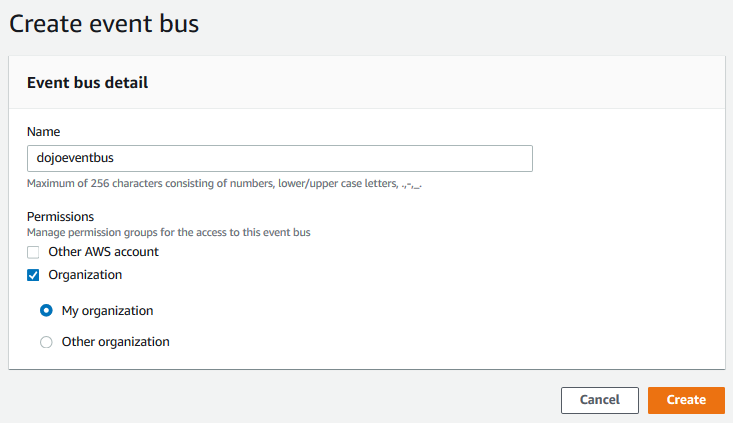
On the next screen, type in the event bus name as dojoeventbus. For permissions, select Organization and then My organization and then click on the Create button.
-
The bus is created in no time.

-
The event bus is ready. Let’s configure rules for the message routing.
Step4: Create Event Rules
In this step, you create four rules - two source based and two content based to route messages to a particular SQS queue. The source based rules route messages based on the event / message source and content based rules use message content to route message to a particular queue.
-
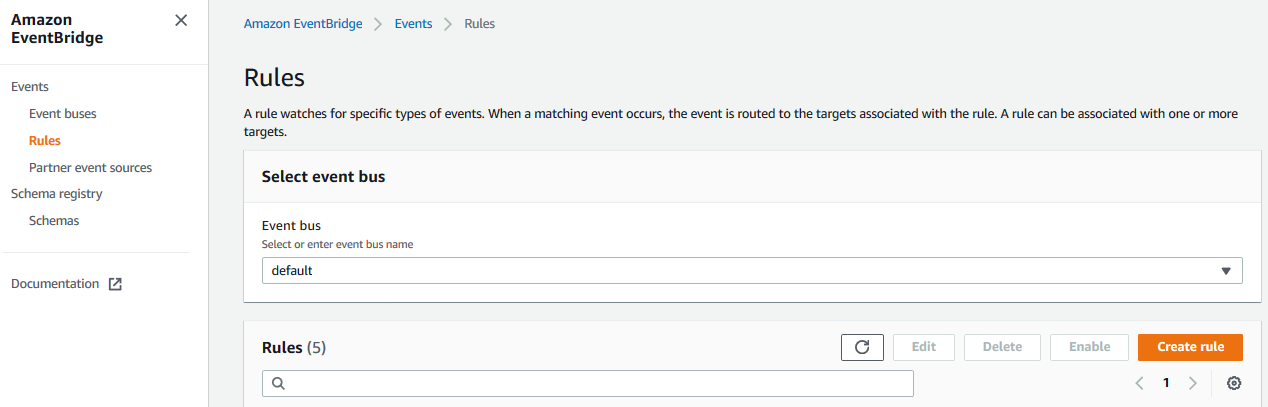
Let’s start with source based routing. Goto the EventBridge Console and click on the Rules menu in the left. Then click on the Create rule button.
-
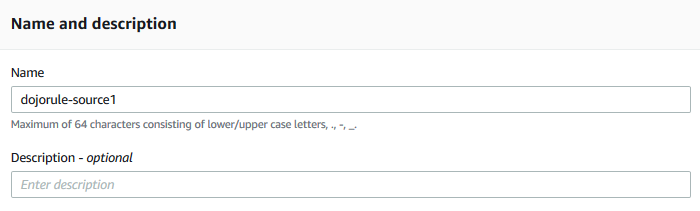
On the next screen, type in dojorule-source1 as the rule name.
-
In the define pattern section, select Event pattern option. Select custom pattern option and copy-paste the following json as the event pattern. Click on the Save button. It will save the pattern. It is basically looking for a message whose source name is source1.
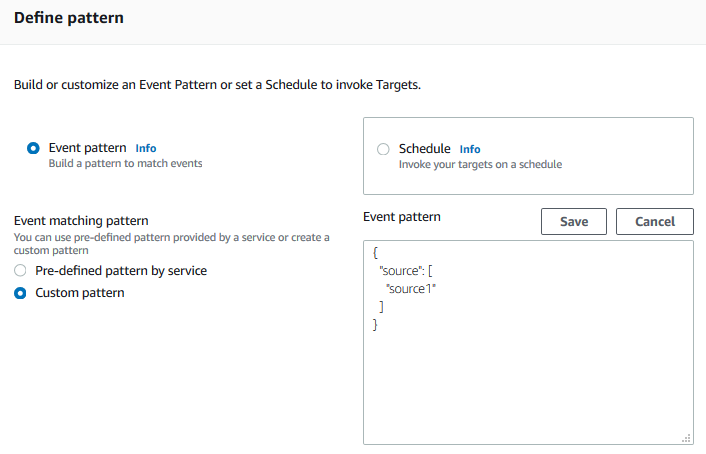
{
  "source": [
    "source1"
  ]
}
-
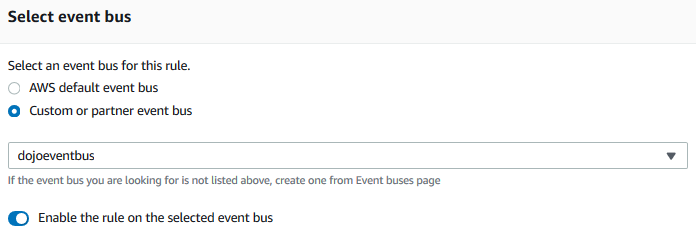
In the select event bus section, select Custom or partner event bus option and select dojoeventbus as the event bus.
-
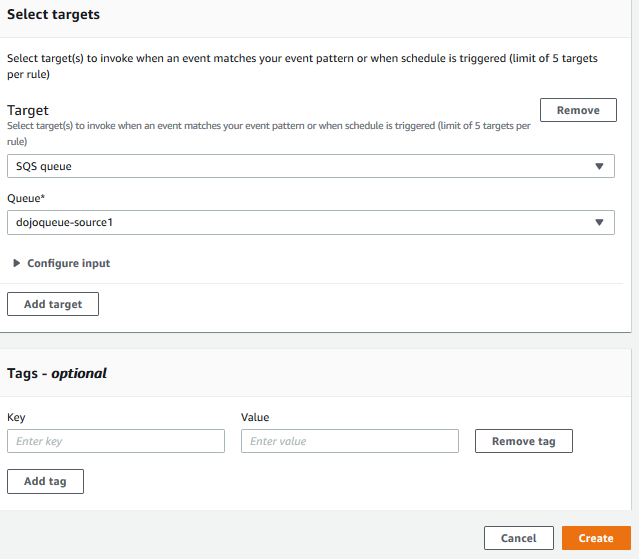
In the select targets section, select SQS Queue as the target and select dojoqueue-source1 as the queue. You are selecting dojoqueue-source1 as the destination for the messages from the source1. Finally click on the Create button.
-
The rule is created in no time. You follow the same method to create three more rules.
-
Follow steps 1 to 5 to create another source based rule using the same type of configuration. Only the following configurations differ. This rule routes messages from source2 to the queue dojoqueue-source2.
Rule name = dojorule-source2
Event Pattern
{
  "source": [
    "source2"
  ]
}
`
Queue name = dojoqueue-source2
-
Next, follow steps 1 to 5 to create content based rule using the same type of configuration. Only the following configurations differ. This rule routes messages with content { “key”: “key1” } to the queue dojoqueue-key1.
Rule name = dojorule-key1
Event Pattern
{
  "detail": {
    "key": [
      {
        "prefix": "key1"
      }
    ]
  }
}
`
Queue name = dojoqueue-key1
-
Finally, follow steps 1 to 5 to create content based rule using the same type of configuration. Only the following configurations differ. This rule routes messages with content { “key”: “key2” } to the queue dojoqueue-key2.
Rule name = dojorule-key2
Event Pattern
{
  "detail": {
    "key": [
      {
        "prefix": "key2"
      }
    ]
  }
}
`
Queue name = dojoqueue-key2
-
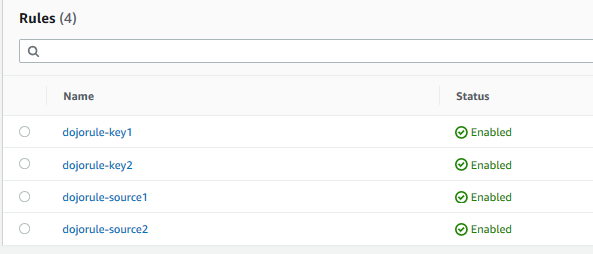
All four rules are in place now.
-
The EventBridge side of the configuration is ready. Let’s build the client code which publishes the messages. First create the development environment.
Step5: Create Development Environment
AWS Cloud9 is a cloud-based integrated development environment (IDE) from Amazon Web Services. The Cloud9 IDE provides the software and tooling needed for dynamic programming with around 40 languages including JavaScript, Python, PHP, Ruby, Go, and C++. In this task, you configure AWS Cloud9 environment with AWS SDK for Python Boto3 in order to program with Amazon EventBridge.
-
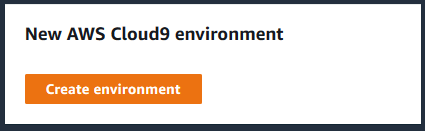
Goto the AWS Cloud9 console and click on the Create environment button.
-
On the next screen, enter dojoenvironment as the name and click on the Next step button.

-
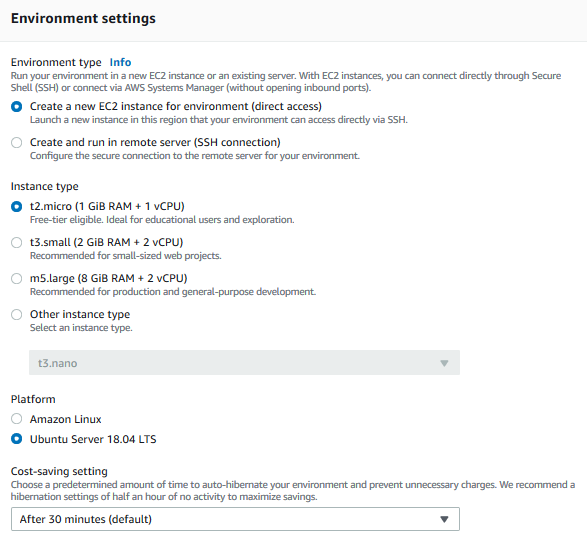
On the next screen, select Environment type as Create a new instance for environment (direct access). Select Instance type as t2.micro (1 GiB RAM + 1 vCPU). Select Ubuntu Server 18.04 LTS for the Platform. The development environment will have Ubuntu as the operating system. Keep rest of the fields with the default values and click on the Next step button.
-
On the next screen, click on the Create environment button.
-
It will take couple of minutes to create the environment. Wait for the environment to be ready. Once it is ready, you can see bash console window in the bottom part of the screen. It provides console based access to the development machine.
-
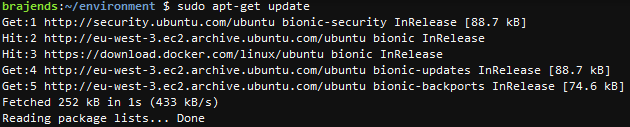
You will now configure the environment for the Python Boto3 SDK. Run the following command in the console to update the environment.
sudo apt-get update`
-
Python3 is already installed in the environment. You can check it by running the command bellow in the console.
python3 --version`

-
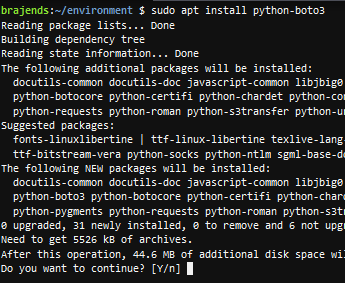
AWS SDK for Python Boto3 is not installed in the environment. Run the following command to install Boto3 package in the environment. When it asks for the confirmation; you type in Y and enter.
sudo apt install python-boto3`
-
The Cloud9 environment is ready for the programming with AWS SDK Boto3. Let’s start coding with Amazon EventBridge.
Step6: Publish Events and Check Routing
Let’s write code which publishes the messages to the event bus in the EventBridge.
-
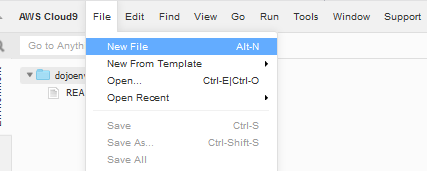
In AWS Cloud9 console, click on the New File option under the File menu.
-
It will open an Untitled1 file. Copy-Paste the following code into the file.

import boto3

client = boto3.client('events')

response = client.put_events(Entries=[ { 'Source': 'source1', 'DetailType': 'testdetails', 'Detail': '{ "mydata": "sampledata" }', 'EventBusName': 'dojoeventbus' },])

print(response)
`
-
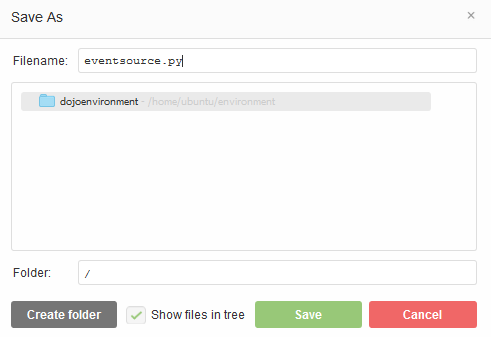
Click on the Save option under the File menu. It will throw a popup. Type in eventsource.py as the file name and click on the Save button.
-
The file is saved. In the code above, you create events client and then use put_events method to submit the event message. Finally you print the response of the put_events method call. The event message has source set as source1 which will route this message to dojoqueue-source1 queue.
-
Use command python eventsource.py to run the python file. You get a successful call response back.

-
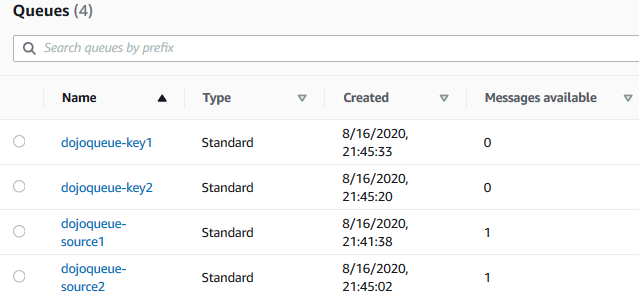
Goto SQS console and you can see a message routed to the queue dojoqueue-source1.

-
Update the code and change the source to source2 to route message to the queue dojoqueue-source2.
import boto3

client = boto3.client('events')

response = client.put_events(Entries=[ { 'Source': 'source2', 'DetailType': 'testdetails', 'Detail': '{ "mydata": "sampledata" }', 'EventBusName': 'dojoeventbus' },])

print(response)
`
-
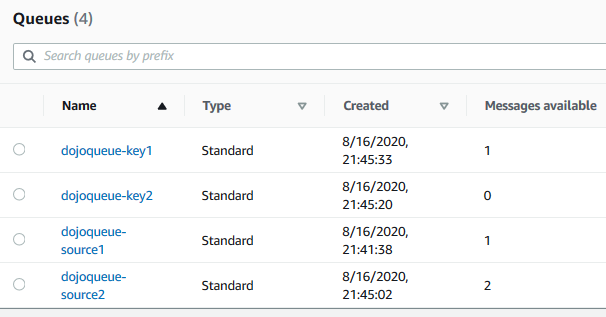
Save and run the code again. Goto SQS console and you can see a message routed to the queue dojoqueue-source2.
-
Update the code and change the details to { “key”: “key1” }. It will cause the message to be routed at two places - to dojoqueue-source2 queue because the source is source2 and to dojoqueue-key1 queue because the message has key: key1.
import boto3

client = boto3.client('events')

response = client.put_events(Entries=[ { 'Source': 'source2', 'DetailType': 'testdetails', 'Detail': '{ "key": "key1" }', 'EventBusName': 'dojoeventbus' },])

print(response)
`
-
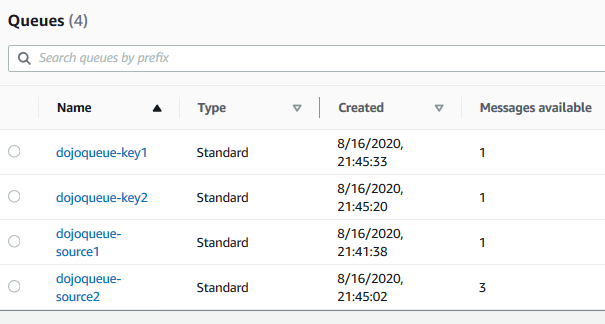
Save and run the code again. Goto SQS console and you can see the message routed to the dojoqueue-source2 and dojoqueue-key1 queues.
-
Finally update the code and change the details to { “key”: “key2” }. It will cause the message to be routed at two places - to dojoqueue-source2 queue because the source is source2 and to dojoqueue-key2 queue because the message has key: key2.
import boto3 client = boto3.client('events') response = client.put_events(Entries=[ { 'Source': 'source2', 'DetailType': 'testdetails', 'Detail': '{ "key": "key2" }', 'EventBusName': 'dojoeventbus' },]) print(response) -
Save and run the code again. Goto SQS console and you can see the message routed to the dojoqueue-source2 and dojoqueue-key2 queues.
-
This was an exercise to see how message source and content based routing can be achieved in Amazon EventBridge. You also learnt the coding required to publish an event / message into the event bus.
-
The exercise is complete. Please follow the next step to clean-up the resources so that you don’t incur any cost post the exercise.
Step7: Clean up
Delete dojorule-key1, dojorule-key2, dojorule-source1 and dojorule-source2 EventBridge rules.
Delete dojoeventbus event bus.
Delete dojoqueue-key1, dojoqueue-key2, dojoqueue-source1 and dojoqueue-source2 SQS queues.
Delete dojoenvironment Cloud9 environment.
Thanks and hope you enjoyed the exercise.