Using Lambda Function with Systems Manager
AWS Systems Manager provides centralized and unified way to view operational data and automate operational tasks from across multiple AWS services and resources. Systems Manager simplifies resource and application management, shortens the time to detect and resolve operational problems, and makes it easy to operate and manage the infrastructure securely at scale.
AWS Lambda is serverless compute service.
Many times, you might want to create custom automation in AWS Systems Management to perform repeatable operational tasks on AWS resources at scale. In this exercise, you learn how to create such automation task using Lambda functions. The custom automation is to create an Elastic IP and assign to an EC2 instance using Systems Manager Automation.
The AWS Resource consumption for the exercise does not fall under AWS Free Tier.
Step1: Pre-Requisite
You need to have an AWS account with administrative access to complete the exercise. If you don’t have an AWS account, kindly use the link to create free trial account for AWS.
Step2: Create Roles for Lambda and Systems Manager
The first step is to create two roles which are used by the Lambda function and the Systems Manager.
-
Login to the AWS Console and goto IAM Management console.
-
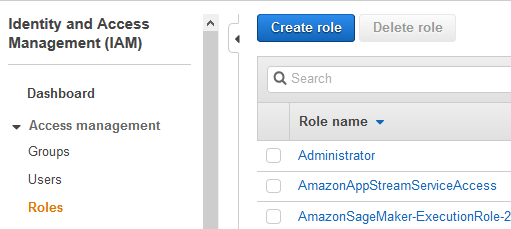
Click on the Roles menu in the left and then click on the Create role button.
-
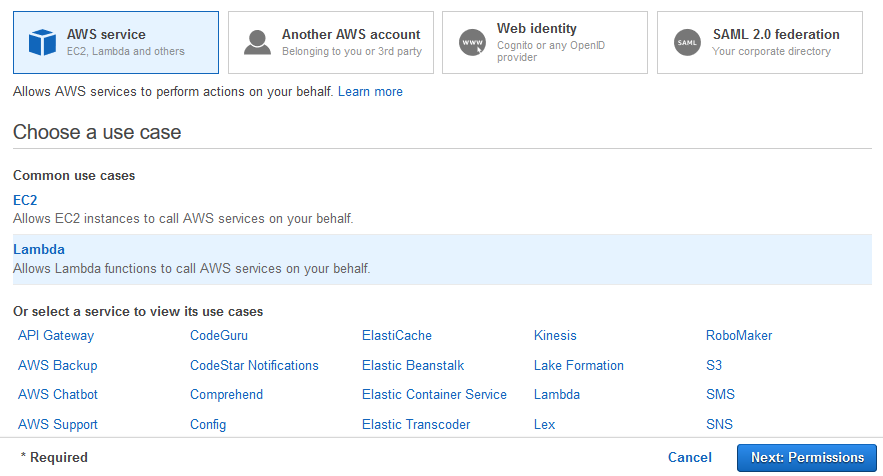
On the next screen, select Lambda as the service and click on the Next: Permissions button.
-
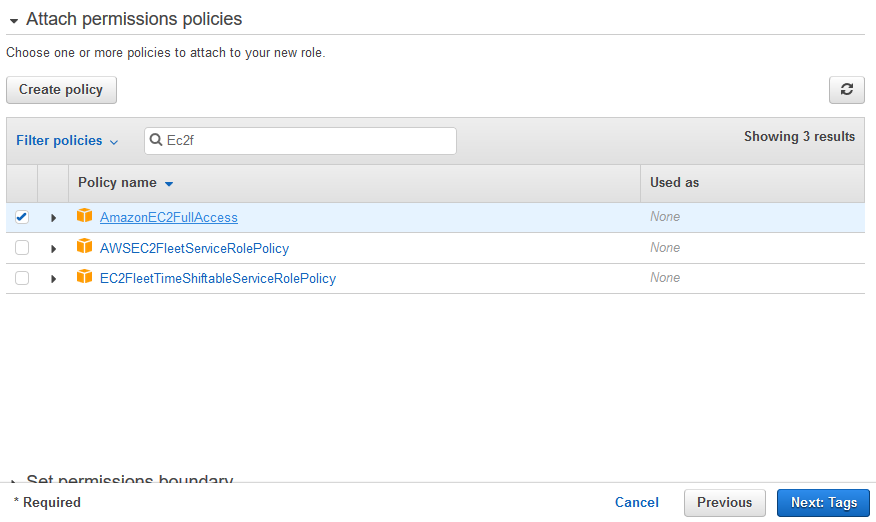
On the next screen, select AmazonEC2FullAccess as the policy and click on the Next: Tags button.
-
On the next screen, click on the Next: Review button.
-
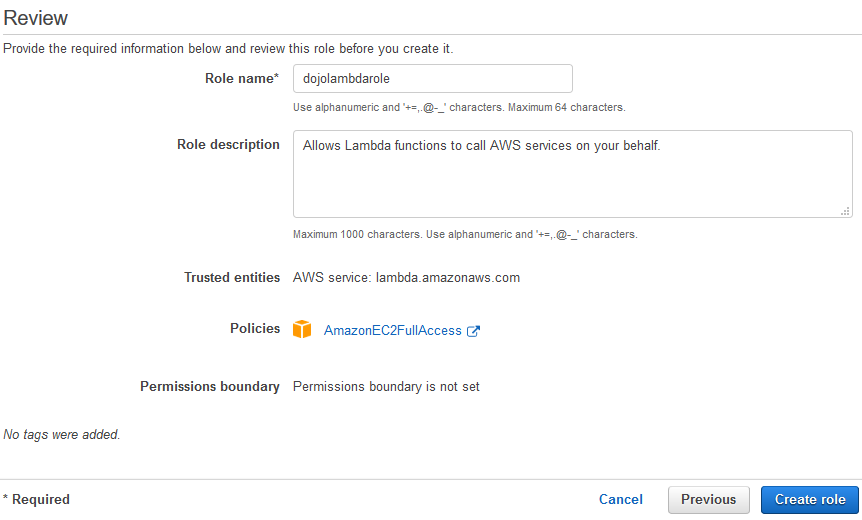
On the next Review screen, type in the role name as dojolambdarole and click on the Create role button.
-
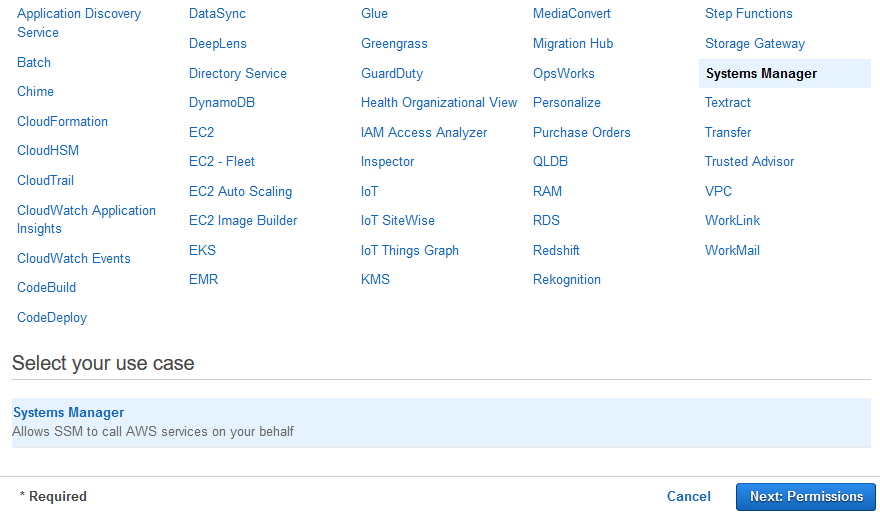
The role is created in no time and it is used by the Lambda function. You now create another role which is used by the Systems Manager. Use the step 2 to create a new role. Select Systems Manager as the service and click on the Next: Permissions button.
-
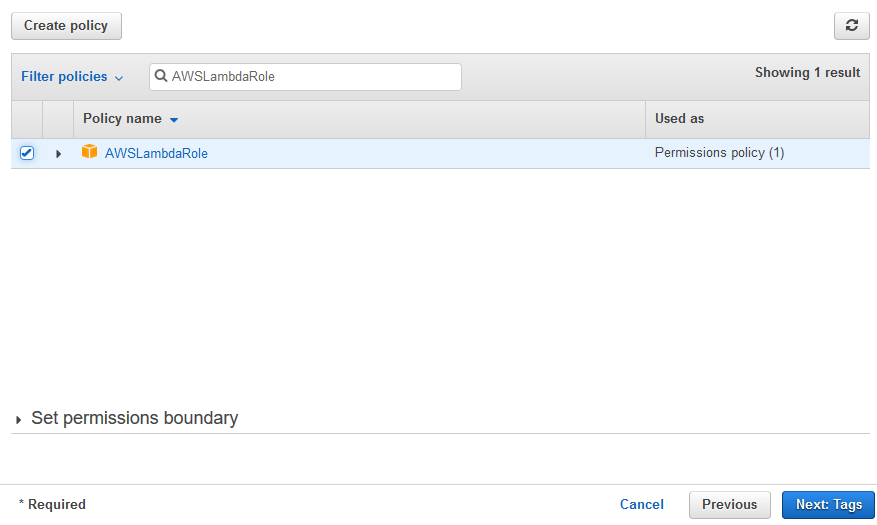
On the next screen, select AmazonSSMAutomationRole and AWSLambdaRole as the policies and click on the Next: Tags button.
-
On the next screen, click on the Next: Review button.
-
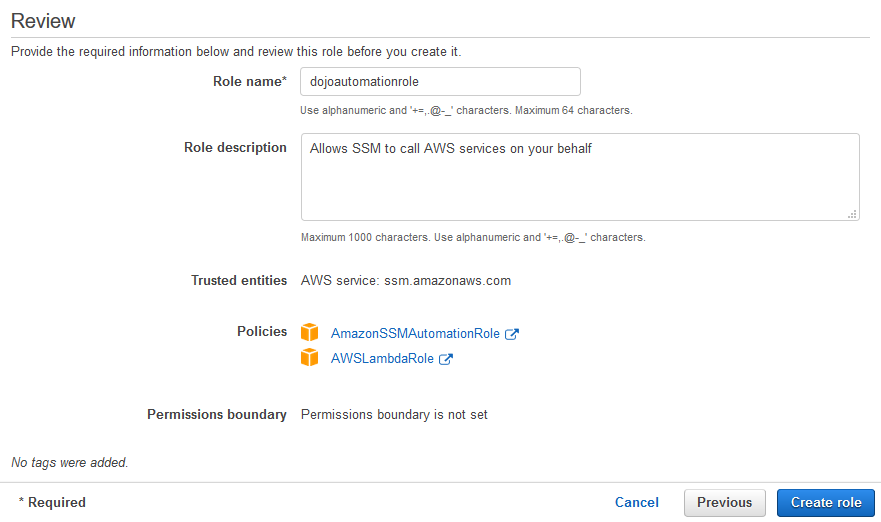
On the next Review screen, type in the role name as dojoautomationrole and click on the Create role button.
-
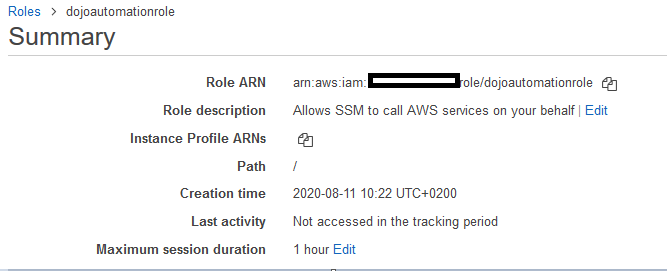
The role is created in no time. It is used by the Systems Manager automation. Please make note of the role ARN as it will be required later in the exercise.
-
The roles are created. Let’s create the Lambda function which performs the actual automation of creating an EIP and assigning to an EC2 instance.
Step3: Create Lambda Function
Create the Lambda function for the automation.
-
Login to the AWS Console. Select an AWS Region of your choice. You will see the exercise using the Ireland region.
-
Goto Lambda Management Console and click on the Create function method.

-
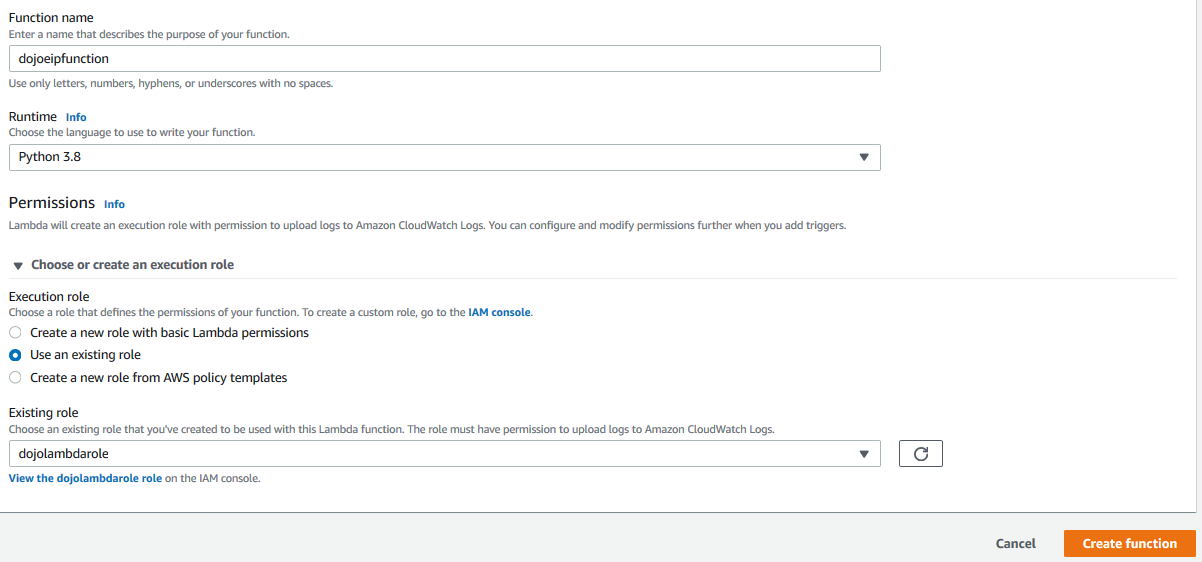
On the next screen, select the option Author from scratch. Type in the function name as dojoeipfunction. Select Python3.8 as the runtime. In Permissions, select Use an existing role option and select dojolambdarole as the role. Then click on the Create function button.
-
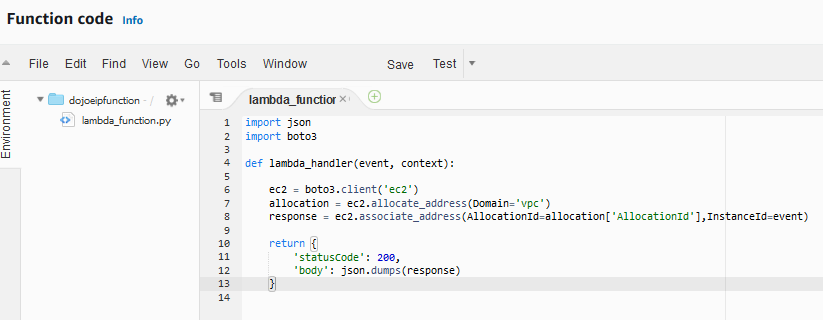
The function is created in no time. Goto the Function code configuration area, update the Lambda function code with the code shown below.
import json
import boto3

def lambda_handler(event, context):

    ec2 = boto3.client('ec2')
    allocation = ec2.allocate_address(Domain='vpc')
    response = ec2.associate_address(AllocationId=allocation['AllocationId'],InstanceId=event)

    return {
        'statusCode': 200,
        'body': json.dumps(response)
    }
-
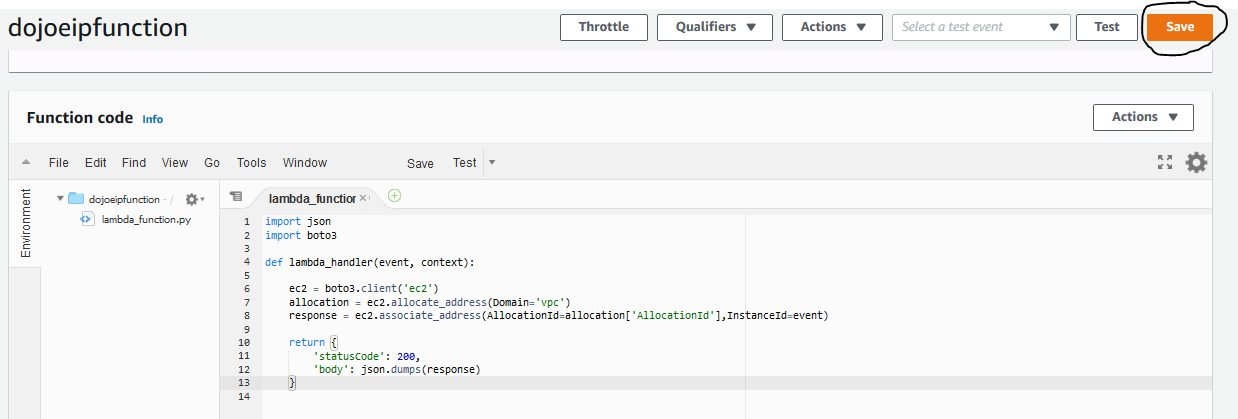
In the code above, you create EC2 boto3 client and use allocate_address to create an Elastic IP. Then you use associate_address method to assign it to an EC2 instance. The EC2 instance ID is provided by the event parameter. Finally return the response with association details. Click on the Save button on the top right corner of the page to save the Lambda function.
-
Make note of the Lambda function ARN. You need it later when configuring the automation document.

-
The next step is to create a document in Systems Manager which is used for the automation.
Step4: Create Document in AWS Systems Manager
In this step, you create AWS Systems Manager document which will use the Lambda function to perform the automation.
-
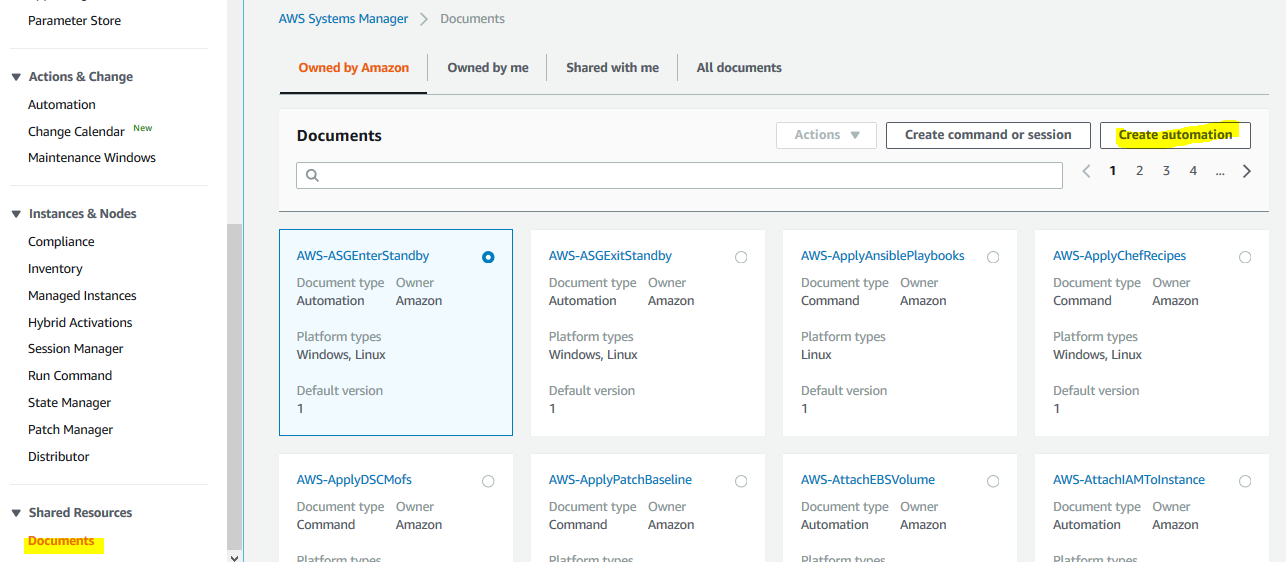
Goto Systems Manager Console. Click on the Documents in the left and then click on the Create automation button.
-
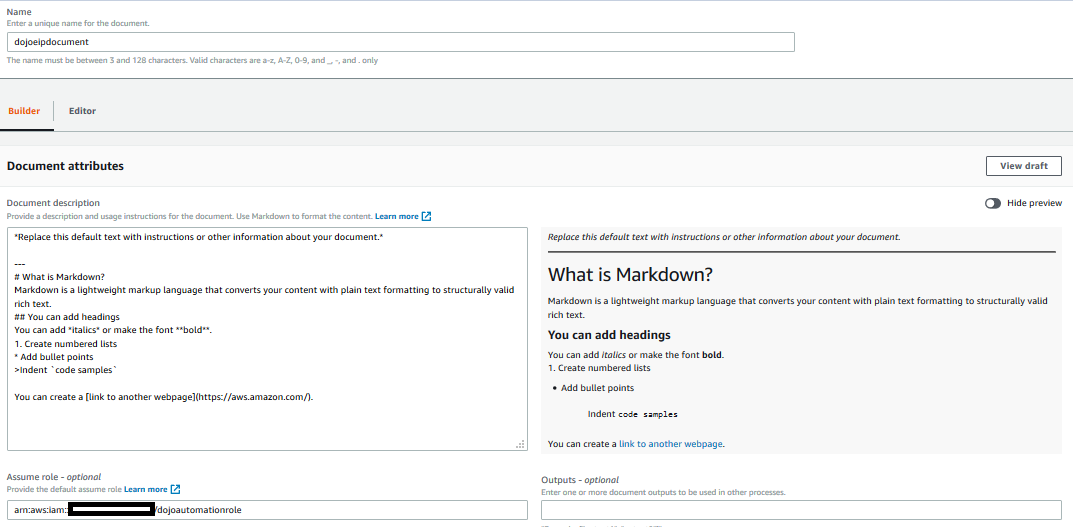
On the next screen, type in dojoeipdocument as the name. In the Assume role - optional field, copy-paste the dojoautomationrole role ARN you made note of in the previous steps.
-
Move to the Input parameters - optional section. Type in instanceid for the Parameter name. Select String for Type and Yes for Required.

-
Move to the Step 1: section. Type in createeip as the Step name. Select Invoke an AWS Lambda function as the Action type. Copy-paste the dojoeipfunction Lambda function ARN you made note of in the previous step.

-
Expand Additional inputs - optional section for the Step1. Click on the Add optional input link.

-
It will add additional input field. Select Payload as the input name. Type in "{{ instanceid }}" as the input value. You are configuring instanceid as the payload for the Lamdba function.

-
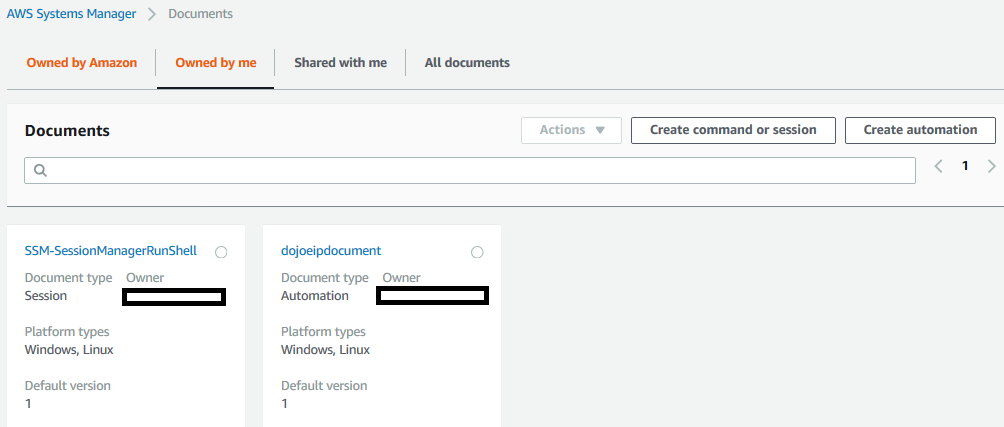
Finally, click on the Create automation button in the bottom-right of the page. The document is created in no time. You can see it under Documents menu and Owned by me tab.
-
Let’s recap what you did. You create a document with name dojoeipdocument and configured it to use dojoautomationrole role for the authorization. You configured instanceid as the parameter for the document. This parameter is used to pass the instance id of the EC2 instance which we assign the created elastic ip. You also configured the document to execute dojoeipfunction Lambda function and passed instanceid as the payload to the function.
-
The automation document is ready. Let’s run it.
Step5: Run the Automation
Let’s use the automation document to create an EIP and associate it with an EC2 instance.
-
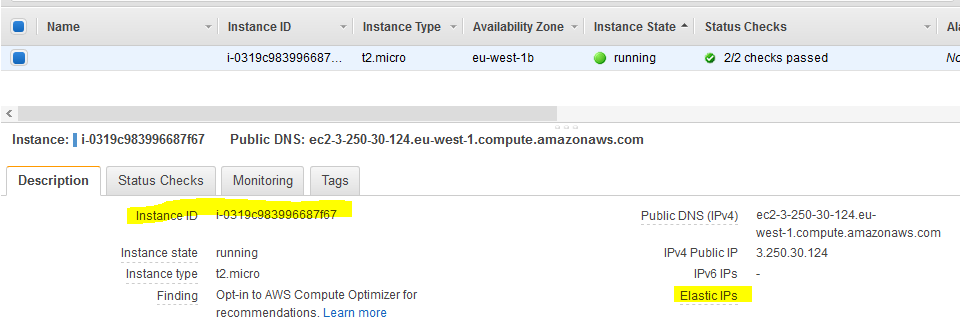
Since the automation is to create EIP and associate with an EC2 instance, please launch an EC2 instance which you can use. You can launch t2.micro instance with Amazon Linux2 operating system to keep the cost under AWS Free Tier. The following is the screen shot of one such instance. Make note of the Instance ID as you need it later. Also notice that the EC2 instance does not have any Elastic IP assigned at this point of time.
-
The EC2 instance is ready. Goto Systems Manager Console. Click on the Documents in the left and then click on the Owned by me tab. You can see the dojoeipdocument document. Click on the dojoeipdocument link.

-
On the next screen, click on the Execute automation button.

-
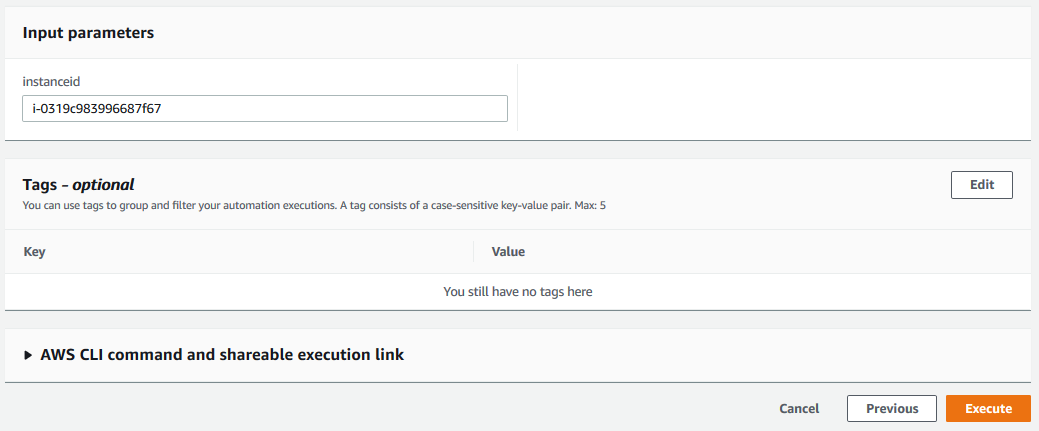
It will open the Execute automation document in a new browser window or tab. Select Simple execution option. Copy-paste the EC2 instance id from the previous step into instanceid field and click on the Execute button.
-
The execution will start. Wait till the status of the execution changes to Success.

-
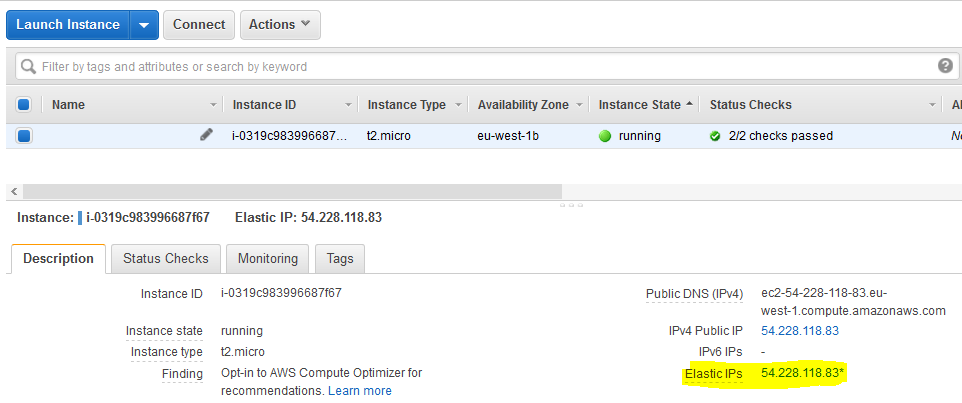
The automation has completed successful. Goto EC2 Management Console to check the EC2 instance details again. You can see an Elastic IP has been created and assigned to the EC2 instance now.
-
You can also see the new Elastic IP created.

-
This was an example to see how Lambda function can be used to Systems Manager to perform operational tasks. This finishes the exercise. Please follow the next step to clean-up the resources so that you don’t incur any cost post the exercise.
Step6: Clean up
Delete the EC2 instance you created to run the automation document.
Delete the Elastic IP created by the automation document.
Delete the dojoeipdocument document.
Delete the dojoeipfunction function.
Delete the dojoautomationrole and dojolambdarole IAM roles.
Thanks and hope you enjoyed the exercise.

