
Creating Image Pipeline with EC2 Image Builder
EC2 Image Builder helps in creating pipeline for Linux or Windows Server images for use with Amazon EC2 and on-premises. The pipeline takes care of all stages such as image creation, maintenance, validation, sharing, and deployment.
In EC2 Image Builder pipeline, you start with a base Linux / Windows image and then customize the image during the pipeline to install / configure software or settings. The image is then validated and shared for the deployment.
In this exercise, we work on sample pipeline. You start with a Linux base image. In pipeline, you install python-boto3 SDK and then share the image as private. The end user can use this image to create an EC2 instance where the user can start python-boto3 SDK based development without any additional configuration or installation.
Step1: Pre-Requisite
You need to have an AWS account with administrative access to complete the exercise. If you don’t have an AWS account, kindly use the link to create free trial account for AWS.
Step2: Create IAM Role
The first step is to create IAM Role which is used by EC2 Image Builder for the authorization.
-
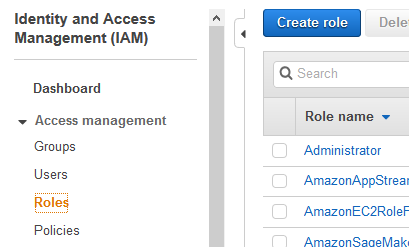
Login to the AWS Console. Goto the IAM Management Console. Click on the Roles menu in the left and then click on the Create role button.
-
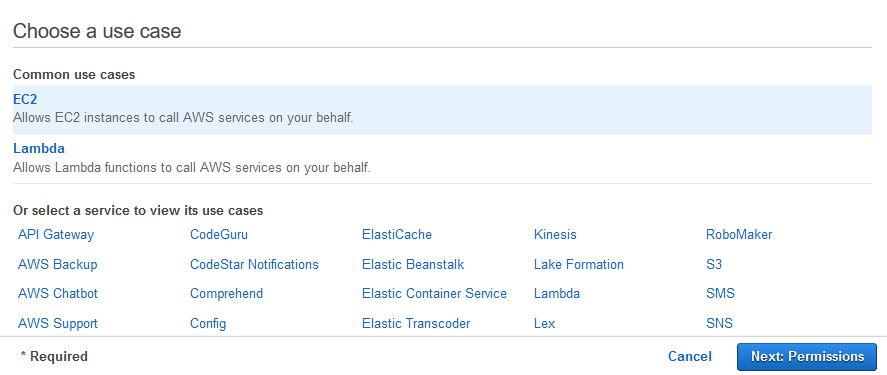
On the next screen, select EC2 as the service and click on the Next: Permissions button.
-
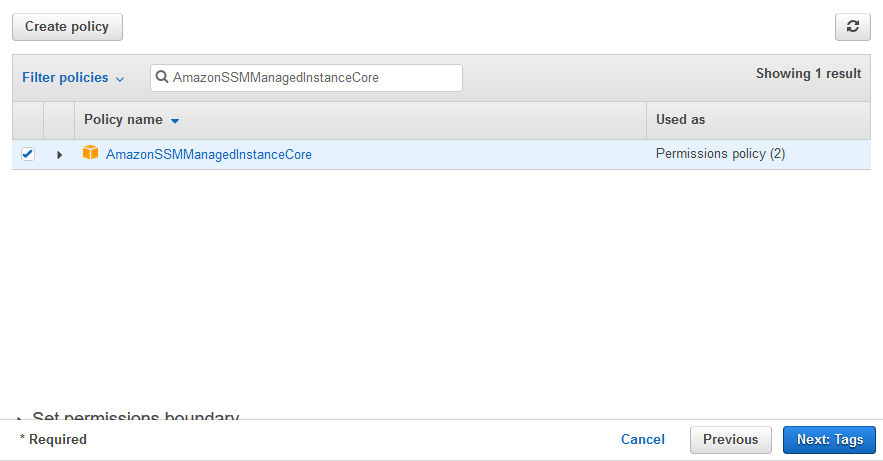
On the next screen, select EC2InstanceProfileForImageBuilder and AmazonSSMManagedInstanceCore as the policies and click on the Next: Tags button.
-
On the next screen, click on the Next: Review button.
-
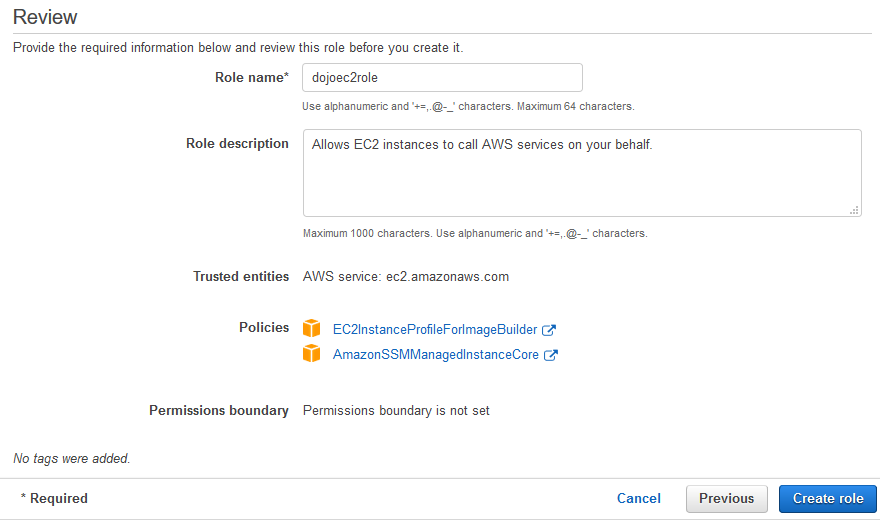
On the next screen, type in the role name as dojoec2role and then click on the Create role button.
-
The role is created in no time. Let’s create SNS topic which is used by the pipeline to send notification about the pipeline execution.
Step3: Create SNS Topic and Subscription
The next step is to create SNS topic and subscription which is used by the pipeline to send notification about the execution progress.
-
Login to the AWS Console. Select an AWS Region of your choice where Amazon EC2 Image Builder is available. You will see the exercise using the Paris region.
-
Goto the Amazon SNS Console. In the left menu, click on the Topics and then click on the Create topic button.

-
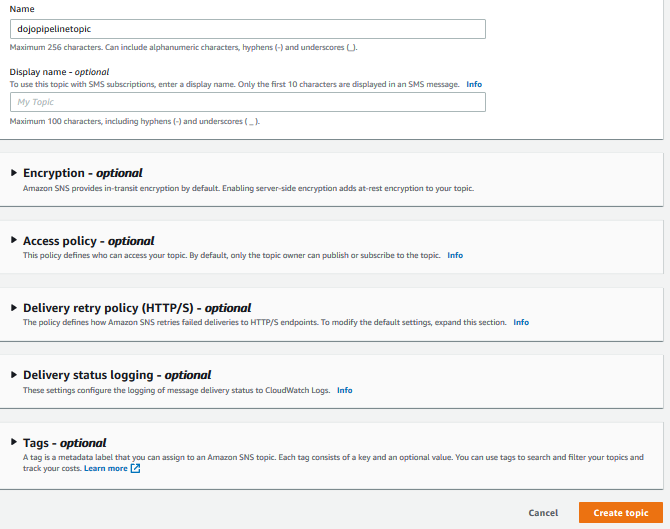
On the next screen, type in dojopipelinetopic as the topic name and then click on the Create topic bucket.
-
The topic is created in no time. You now need to create subscription to enable notification using the topic. You will configure email based subscription to get notification about the pipeline execution over emails. On the next screen, click on the Create subscription button.

-
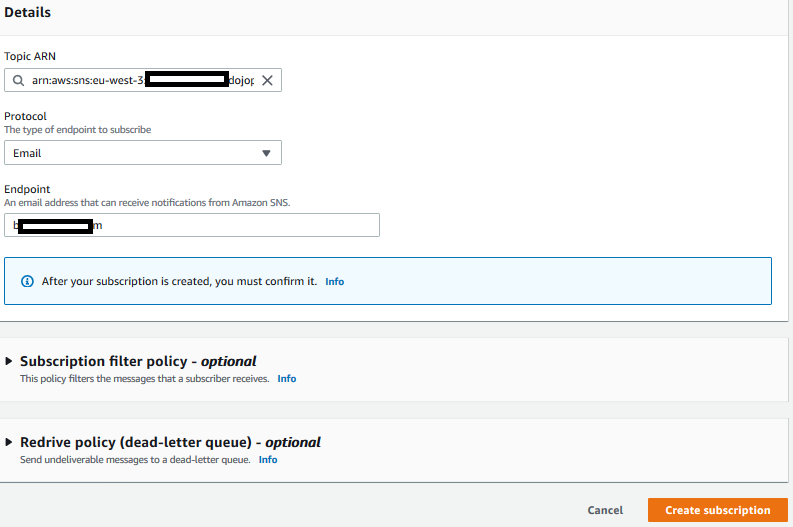
On the next screen, select Email as the protocol, enter a valid email id in the endpoint. Then click on the Create subscription button.
-
The subscription is created in no time. Since it is an email based subscription, it has to be confirmed by the email owner. For that reason, the subscription stays in Pending confirmation status.

-
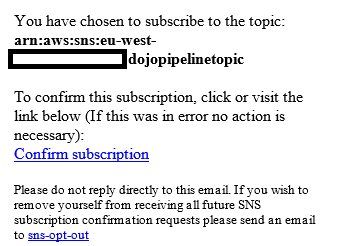
Goto the inbox of the email id used, you will see an email like shown below. Click on the Confirm subscription link to confirm the subscription.
-
You will find that the subscription back in AWS has turned to Confirmed status now.

-
The topic and subscription are ready. Time to start the core of the exercise - pipeline creation in EC2 Image Builder.
Step4: Create Build Component
The pipeline is used to customize the base Linux / Windows images and create a new image for the deployment. The customization is done using Build Component. The first step of the pipeline is to configure a Build Component which installs Python-Boto3 SDK on the Linux base image.
-
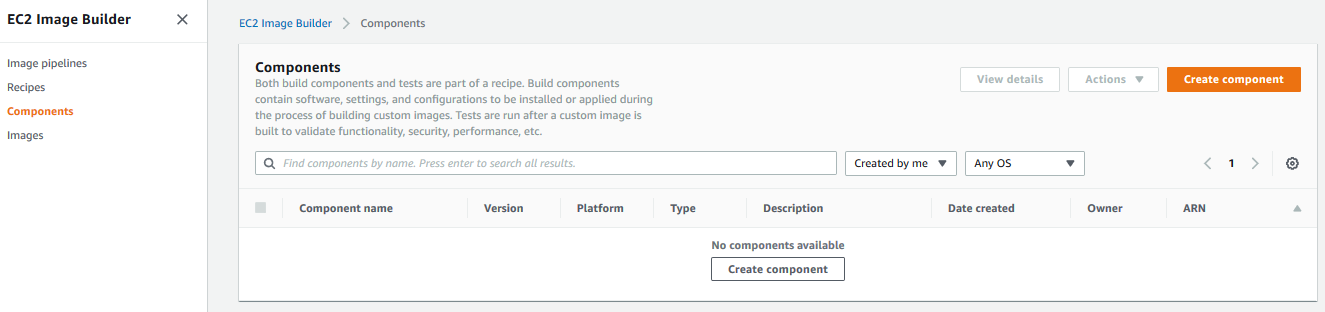
Goto EC2 Image Builder console. Click on the Components in the left menu and then click on the Create component button.
-
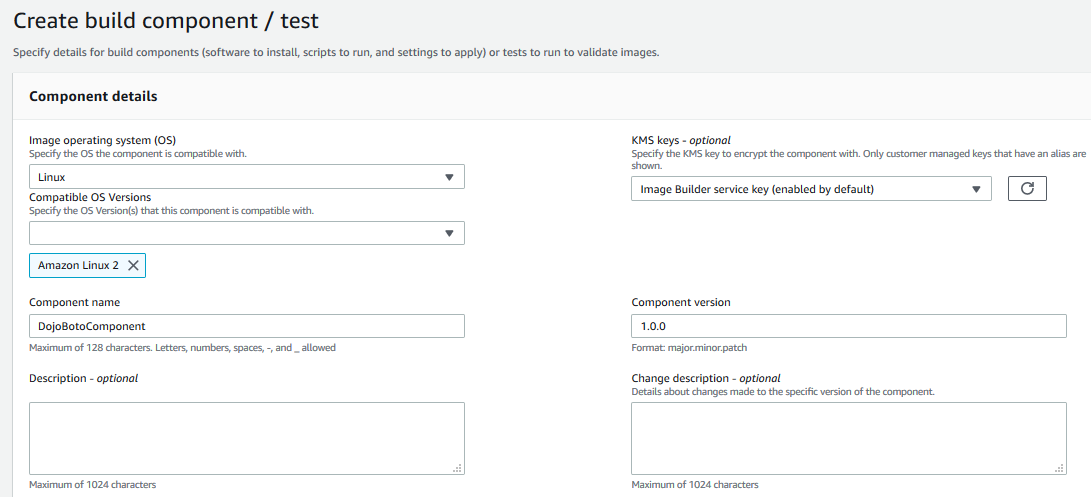
On the next screen, select Linux as the Image operating system (OS). Select Amazon Linux 2 as the Compatible OS Versions. Type in DojoBotoComponent as the component name. Type in 1.0.0 as the component version. Keep rest of the fields with the default.
-
Next, goto the Defintion document section. Select Define document content as the option. Copy-paste the below yaml document to the Content field.
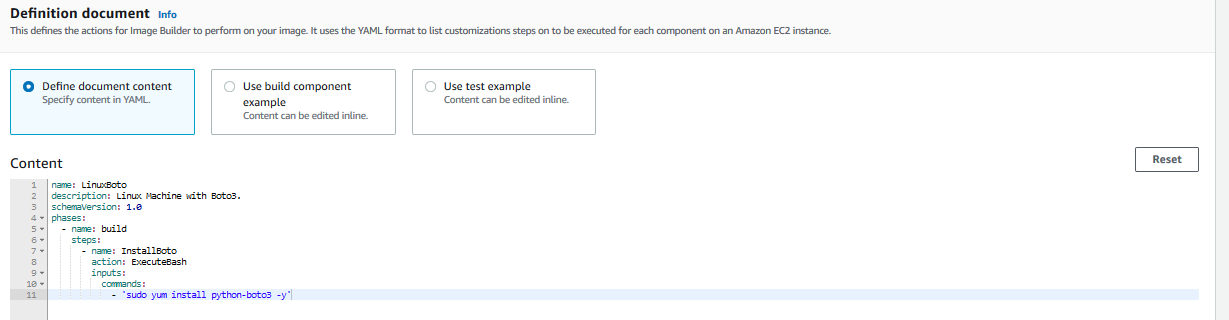
name: LinuxBoto
description: Linux Machine with Boto3.
schemaVersion: 1.0
phases:
  - name: build
    steps:
      - name: InstallBoto
        action: ExecuteBash
        inputs:
          commands:
            - 'sudo yum install python-boto3 -y'
-
The component uses ExecuteBash action to run the command - sudo yum install python-boto3 -y. The command installs python-boto3 SDK to the Linux base image. You can configure many such steps across build, validate and test phases.
-
Finally click on the Create component button in the bottom-right of the page. The component is created in no time.
-
The component to customize the base Linux image is ready. Let’s work on the pipeline.
Step5: Create the Pipeline
Let’s create the pipeline which manage the stages from the image creation to deployment.
-
Goto EC2 Image Builder console. Click on the Image pipelines in the left menu and then click on the Create image pipeline button.

-
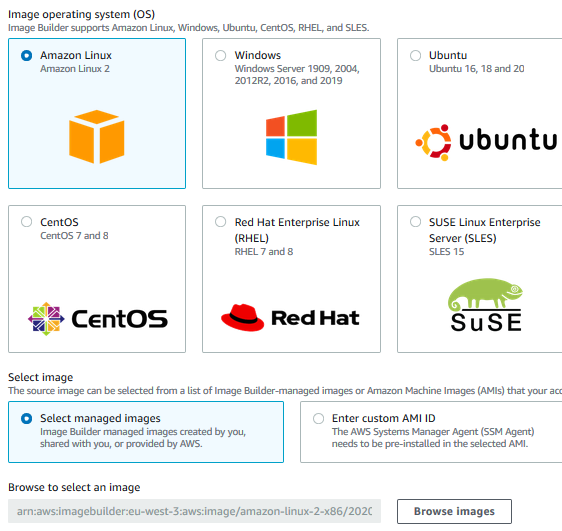
On the next screen, select Amazon Linux as the Image operating system (OS) option. Select Select managed images as the Select image option. Then click on the Browse images button.
-
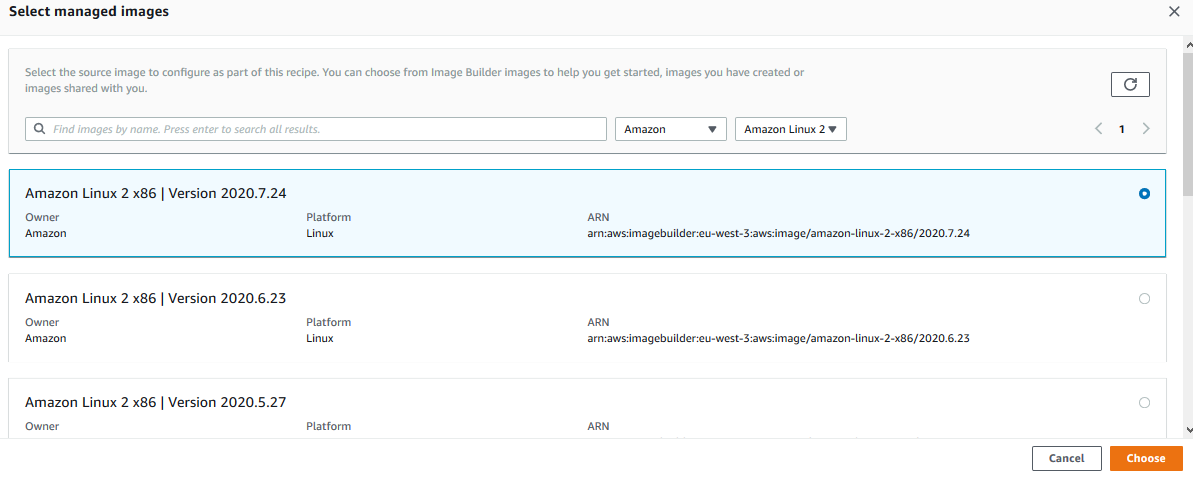
On the browse image popup, filter for the Amazon Linux 2 images, select the latest image and then click on the Choose button.
-
The latest Linux image is selected now as the base image. Next goto the Build Component section and click on the Browse build component button.

-
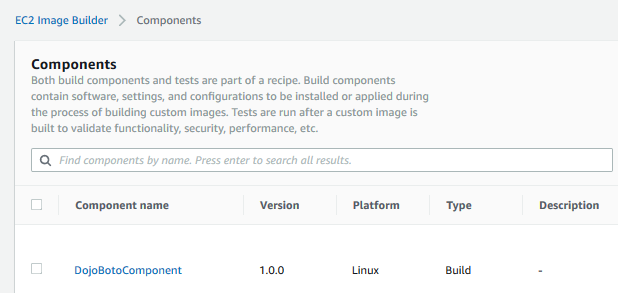
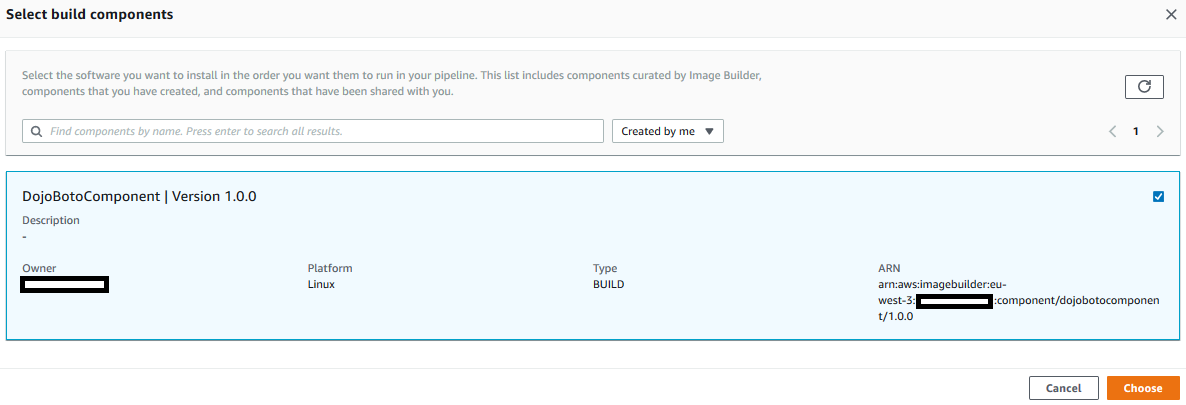
On the component popup, filter for the components Created by me. Select DojoBotoComponent and click Choose button. You created this component in the previous step.
-
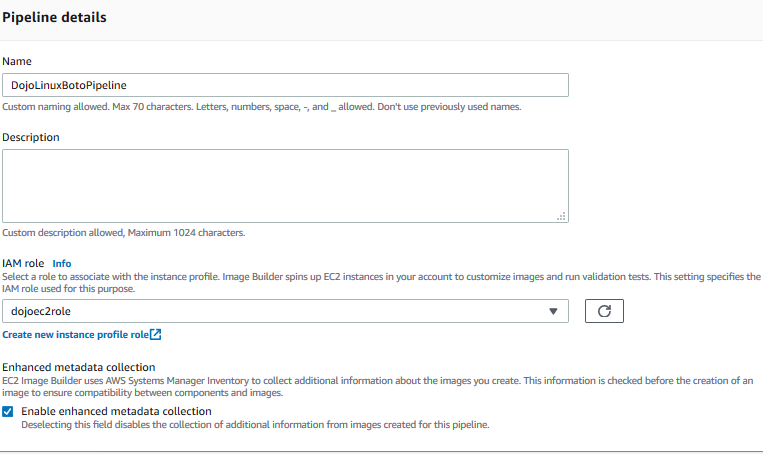
The component is selected. Click on the Next button in the bottom-right of the page. On the next page, type in DojoLinuxBotoPipeline as the pipeline name. Select dojoec2role as the IAM role. This is the role you created in the earlier steps.
-
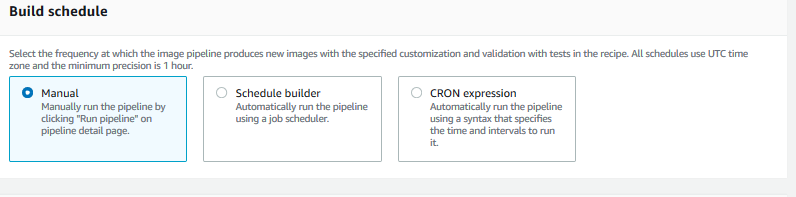
In the Build schedule section, select Manual for the exercise. However in production use, you would like to schedule the build. For the exercise, we are choosing the manual option.
-
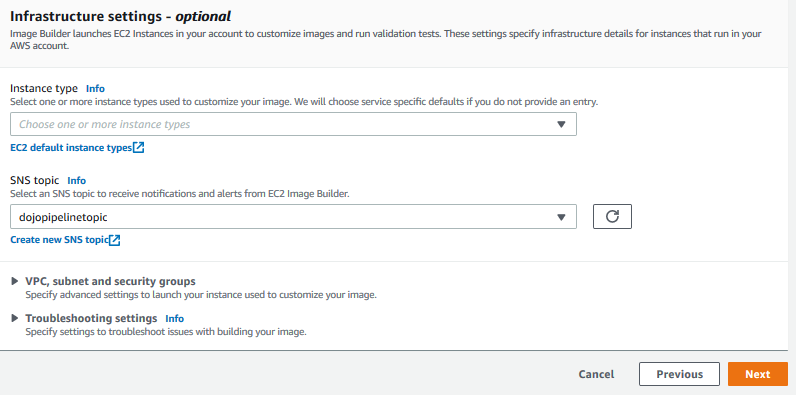
In the Infrastructure settings - optional section. Select dojopipelinetopic for the SNS topic. The topic is used to send notification about the pipeline execution. Then click on the Next button.
-
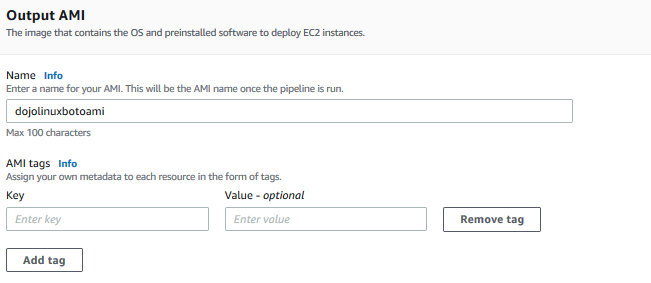
On the next screen, in the Output AMI section, type in dojolinuxbotoami as the name. Keep rest of the configuration as the default and click on the Review button in the bottom-right of the page.
-
On the next Review and create page, click on the Create pipeline button. The pipeline is created in no time. You will also see a notification email sent to you about the pipeline creation. Time to run the pipeline. Select the pipeline and click on the Run pipeline option under Actions menu.

-
The pipeline execution will start. Click on the pipeline to see the details. Under the Output images section, you can see the pipeline running.
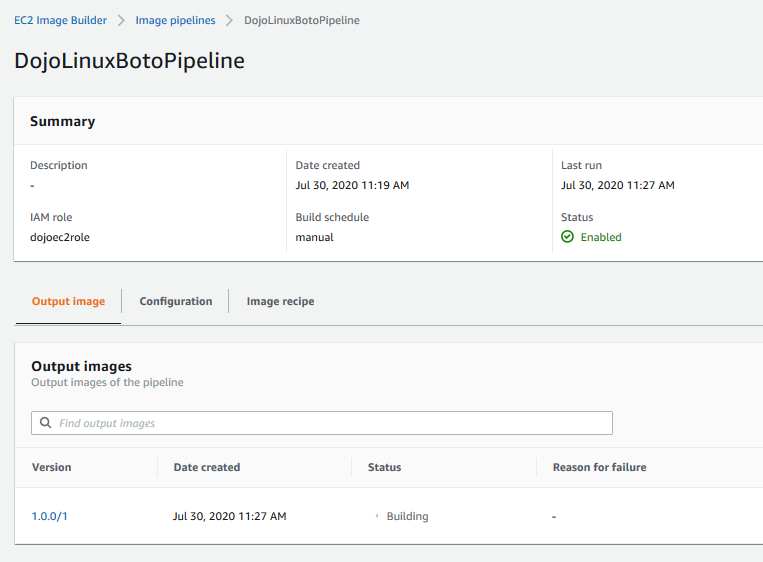
-
The pipeline execution will take some time. You can go for a break if you want. Wait till the status changes to Available. You also receive notification about the pipeline execution in the email.
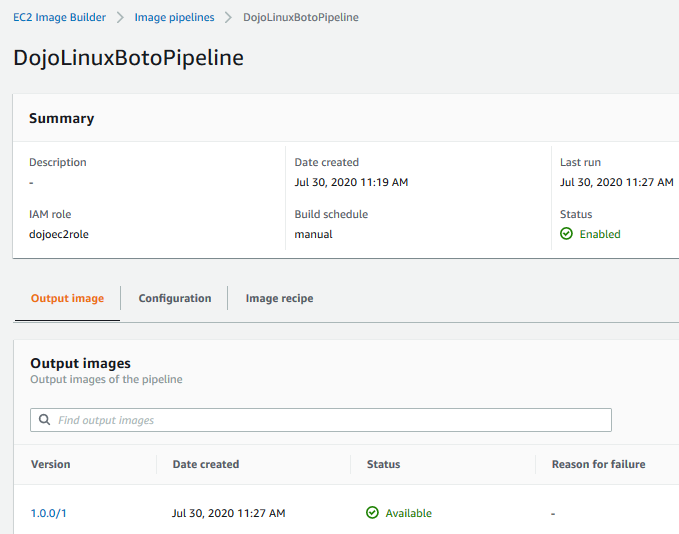
-
The pipeline execution completed. The image is created and is ready for use. Goto EC2 Management Console and click on the AMIs menu option in the left.

-
On the next screen, filter for the AMIs Owned by me and you can see the new image listed there.

-
If you launch an EC2 instance using this image, you will have a Linux virtual machine with Python-Boto3 SDK already installed on it.
-
It completes the exercise. You learn how to create a pipeline in EC2 Image Builder to create custom images in automated and scheduled manner. Kindly follow the next step to clean-up the resources so that you don’t incur any cost after the exercise.
Step6: Clean up
Delete dojolinuxbotoami AMI in the EC2 Console.
Delete DojoBotoComponent build component and DojoLinuxBotoPipeline pipeline in the EC2 Image Builder Console.
Delete the email subscription and dojopipelinetopic topic in the SNS Console.
Delete dojoec2role role in the IAM Management Console.
Thanks and hope you enjoyed the exercise.