Working with AWS Config
AWS Config enables to assess, audit, and evaluate the configurations of the AWS resources. It can help in evaluation and reporting of configuration drift from the desired configurations. Config can review changes in configurations and relationships between AWS resources, present detailed resource configuration histories, and determine the overall configuration compliance against the set guidelines.
In this exercise, you will use AWS Config to keep check on AWS Lambda function configuration. You will also look into function configuration change history.
So the rule or guideline is that all AWS Lambda functions must be configured with dead-letter queue. It is very important because you want to keep track of the unprocessed asynchronous Lambda function executions and probably want to automate retry. With dead-letter configuration, you can handle unprocessed functions easily. Compliance with this configuration is must for you.
AWS Config will help in maintaining this compliance.
Step1: Pre-Requisite
You need to have an AWS account with administrative access to complete the exercise. If you don’t have an AWS account, kindly use the link to create free trial account for AWS.
Step2: Create IAM Role
The first step is to create IAM Role which is used by Lambda function for the authorization.
-
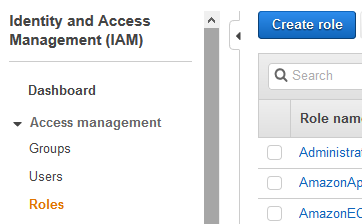
Login to the AWS Console. Goto the IAM Management Console. Click on the Roles menu in the left and then click on the Create role button.
-
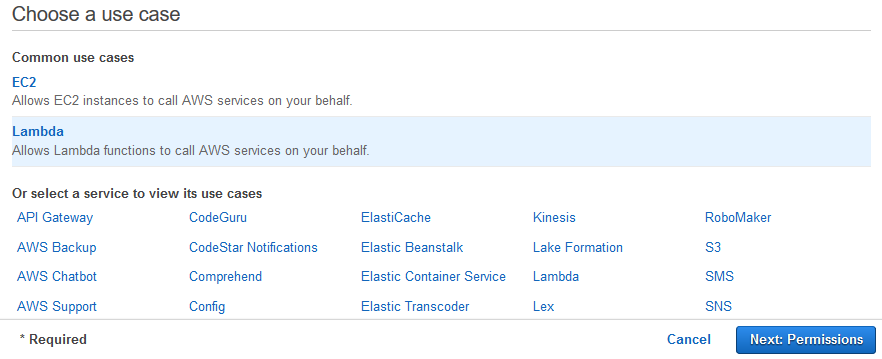
On the next screen, select Lambda as the service and click on the Next: Permissions button.
-
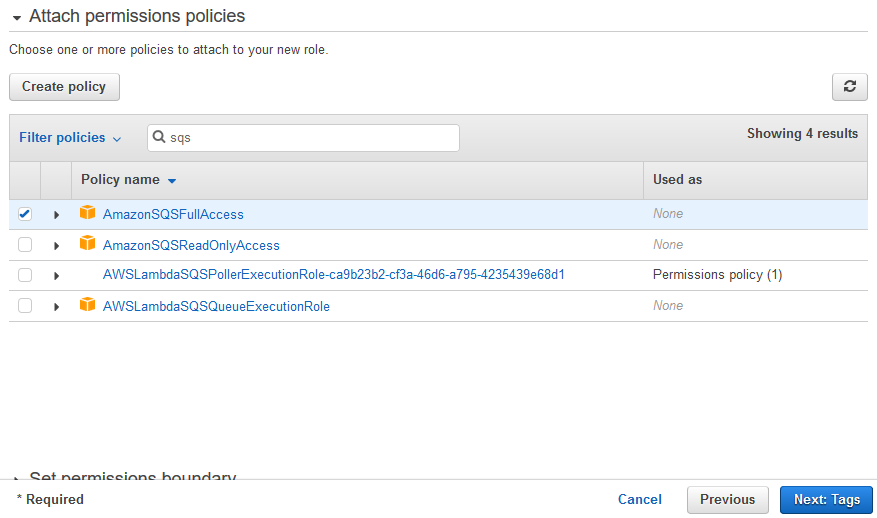
On the next screen, select AmazonSQSFullAccess as the permissions and click on the Next: Tags button.
-
On the next screen, click on the Next: Review button.
-
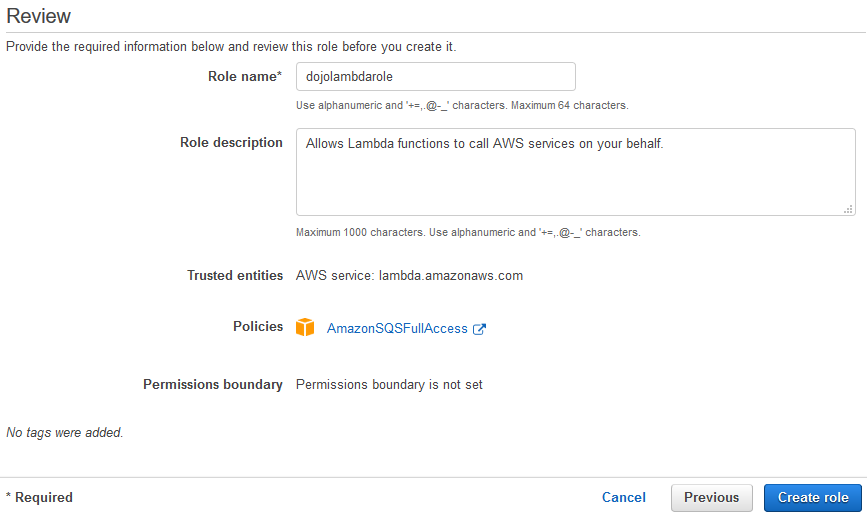
On the next screen, type in the role name as dojolambdarole and then click on the Create role button.
-
The role is created in no time. Let’s create queue for the dead-letter queue configuration.
Step3: Create SQS Queue
The next step is to create SQS queue which is used as the dead-letter queue in the Lambda configuration.
-
Login to the AWS Console. Select an AWS Region of your choice where AWS Lambda and AWS Config both services are available. You will see the exercise using the Frankfurt region.
-
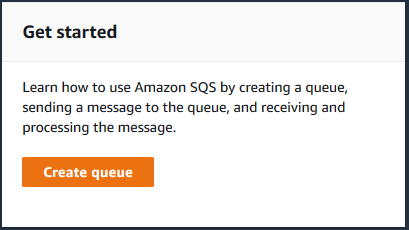
Goto the Amazon SQS Console and click on the Create queue button.
-
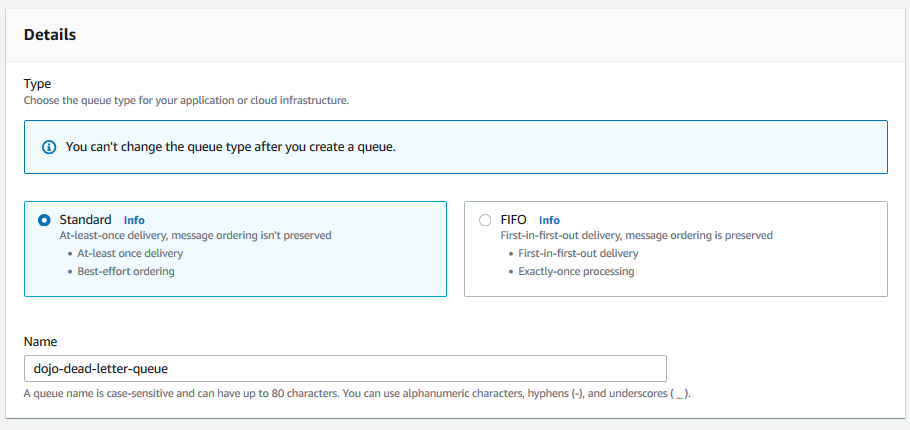
On the next screen, type in the queue name as dojo-dead-letter-queue and select Standard as the queue type. Keep rest of the configuration as the default and click on the Create queue button.
-
The queue is created in no time. The next step is to create two Lambda functions - one will have dead-letter queue configured while other will not.
Step4: Create Lambda Functions
Let’s create two lambda functions - dojofunction1 with dead-letter queue configuration and dojofunction2 without the dead-letter queue configuration.
-
Goto AWS Lambda Management console and click on the Create function.

-
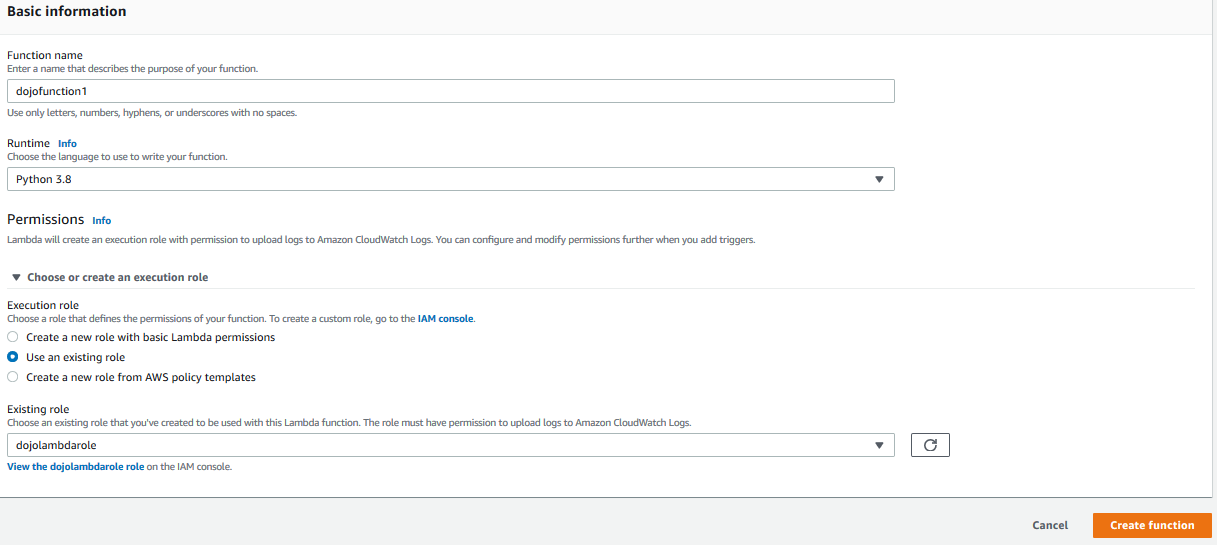
On the next screen, type in dojofunction1 as the function name. Select Python 3.8 as the runtime. Select Use an existing role option for the execution role. Then select dojolambdarole as the role. Click on the Create function button.
-
The function is created in no time. Repeat step 1 and 2 to create another similar function with the name dojofunction2. There are now two functions created.

-
You now change the configuration of the dojofunction1 function to enable dead-letter queue for it. Click on the dojofunction1 function to open the function details and goto Asynchronous invocation section. Click on the Edit button.

-
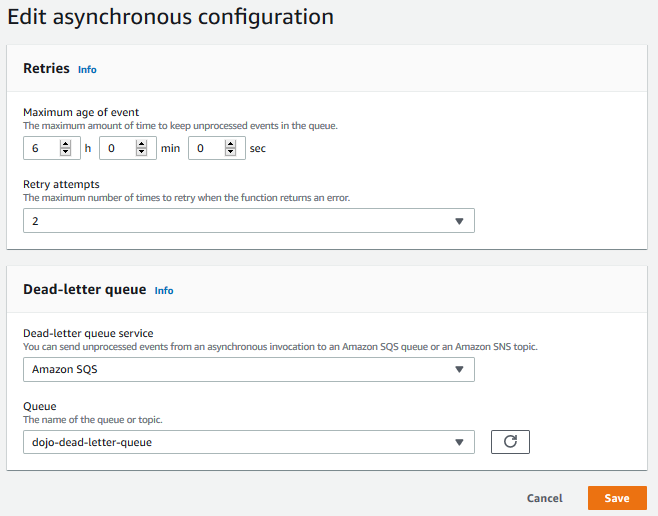
On the next screen, select Amazon SQS for the Dead-letter queue service and select dojo-dead-letter-queue as the queue. Click on the Save button.
-
The two Lambda functions are ready. One with dead-letter queue configuration and the other not. Let’s see how AWS Config tracks that.
Step5: Work with AWS Config
You now configure AWS Config to track configuration of the Lambda functions.
-
Goto AWS Config console and click on the Get started button.

-
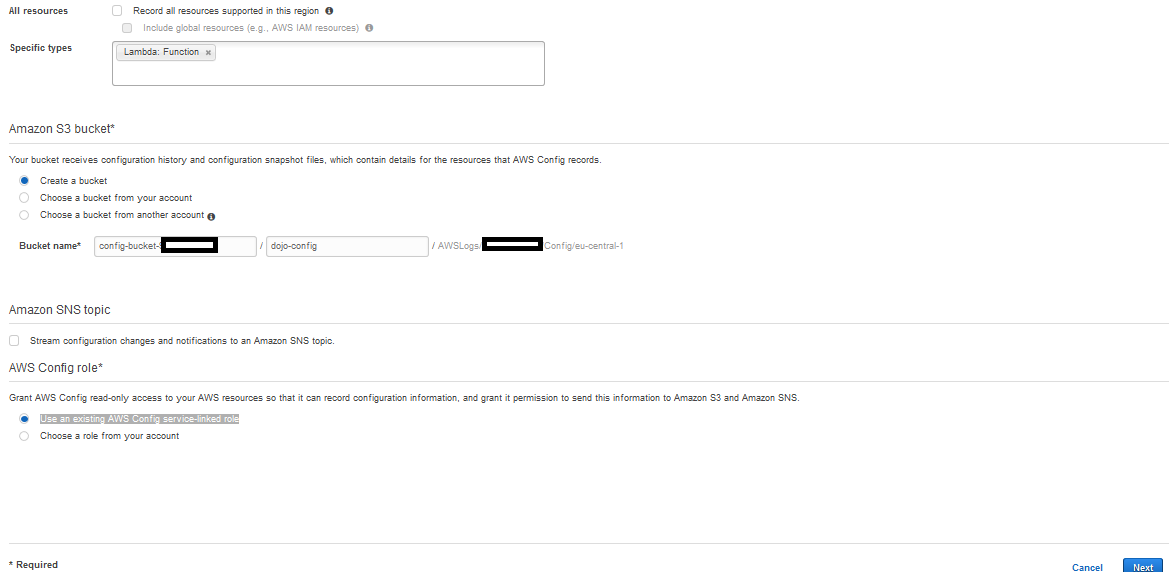
On the next screen, uncheck All Resources checkbox. Select Lambda: Function as the specific types. For the Amazon S3 bucket, select Create a bucket as the choice. For the bucket name, type in dojo-config for the prefix (optional) field. Select Use an existing AWS Config service-linked role for the AWS Config role. Then click on the Next button.
-
In the previous step, you selected only Lambda as the resource to track. But in actually production environment, you might want to track all the resources used by you.
-
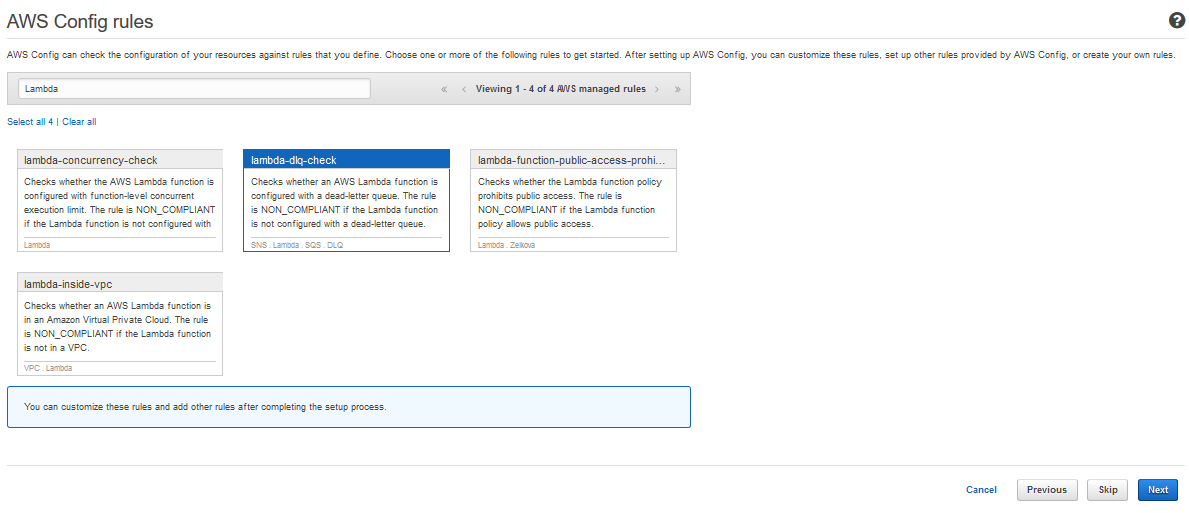
On the next screen, you select the rules for configuration compliance. Filter the list for the Lambda and then select lambda-dlq-check as the rule. Click on the Next button.
-
You selected the lambda-dlq-check rule because you want to track configuration of the Lambda function for dead-letter queue configuration.
-
On the next screen, click on the Confirm button.

-
The configuration is completed in no time. You will be directed to the Config Dashboard which is blank at this point of time.

-
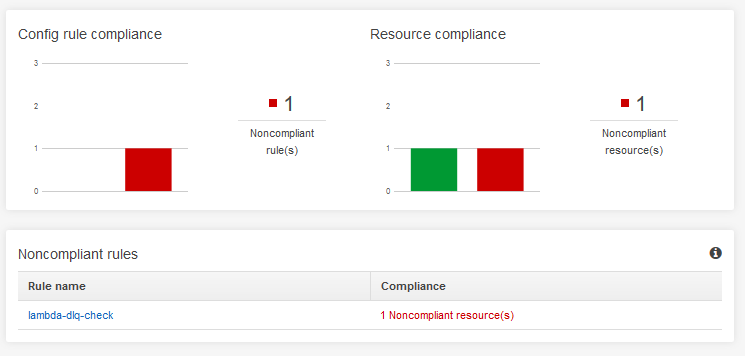
The AWS config will take some time to discover the resources and evaluate their configurations. Have patience and keep refreshing the dashboard time to time. Once AWS Config has discovered all the resources and has tracked the configuration; it will start showing compliance status. You can see in the picture below - it shows one compliant and one non-compliant resource. Click on lambda-dlq-check rule link to check the details of the non-compliant resource.
-
You can see dojofunction2 as the non-compliant resource because it does not have DLQ configured.

-
Change the dropdown for the Compliance status to Compliant. You can see dojofunction1 as the compliant resource because it has DLQ configured.

-
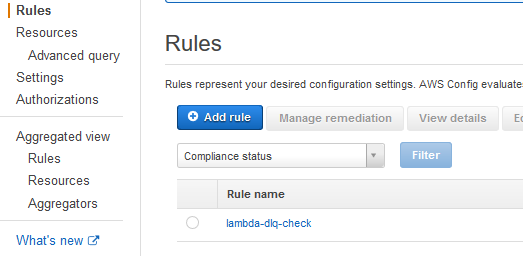
Go back to AWS Lambda console and config dead-letter-queue for dojofunction2 as well. Then comeback to AWS Config console. Click on the Rules menu in the left and then click on the lambda-dlq-check rule.
-
On the next screen, click on the Re-evaluate button. You are manually clicking for the re-evaluation to expedite it for the exercise. But in production use, you don’t need to do it as the re-evaluation will happen automatic.

-
It will take some time to complete the rule evaluation. Keep refreshing the page. When the evaluation completes, you can see both functions in the compliant status. Click on the dojofunction2 function / resource.

-
On the next screen, click on the Configuration timeline button.

-
You can see the configuration history for the dojofunction2. You can see two changes with timestamp - one was when created and one when you changed the DLQ configuration. Click on the Changes link.

-
On the next screen, you can see DLQ configuration change for the dojofunction2 which is registered with the configuration timeline.

-
You saw how AWS config was able to check the compliance and able to show the history of the configuration changes for the resources. You can take it further by setting up notification for the compliance violation or even better by defining automatic remediation.
-
This completes the exercise. Please follow the next step to clean-up the resources so that you don’t incur any cost post the exercise.
Step6: Clean up
Delete dojofunction1 and dojofunction2 functions in the AWS Lambda console.
Delete dojo-dead-letter-queue queue in the AWS SQS Console.
Delete dojolambdarole IAM role from the IAM Management console.
Finally Turn off AWS Config recording by going to the Settings menu in the AWS Config console.
Thanks and hope you enjoyed the exercise.

