The development environment is ready. You will now write some PySpark code to work with the data. There are two catalog tables - sales and customers. You will write code which will merge these two tables and write back to S3 bucket. Later we will take this code to write a Glue Job to automate the task.
-
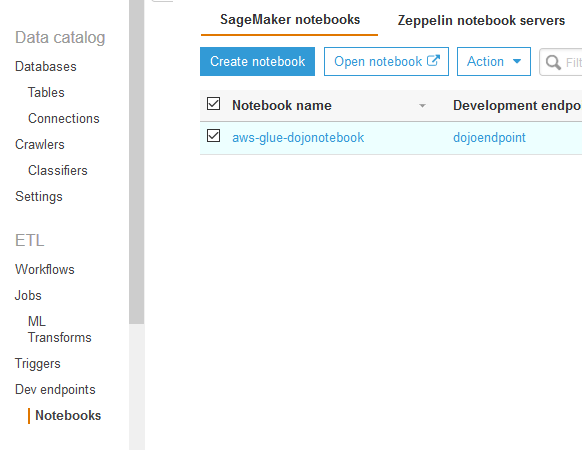
Goto the AWS Glue console, click on the Notebooks option in the left menu, then select the notebook and click on the Open notebook button.
-
On the next pop-up screen, click the OK button. It will open jupyter notebook in a new browser window or tab. In the notebook window, click on Sparkmagic (PySpark) option under the New dropdown menu.

-
It will open notebook file in a new browser window or tab. Copy and paste the following PySpark snippet (in the black box) to the notebook cell and click Run. It will create Glue Context. The Glue context connects with the Spark session and also provides access to the data lake catalog tables.
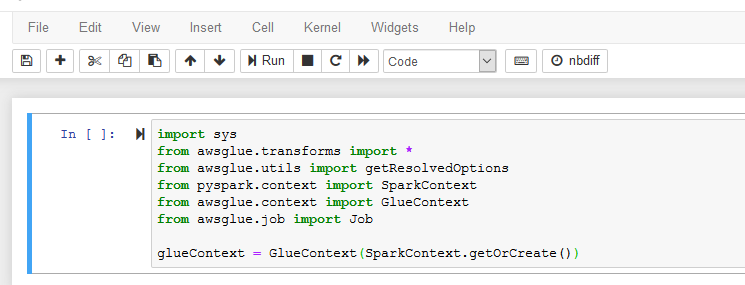
import sys
from awsglue.transforms import *
from awsglue.utils import getResolvedOptions
from pyspark.context import SparkContext
from awsglue.context import GlueContext
from awsglue.job import Job

glueContext = GlueContext(SparkContext.getOrCreate())
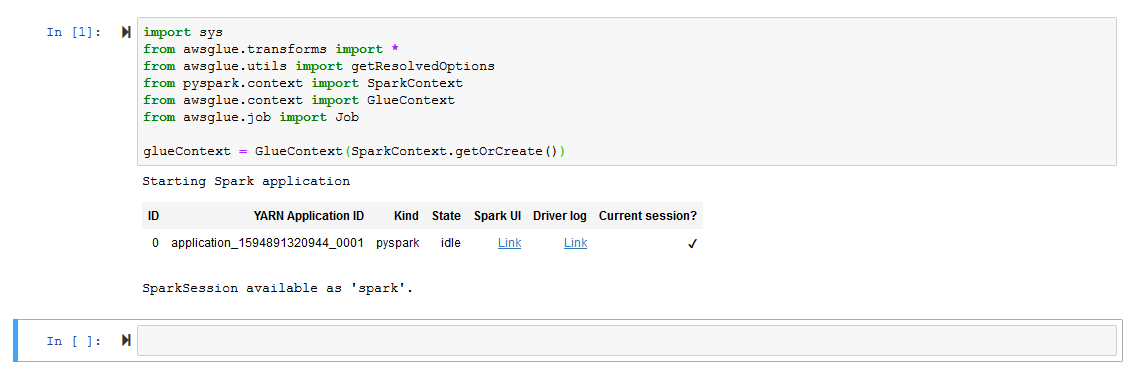
- It takes some time to start SparkSession and get Glue Context. Wait for the confirmation message saying SparkSession available as ‘spark’..
- Next Run the following PySpark code snippet which loads data in the Dynamicframe from the sales and customers tables in the dojodatabase database.

salesDF = glueContext.create_dynamic_frame.from_catalog(
             database="dojodatabase",
             table_name="sales")
customerDF = glueContext.create_dynamic_frame.from_catalog(
             database="dojodatabase",
             table_name="customers")
- Run the following PySpark code snippet to check schema of the two Dynamicframes. You will find that the frames have customerid as common key or field. You can join the salesDF and customerDF Dynamicframes based on the field customerid.
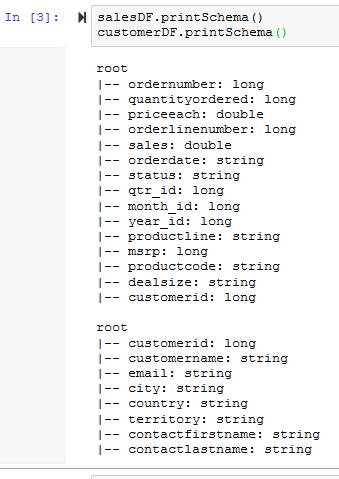
salesDF.printSchema()
customerDF.printSchema()
- Run the following PySpark code snippet to join the salesDF and customerDF Dynamicframes based on the field customerid. Use printSchema method to check the schema of the merged frame.
customersalesDF=Join.apply(salesDF, customerDF, 'customerid', 'customerid')
customersalesDF.printSchema()
- You can see two columns customerid and .customerid due to join on the key. You can use drop_fields method to remove .customerid field.
customersalesDF = customersalesDF.drop_fields(['`.customerid`'])
customersalesDF.printSchema()
-
The dataframes have been merged. Let’s write this merged data back to S3 bucket. Run the following PySpark code snippet to write the Dynamicframe customersalesDF to the customersales folder within s3://dojo-data-lake/data S3 bucket. If you recall, it is the same bucket which you configured as the data lake location and where your sales and customers data are already stored. You also chose json as the file format which will convert the data from csv to json. You might have retained the format by choosing csv for the format; or choose other formats such as AVRO, PARQUET and ORC.
If you created bucket with a different name, then use that name in the script.
glueContext.write_dynamic_frame.from_options(customersalesDF, connection_type = "s3", connection_options = {"path": "s3://dojo-data-lake/data/customersales"}, format = "json")
-
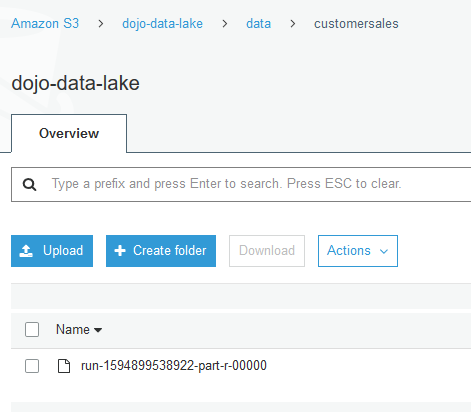
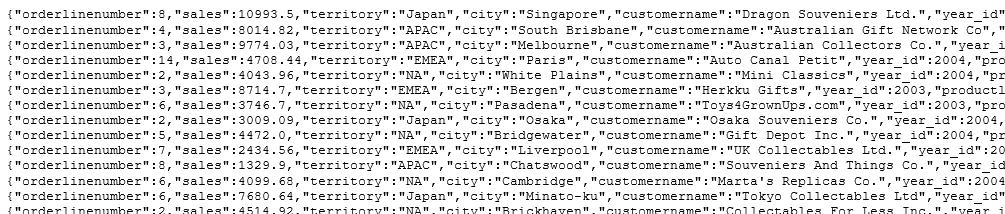
It takes a while to write data. Once the execution completes, you can check S3 bucket location for the data written and file format conversion from CSV to JSON.
File in the bucket
File format
-
You learnt how to write PySpark code in notebook to work with data for transformation. There are many more things you can do but we cover that in part-2 of the workshop. The next task is to write the same code in AWS Glue job so that you can run it based on schedule, event or workflow.