The notebook instance is ready. You now write code using Data Wrangler to work with Redshift.
-
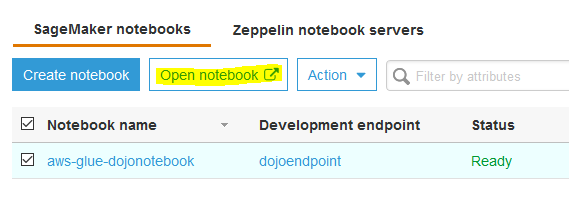
In the Glue console, click on the Notebooks menu in the left. Select aws-glue-dojonotebook instance and click on the Open notebook button.
-
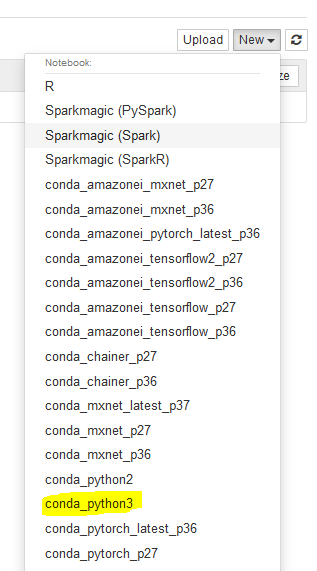
It will open Jupyter in a new browser tab or window. Select conda_python3 option under the New menu. Basically, you are starting a notebook with Python3.
-
It will open a notebook in a new browser tab or window.

-
Run the command !pip install awswrangler in the cell to install AWS Data Wrangler in the notebook instance.

-
Copy-paste and run the following command to import pandas and awswrangler modules.
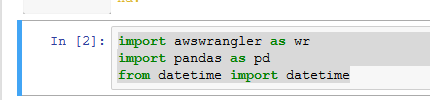
import awswrangler as wr
import pandas as pd
from datetime import datetime
`
-
Copy-paste and run the following command to connect to Redshift cluster and fetch all the records from the dojotable. It will use Glue connection to connect to the Redshift cluster.
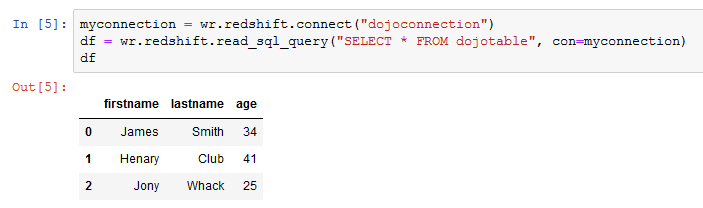
myconnection = wr.redshift.connect("dojoconnection")
df = wr.redshift.read_sql_query("SELECT * FROM dojotable", con=myconnection)
df
`
-
Copy-paste and run the following command. It first transforms the data in df data frame by selecting firstname and lastname fields only and then writes that data to the dojocustomers table in the Redshift dev database.

df = df [["firstname","lastname"]]
wr.redshift.to_sql(df=df,table="dojocustomers",schema="public",con=myconnection)
`
-
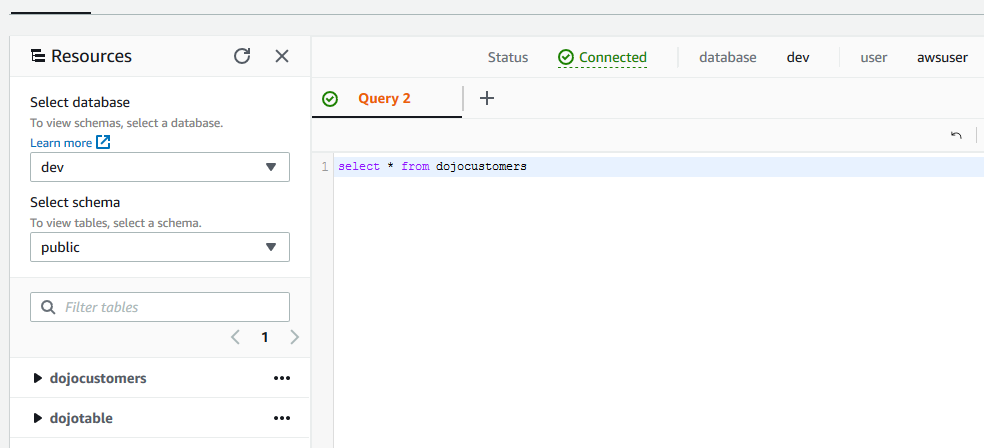
You can check a new table dojocustomers created under public schema in the dev database in the Redshift cluster.
-
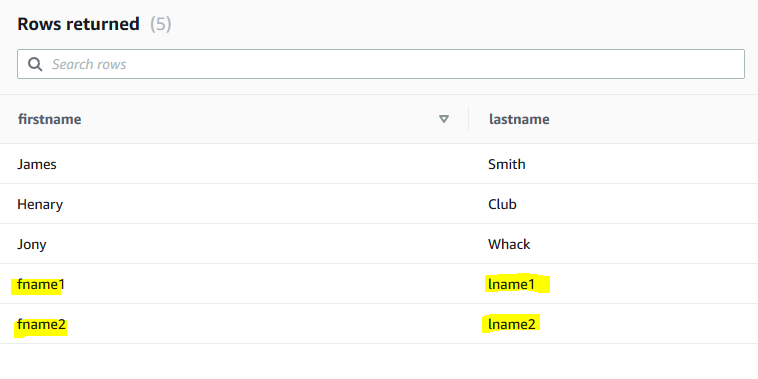
Back to the Jupyter notebook. Copy-paste and run the following command. It first creates a new dataframe newdf with some dummy data and then appends the data to the dojocustomers table.

newdf = pd.DataFrame({"firstname": ["fname1", "fname2"], "lastname": ["lname1", "lname2"]})
wr.redshift.to_sql(df=newdf, table="dojocustomers",  schema="public", con=myconnection, mode="Append")
`
-
You can check the appended records in the table dojocustomers
-
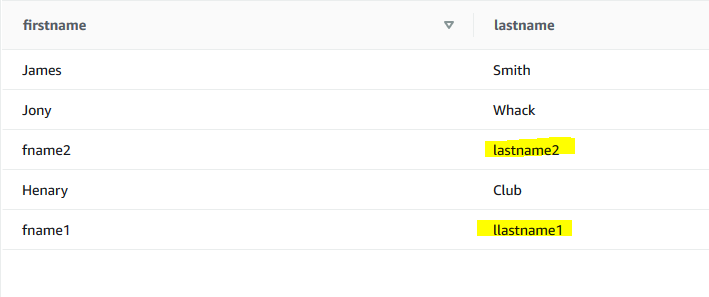
Back to the Jupyter notebook. Copy-paste and run the following command. It first creates a new dataframe updatedf where the lastname field is updated for few records. Then it updates the data to the dojocustomers table. It uses firstname as the primary key.

updatedf = pd.DataFrame({"firstname": ["fname1", "fname2"], "lastname": ["llastname1", "lastname2"]}) wr.redshift.to_sql(df=updatedf, table="dojocustomers", schema="public", con=myconnection, mode="upsert", primary_keys=["firstname"]) -
You can check the updated records in the table dojocustomers
-
Back to the Jupyter notebook. Copy-paste and run the following command to close the connection to the Redshift database.
myconnection.close() -
This finishes the workshop. Follow the next step to clean-up the resources so that you don’t incur any cost post the workshop.