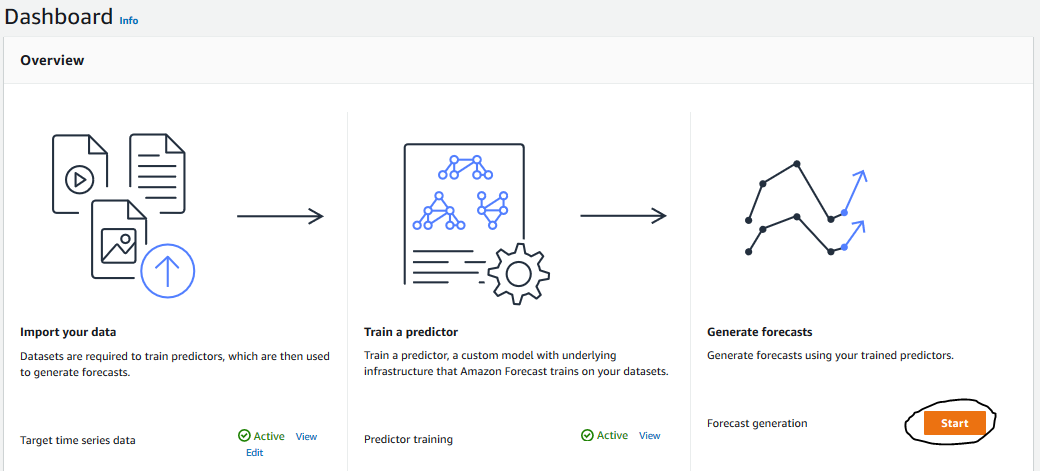
In this step, Amazon Forecast will use the trained predictor to generate the forecast for the house prices in all zip codes.
-
On Amazon Forecast dashboard, click on the Start button under the Generate forecasts.
-
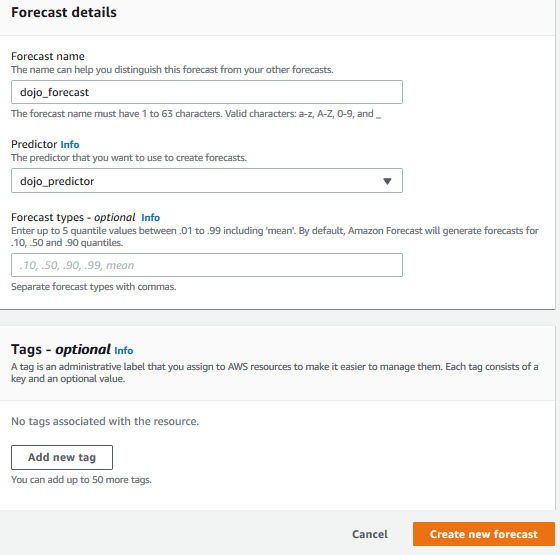
On the next screen, type in dojo_forecast as the name. Select dojo_predictor for the predictor. Click on the Create new forecast button.
-
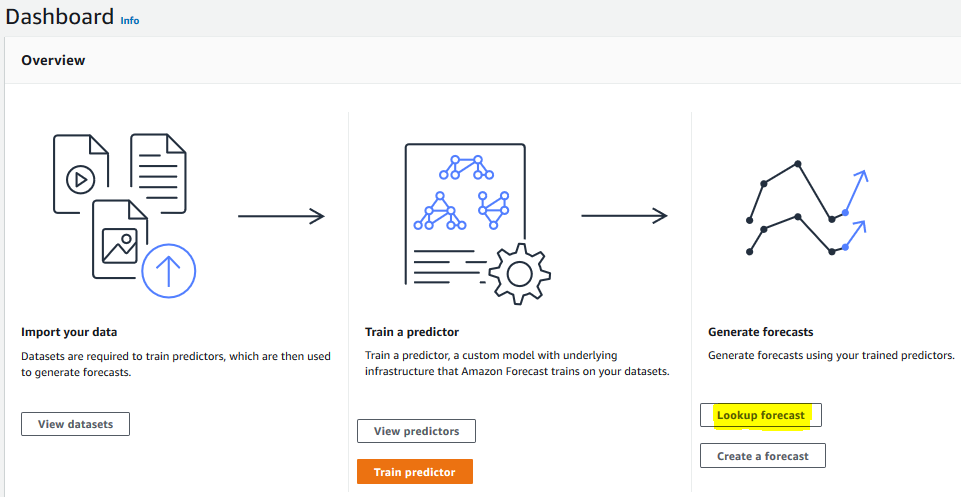
It will start generation of the forecast which will take some time (took around 30-40 mins for this workshop). Wait till the forecast generation finishes and Lookup forecast button is enabled. Once the Lookup forecast button is enabled, click on the Lookup forecast button to test the forecast.
-
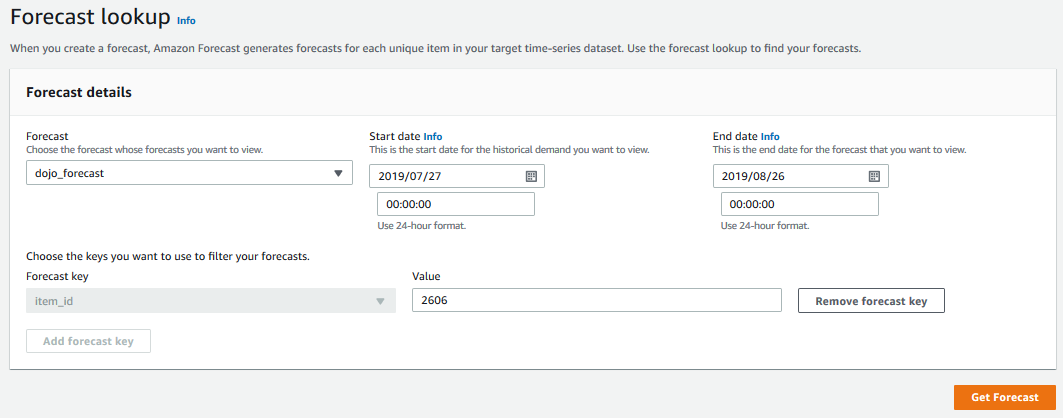
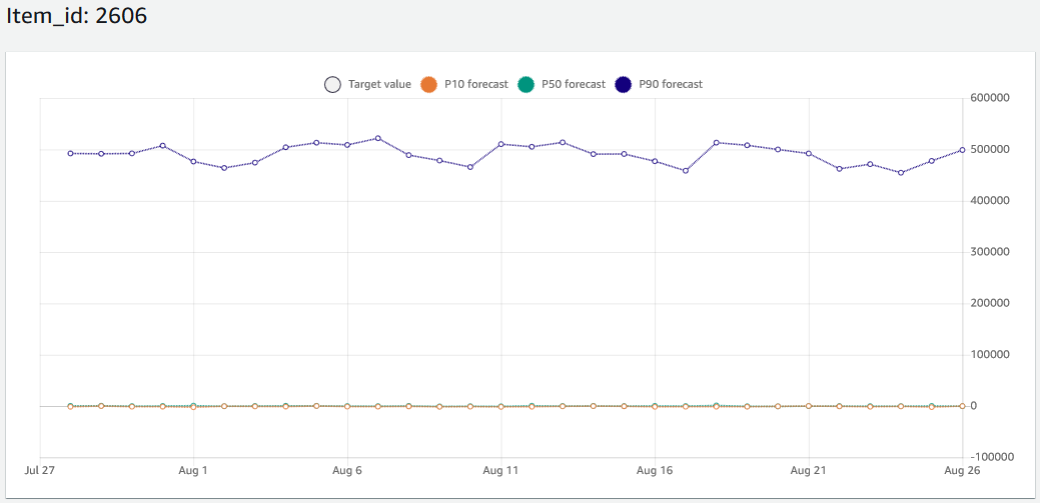
On the next screen, select dojo_forecast as the forecast. Type in 2019/07/27 for the start date. Type in 2019/08/26 for the end date. Type in 2606 for the forecast key (itemd_id) value. You select this date range because the last record of the sample data has value 2019-07-26. So you need start at 2019/07/27. Since the model has been trained for 30 days, you select 2019/08/26 for the end date. In this test, you are interested in house price forecast for zip code 2606. Click on the Get Forecast button.
-
It will show you the forecast for the house price for the zip code 2606 in the given date range. It shows forecast (target value) for P10,P50 and P90.
-
The P10,P50 and P90 are uncertainty range in forecasting. Please refer the link to learn more about it.
-
Great. Let’s write a client in Python to call Forecast service API to get forecast for a zip code using code. In the next step, you configure the development environment in Amazon Cloud9.