The device and AWS IoT Core use publish-subscribe based communication model using MQTT protocol. You create a file publish.py to send messages from the device to the AWS IoT core. You will write code to send more than three messages within 5 mins so that the device defender raises that as an alert.
-
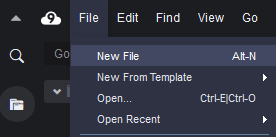
In AWS Cloud9 IDE, Click on the New File option under the File menu to create a new file.
-
It creates a new Untitled1 file. Copy-paste the following code in the file.
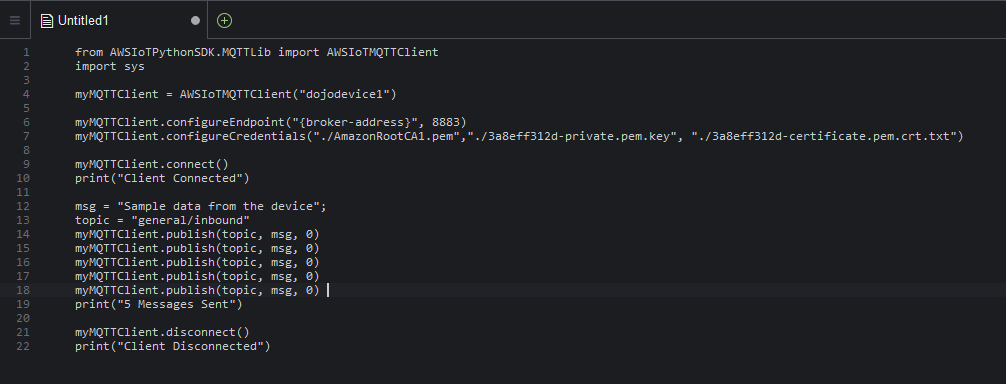
from AWSIoTPythonSDK.MQTTLib import AWSIoTMQTTClient
import sys

myMQTTClient = AWSIoTMQTTClient("dojodevice1")

myMQTTClient.configureEndpoint("{broker-address}", 8883)
myMQTTClient.configureCredentials("./AmazonRootCA1.pem","./3a8eff312d-private.pem.key", "./3a8eff312d-certificate.pem.crt.txt")

myMQTTClient.connect()
print("Client Connected")

msg = "Sample data from the device";
topic = "general/inbound"
myMQTTClient.publish(topic, msg, 0)
myMQTTClient.publish(topic, msg, 0)
myMQTTClient.publish(topic, msg, 0)
myMQTTClient.publish(topic, msg, 0)
myMQTTClient.publish(topic, msg, 0)
print("5 Messages Sent")

myMQTTClient.disconnect()
print("Client Disconnected")
`
-
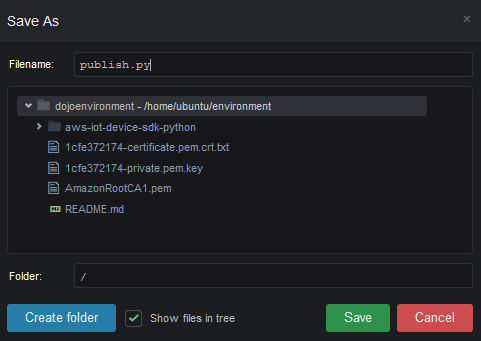
In the code above, replace {broker-address} (at line 6) with broker-address you noted down during device registration task earlier. Replace 3a8eff312d-private.pem.key and 3a8eff312d-certificate.pem.crt.txt (at line 7) with the private key and X509 file names you uploaded in the environment in the previous task.
-
In AWS Cloud9 IDE, Click on the Save option under the File menu to save the file. In the popup, enter the file name as publish.py and click the Save button.
-
publish.py is sending 5 messages back to back to the AWS IoT core. You can see the code in the lines 14 to 18. It uses broker-address to connect to AWS IoT core using the certificates for the authentication. It then sends the 5 messages to general/inbound topic. Finally, it closes the connection.
-
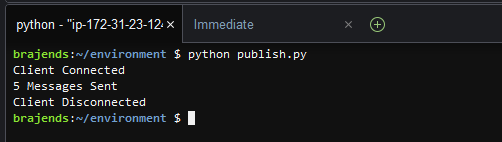
The python code is ready to send messages to the AWS IoT core. Run the command python publish.py in the environment bash console to execute publish.py file.
-
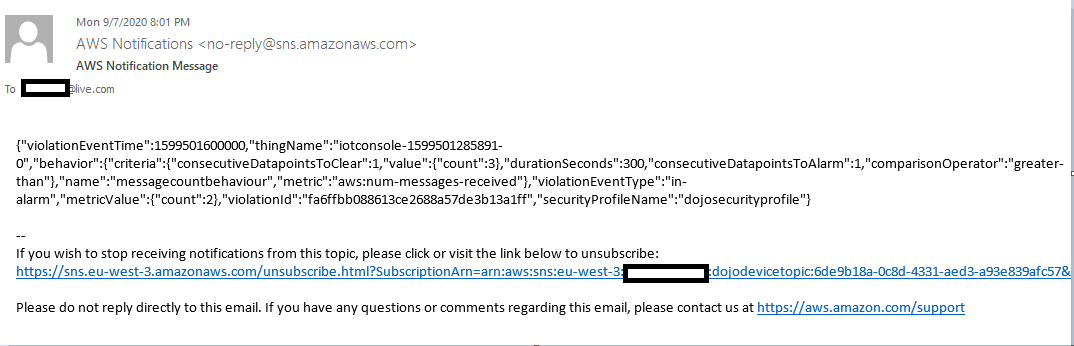
The code will run and publish MQTT message Sample data from the device 5 times to the general/inbound topic. Meanwhile, the device defender is monitoring the devices for the anomaly. It will monitor more than 3 messages sent within 5 mins and would raise alert about it. Since the device defender collects the device metrics for 5 mins before raising the alert, you will have to wait for 5 mins before the device defender sends the alert over email like the one shown below.
-
This completes the workshop. You can create complex security profile using the device defender. You can build further automation to handle the alert. For instance, you can add Lambda subscription to the SNS topic and when the Lambda function gets called at the alert, the Lambda function updates the device security such as reduce the policy based access rights or deactivate the certificate.
-
The next step is to clean-up the resources so that you don’t incur any cost post the workshop.