You create and configure fraud detectors to hold the deployed model and decision logic using rules. The detectors uses model to predict the risk of fraud with the event.
-
On Amazon Fraud Detector console, click on the Detectors menu in the left and click on the Create detector button.

-
On the next screen, type in dojodetector as the name and select dojo-event as the event type. Click on the Next button.
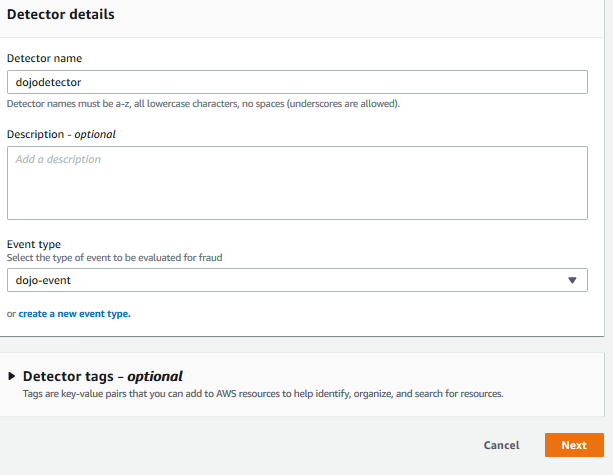
-
On the next screen, use Add model button to add version 1.0 of the dojo_fraud_detection_model. Make note of the dojo_fraud_detection_model_insightscore variable as you need it to determine the risk of the event based on the score in the model. Click on the Next button.
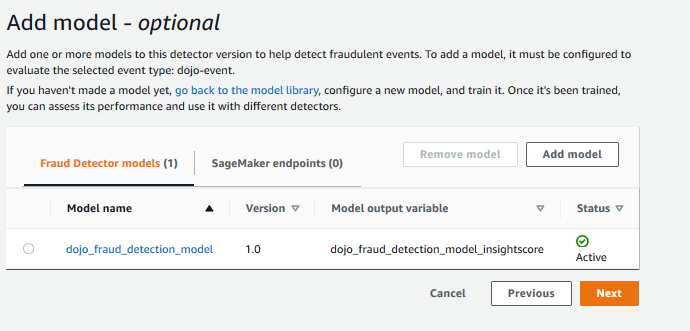
-
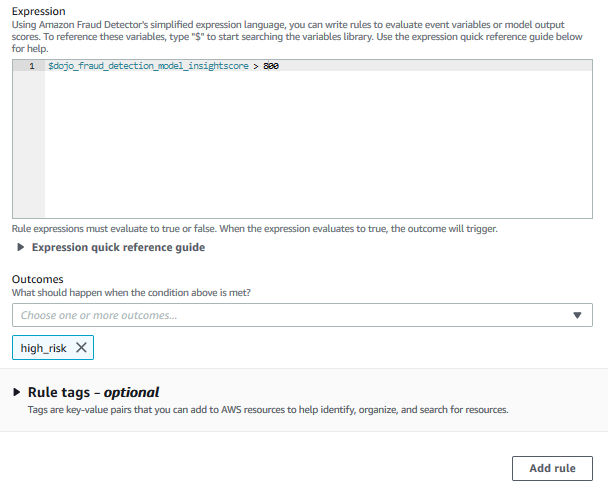
On the next screen, you write rules to determine the level of risks with events. Many people categorize event for fraud or not-fraud. Many people simply see level of risk of fraud. The workshop will create rules to predict the level of risks. The rule is written using dojo_fraud_detection_model_insightscore variable and score. Type in highriskrule as the rule name. Type in $dojo_fraud_detection_model_insightscore > 800 for the expression. Select Create a new outcome option.
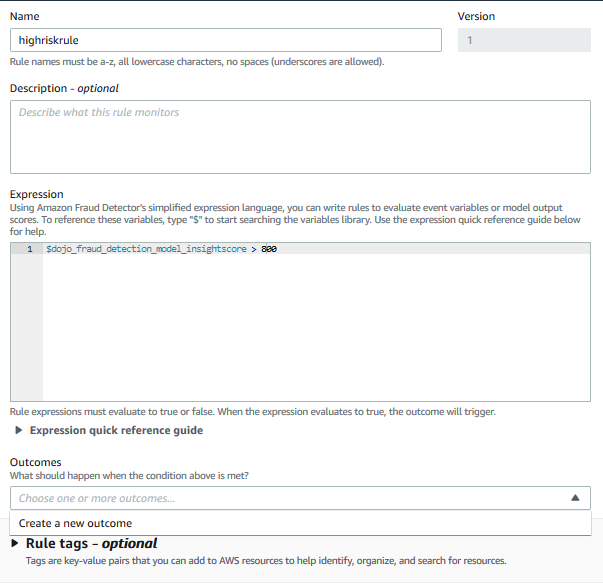
-
It will show a popup for the outcome, type in high_risk for the outcome name and click on the Save outcome button.
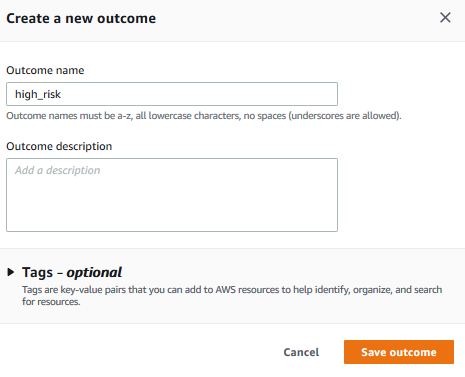
-
Finally click on the Add rule button.
-
It will add the rule. The rule basically says that for an event, if the score comes more than 800, it will be considered high risk event. It is the same score, you saw in the previous task in the model performance score distribution.
-
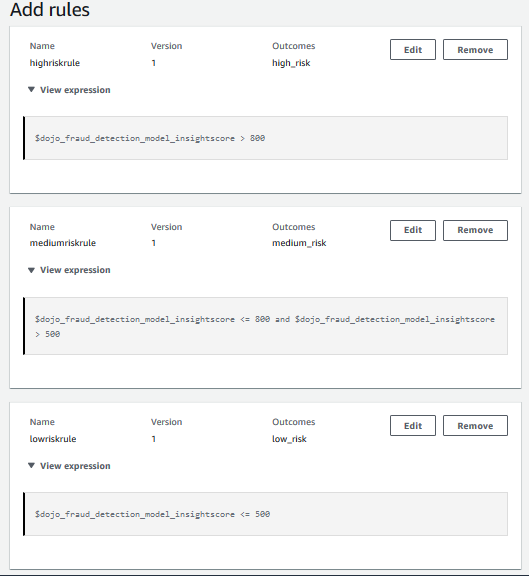
Repeat steps 4 to 6 to add two more rules as per configuration below.
Rule 2:
 Rule Name = mediumriskrule
 Expression = $dojo_fraud_detection_model_insightscore <= 800 and $dojo_fraud_detection_model_insightscore > 500
 Outcome = medium_risk
Rule 3:
Rule Name = lowriskrule Expression = $dojo_fraud_detection_model_insightscore <= 500 Outcome = low_risk -
The rules will look like the following after the configuration. After adding all three rules, click on the Next button.
-
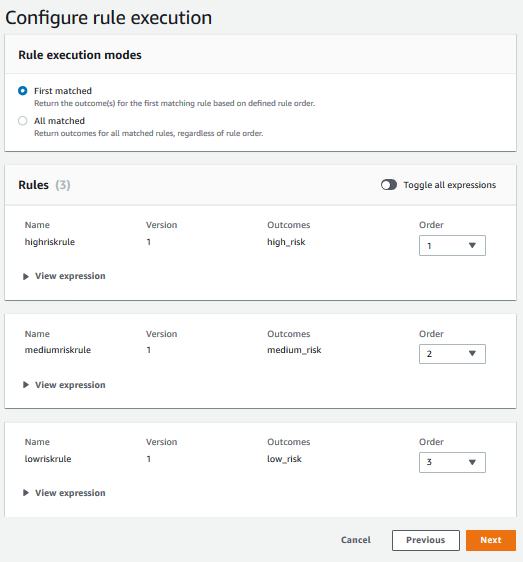
On the next screen, select First matched option. Keep rules orders as it is and click on the Next button.
-
On the next review and create screen, click on the Create detector button. The detector is created in no time and it is in the Draft status. Click on the Publish option under Actions menu. On the publish version popup, click on the Publish version button.

-
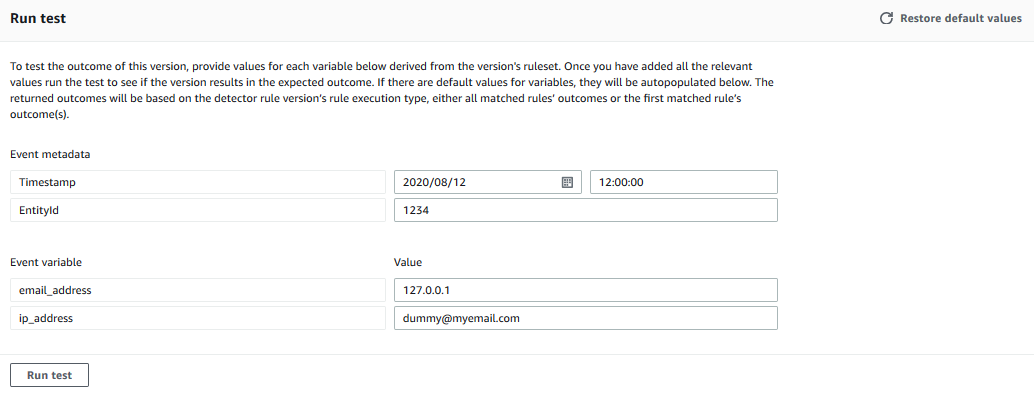
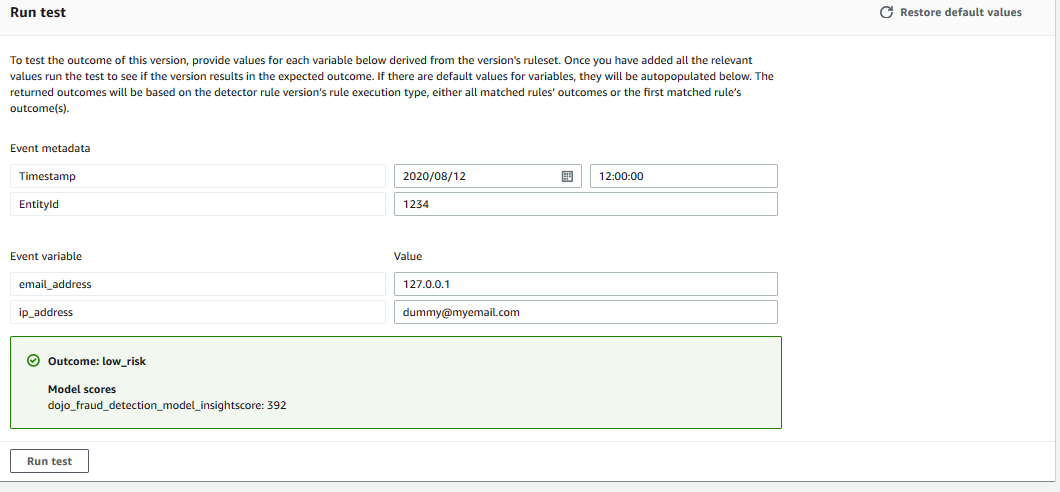
The detector is published and the status changes to Active. You can test the detector using the test function available with the detector. In Run test section, type in some test value as shown below and click on the Run test button.
-
It shows an outcome like shown below. It shows that the score was 392 - hence the event is low risk.
-
The detector is ready. In production use, you might want to expose your model as an API which applications can use to predict the risk of fraud. Let’s write a client code which can call the detector as an API to check the risk with the event.
