Let’s start with updating the shadow document. The workshop will first try to update with an incorrect document to see how that is handled and then will update with correct document. The workshop will use built-in MQTT Client page in the AWS IoT console to work with the topics.
-
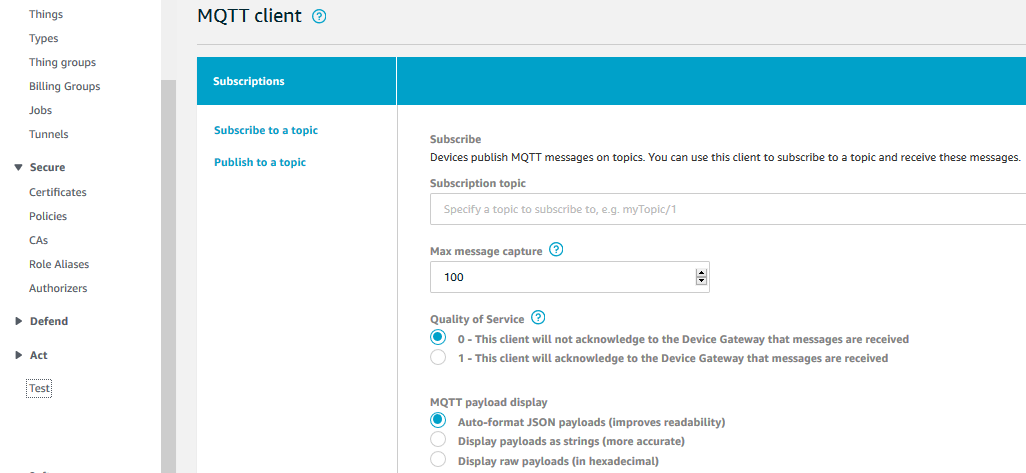
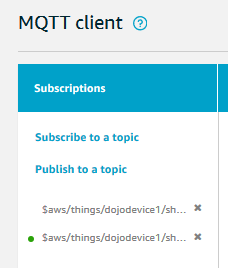
On the AWS IoT Core console, click on the Test menu. You can see the MQTT Client which you use to publish and subscribe messages to the topics.
-
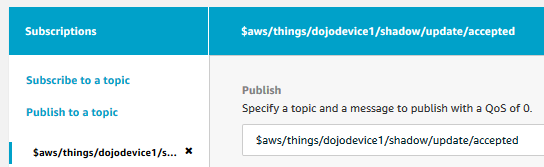
You will add subscriptions for $aws/things/dojodevice1/shadow/update/accepted and $aws/things/dojodevice1/shadow/update/rejected topics. The first topic gets a message when the shadow document of the device is updated successfully. The second topic gets a message when the shadow document update goes unsuccessful. Copy-paste $aws/things/dojodevice1/shadow/update/accepted to the Subscription topic and click on the Subscribe to topic button. The subscription is created in no time and you can see it listed.

-
Similarly, add subscription for the topic $aws/things/dojodevice1/shadow/update/rejected. Now, you have two subscriptions.
-
With rejected and accepted topics in place, we are all set to get notified when the shadow document in updated. Let’s start with an attempt to update with wrong shadow document. On MQTT Client screen, click on the Publish to a topic link.
-
On the next screen, copy-paste the topic name as $aws/things/dojodevice1/shadow/update and the json shadow document as presented in the code snippet below and then click on the Publish to topic button. This is an incorrect document because it is missing a mandatory element state in the shadow document.

Code Snippet
 {
   "desired": {
       "temprature": "10"
     }
 }
-
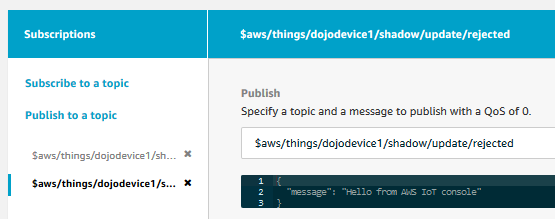
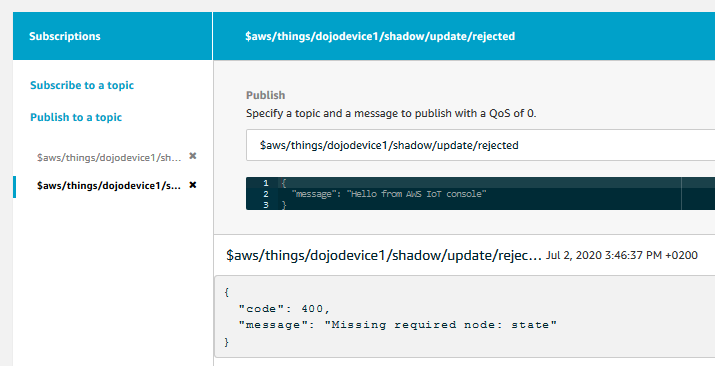
The moment the message is published, you will see a green dot next to the $aws/things/dojodevice1/shadow/update/rejected topic. It means, there is a new message published to this topic.
-
Click on the $aws/things/dojodevice1/shadow/update/rejected topic to check the message. You can see the message saying that the state node is missing. The shadow document update is rejected because the document structure was not right.
-
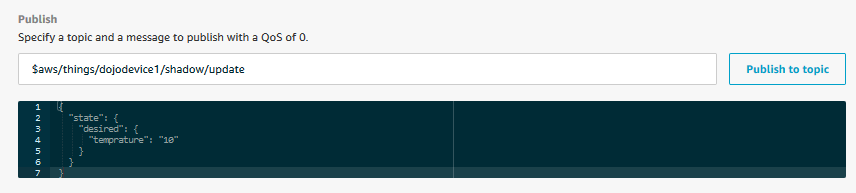
Let’s do a correct shadow update now. On MQTT Client screen, click on the Publish to a topic link again. On the next screen, copy-paste the topic name as $aws/things/dojodevice1/shadow/update and the json shadow document as presented in the code snippet below and then click on the Publish to topic button.
Code Snippet
 {
   "state": {
     "desired": {
       "temprature": "10"
     }
   }
 }
-
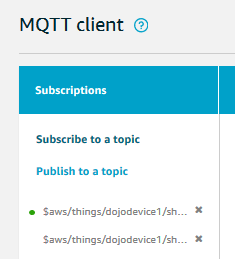
Again, the moment the message is published, you will see a green dot next to the $aws/things/dojodevice1/shadow/update/accepted topic indicating there is a new message published to this topic.
-
Click on the $aws/things/dojodevice1/shadow/update/accepted topic to check the message. You can see the shadow document update confirmation in the message.
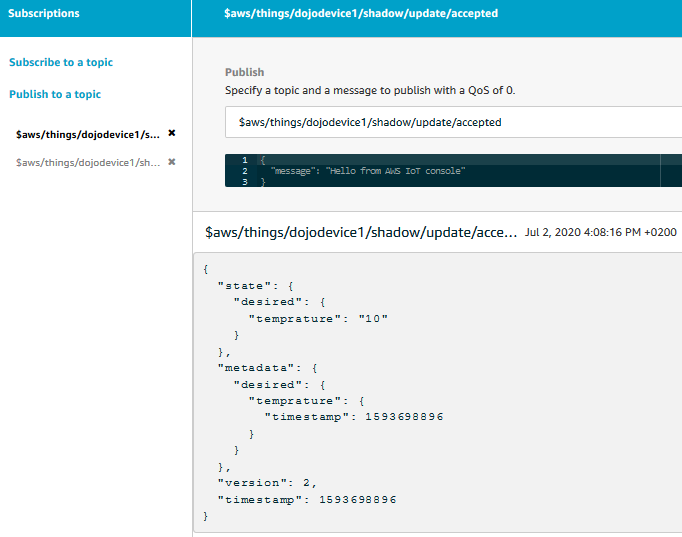
-
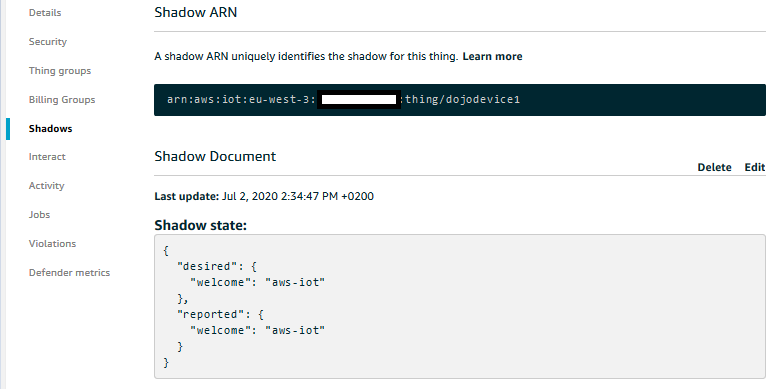
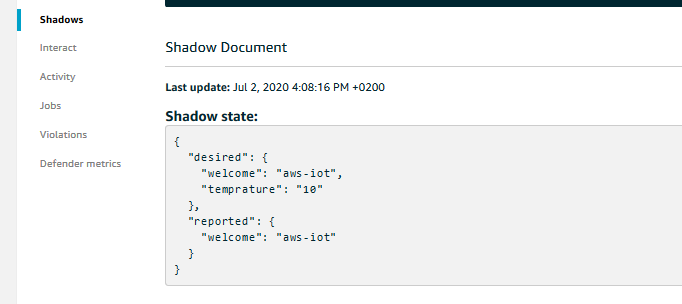
As mentioned in the task-2, open the details for the device dojodevice1 and goto the Shadows menu to check the updated shadow document. You can see a new node temperature has been added to the shadow document.
Before update - There is no temprature node in the desired state.
After update- There is temprature node in the desired state.
-
The shadow update can be triggered by the IoT Core or the device using the shadow document publishing to the reserved topic as shown in the earlier step. In the next task, you learn how to fetch the device shadow document on demand.